Develop Lambdas And Debug Them Locally Using SAM
Developing Serverless Applications has its challenges, SAM offers a solution to many of those challenges. Learn how to develop lambdas and debug them locally using SAM.
by Percy Bolmér, April 18, 2022
Serverless Applications are great, we can get a function up and running in production at super-fast speed, with crazy uptime, and for almost no cost.
Lambda is an AWS service that allows you to deploy small pieces of code that are runnable. For instance, we can deploy a small Go binary that performs a task, and trigger that via an API, schedule it, or make it execute based on several other events.
However, debugging these services can be hard to debug since they run on the cloud. I used to build my functions in a way that I could easily run them locally, and simply wrap that function with the lambda handler. Which works, but sometimes we want to debug the full flow and with the services we use.
I often preach about the requirement for software to be runnable locally, and SAM helps us run our cloud application locally.
During this tutorial, there are a few requirements that I will expect you to already have, or else there wouldn’t be a reason why you are reading about how to locally debug a lambda.
- An AWS account with enough IAM permissions
- AWS CLI installed & Configured
If you don’t have an AWS account or AWS CLI, please follow the official documentation on how to install it.
You can find the full code used in this video at GitHub.
Who Is Sam?
Sam (Serverless Application Model) is an AWS framework that helps us build cloud applications. Sam has a template language that we can use to write the structure of our cloud architecture, and we can leverage that template for deploying and running it locally. Sam is using CloudFormation behind the scenes, you don’t need to know about CF for now.
In this article, we will be creating a few simple lambdas and trying them out using SAM, we will also try debugging a lambda by attaching a remote debugger. SAM allows us to run lambdas, or an API of lambdas locally using docker.
Using SAM is IDE agnostic, you can use any IDE to leverage SAM. Most people do tend to use VS Code from what I understand, due to their great plugin, which we will cover in the end.
We begin by installing SAM, you can find the official docs on how to install on AWS.
I am using Linux, so here is how I installed SAM.
# Wget to Fetch ZIP
wget https://github.com/aws/aws-sam-cli/releases/latest/download/aws-sam-cli-linux-x86_64.zip
# Unzip into a folder named sam-installation
unzip aws-sam-cli-linux-x86_64.zip -d sam-installation
# Execute installation script
sudo ./sam-installation/install
# Cleanup
rm -rf aws-sam-cli-linux-x86_64.zip
rm -rf sam-installationYou can verify by running the version command
sam --versionCreate The Lambda
Let us create our very first simple lambda. I will use Go in this tutorial to demonstrate, but you should be able to use any language that supports lambdas that you want. You can find code examples on your language at the AWS docs, each supported language has a chapter named Working with $LANGUAGENAME.
Create a new folder and initialize a go module, create a file named main.go and another one named template.yml. Forget about the template file for now and leave it blank, we will cover that in a bit.
touch sam-lambda-demo
cd sam-lambda-demo
go mod init programmingpercy.tech/sam-demo
touch main.go
touch template.yml
Let us fill the main.go with the simplest lambda existing in the whole universe, we will accept an input event that contains a name, and we will print Hello $name.
You got it, it is a Hello World Lambda!
package main

import (
	"fmt"

	"github.com/aws/aws-lambda-go/lambda"
)

// Event is the Input Payload representation
type Event struct {
	Name string `json:"name"`
}

// Our Lambda function
// Output Whatever you want, error or str, or struct and error etc.
func lambdaHandler(event Event) (string, error) {

	// Worlds simplest Lambda, Concatinate Event Name with Hello
	output := fmt.Sprintf("Hello From Lambda %s", event.Name)

	return output, nil
}

func main() {
	// Start the lambda handler
	lambda.Start(lambdaHandler)
}The Event struct defines how our lambda input should look like, and we will output a string,error. You could return whatever struct you want, or any of the AWS-defined Events. We will cover AWS events shortly later when we try using the API Gateway in front of the lambda.
Using Sam Template
Before we begin debugging, I will cover some simple aspects of SAM so we understand what is happening.
Sam comes packing a bunch of features, it can even deploy your applications into AWS. For now, let us take it slow and build the lambda and try invoking it.
When I say Application, I refer to the whole Set of Cloud Resources, Not your Single Go Binary — The set of resources makes up our Serverless Application
To build our application, we first need to define what cloud resources the application has. This is done inside the template.yml using a specific format.
We will begin with the easiest template I can imagine and go through what everything is.
AWSTemplateFormatVersion: '2010-09-09'
Transform: AWS::Serverless-2016-10-31
Description: >
  demo

  Sample SAM Template for demo
# More info about Globals: https://github.com/awslabs/serverless-application-model/blob/master/docs/globals.rst
Globals:
  Function:
    Timeout: 5

Resources:
  HelloGopher: # Here we set a Resource Name, You can set anything you want.
    Type: AWS::Serverless::Function # More info about Function Resource: https://github.com/awslabs/serverless-application-model/blob/master/versions/2016-10-31.md#awsserverlessfunction
    Properties:
      CodeUri: ./ # This is the path to the Code, in our case we are bad and store it in root
      Handler: hello-world
      Runtime: go1.x
      Architectures:
- x86_64At the beginning of the file, you see some default settings that I have never seen change. We define the version of the template to use. In fact, there is only one valid version according to the docs.
We will focus on the Resources part. In it, we can define what resources our whole SAM application will have.
The syntax is pretty simple, you begin the yml with the name of the resource, and we create a lambda named HelloGopher. This could be anything you like, the important part about it is that you can use the Name to reference from other resources, this is important when you need a specific arn, etc.
All resources accept a Type input, the type can be anything that cloudformation allows, usually, it goes AWS::Serverless:RESOURCETYPE. As you can see we set the type to AWS::Serverless::Function which tells cloudformation to generate a lambda for us.
Each type has its own set of available properties, which you can find in the docs. To find the available properties for Function, review their docs.
CodeUri is really important, this is the local path or the S3 path to the ZIP file that will contain our code. In this example I use the same folder, in a real project you may have probably lambdas, you could create a folder structure like lambdas/hello-gopher/ and change the codeuri to that for a more scalable solution.
Handler is used to set a certain binary that is called once lambda is executed, let’s try using SAM to explain this one. If you try running the Lambda now by running sam local invoke you should see a crash report saying that there is no such file.
sam local invoke
Invoking hello-gopher (go1.x)
Skip pulling image and use local one: public.ecr.aws/sam/emulation-go1.x:rapid-1.40.1-x86_64.

Mounting /home/percy/development/aws-sam-demo/demo as /var/task:ro,delegated inside runtime container
START RequestId: 10b09db1-9b02-4e1b-9b39-ce410039bfc1 Version: $LATEST
fork/exec /var/task/hello-gopher: no such file or directory: PathError
null
END RequestId: 10b09db1-9b02-4e1b-9b39-ce410039bfc1
REPORT RequestId: 10b09db1-9b02-4e1b-9b39-ce410039bfc1  Init Duration: 0.15 ms  Duration: 29.82 ms      Billed Duration: 30 ms  Memory Size: 128 MB     Max Memory Used: 128 MB
{"errorMessage":"fork/exec /var/task/hello-gopher: no such file or directory","errorType":"PathError"}
This is simply because we set the Handler to point to the hello-gopher binary, which does not yet exist. Let’s start using SAM to help us.
Sam Build & Invoke
We can use SAM to package our application, the build command comes with many parameter flags. You can for instance build and send it to S3.
Using SAM build is good because it will make use of your template file and use the correct version of go by using the runtime property.
It is very easy to use, in the same folder as your template.yml run the following command
sam buildYou should see a .aws folder appear, and opening the folder will reveal the lambda, and the binary named hello-gopher.
Time to retry running the project by locally invoking the lambda.
sam local invokeYou should see it printing, hello, but no name is given. This is because we need to add the input event. This is done by using the -e or –event option, which can point to a file, or a JSON string. I prefer using files, as this also serves as documentation for the lambda as a sample.
Create a file in the folder named event.json and paste in JSON that matches the Event struct in the lambda.
{
    "name": "Percy"
}Now, invoke the lambda again, but this time we add the -e flag that points to the event-json file.
sam local invoke -e event.json
Invoking hello-gopher (go1.x)
Skip pulling image and use local one: public.ecr.aws/sam/emulation-go1.x:rapid-1.40.1-x86_64.

Mounting /home/percy/development/aws-sam-demo/demo/.aws-sam/build/HelloGopher as /var/task:ro,delegated inside runtime container
START RequestId: 50c407a8-9a71-4acc-a45b-2ad1d725c759 Version: $LATEST
END RequestId: 50c407a8-9a71-4acc-a45b-2ad1d725c759
REPORT RequestId: 50c407a8-9a71-4acc-a45b-2ad1d725c759  Init Duration: 0.21 ms  Duration: 36.67 ms      Billed Duration: 37 ms  Memory Size: 128 MB     Max Memory Used: 128 MB
"Hello From Lambda Percy"Amazing, it now prints the name we used in the payload. There is a ton of custom lambda events to use in the AWS SDK, but we will cover that in a lambda-specific tutorial.
There is a -d flag that allows us to pass in a remote debug port, this is very important to remember. This is the feature that will allow us to attach a debugger to the lambda.
Note that we only have one lambda, but if you have multiple you can specify the lambda to run by adding the name of the lambda to the command.
sam local invoke hello-gopher # Runs a specific lambdaIf you want to run a lambda and expose it as a service like if it ran on the real cloud you can mimic that using the start-lambda command.
Let’s try running the following command
sam local start-lambdaThis should print a URL to which the lambda is exposed, which we can add to the AWS cli to invoke the lambda. The default URL is http://127.0.0.1:3001.
You can use the URL as the endpoint to AWS CLI to invoke it using the following command.
aws lambda invoke --function-name HelloGopher --endpoint "http://127.0.0.1:3001" --payload '{ "name": "percy"}' response.jsonThis command will invoke the lambda, insert the payload and output the response into response.json.
Sam API Gateway
Many times you want to run the Lambda with an API Gateway in front of it. The API Gateway will expose the Lambda as an HTTP API.
This is super easy to manage and set up with SAM. We need to create Events that the lambda resource listens for, this does not have to be HTTP, it can be SQS or many other AWS service events. Using the type API will make Sam know that this is an API Gateway.
We will modify the template.yml to add the API endpoint as a POST.
AWSTemplateFormatVersion: '2010-09-09'
Transform: AWS::Serverless-2016-10-31
Description: >
  demo

  Sample SAM Template for demo
# More info about Globals: https://github.com/awslabs/serverless-application-model/blob/master/docs/globals.rst
Globals:
  Function:
    Timeout: 5

Resources:
  HelloGopher: # Here we set a Resource Name, You can set anything you want.
    Type: AWS::Serverless::Function # More info about Function Resource: https://github.com/awslabs/serverless-application-model/blob/master/versions/2016-10-31.md#awsserverlessfunction
    Properties:
      CodeUri: ./ # This is the path to the Code, in our case we are bad and store it in root
      Handler: hello-gopher
      Runtime: go1.x
      Architectures:
        - x86_64
      Events:
        HelloEndpoint:
          Type: Api
          Properties:
            Path: '/api/hellogopher'
Method: postWe also need to modify the lambda to accept the API gateway event instead, these events are structured a bit differently. They wrap the original request with some metadata such as request identifiers.
package main

import (
	"encoding/json"
	"fmt"
	"net/http"

	"github.com/aws/aws-lambda-go/events"
	"github.com/aws/aws-lambda-go/lambda"
)

// Event is the Input Payload representation
type Event struct {
	Name string `json:"name"`
}

// Our Lambda function now Accepts a APIGatewayProxyRequest and outputs a Response instead
func lambdaHandler(event events.APIGatewayProxyRequest) (events.APIGatewayProxyResponse, error) {

	// This is our orignial event
	var input Event
	// We can find the users Payload inside event.Body as a String, Marshal it into our wanted Event format.
	if err := json.Unmarshal([]byte(event.Body), &input); err != nil {
		return events.APIGatewayProxyResponse{
			Body:       err.Error(),
			StatusCode: http.StatusInternalServerError,
		}, nil
	}

	output := fmt.Sprintf("Hello From Lambda %s", input.Name)

	return events.APIGatewayProxyResponse{
		Body:       output,
		StatusCode: 200,
	}, nil
}

func main() {
	// Start the lambda handler
	lambda.Start(lambdaHandler)
}To open up the API and expose the endpoints locally, which is really handy when you are developing a API with many endpoints and want to try your system locally, we can use SAM again.
Let us build the new Lambda and run the API with sam local start-api.
sam build
sam local start-api
You should see an output that specifies what port the API is running on, for me the output is the following.
Mounting HelloGopher at http://127.0.0.1:3000/api/hellogopher [POST]We can try that out with CURL and send the expected data payload.
curl -X POST localhost:3000/api/hellogopher -d '{"name": "percy"}'Sam Environment Variables
Most of the time, your lambda will need configurations. Many times this is done using environment variables.
I recommend specifying the expected variables in the template.yml, this opens up the ability to modify the variables using CLI, we will cover this soon.
To add environments, we modify the template and add a simple Environment property.
Here is a snippet of my template.yml with an environment variable named my-cool-variable.
Resources:
  HelloGopher: # Here we set a Resource Name, You can set anything you want.
    Type: AWS::Serverless::Function # More info about Function Resource: https://github.com/awslabs/serverless-application-model/blob/master/versions/2016-10-31.md#awsserverlessfunction
    Properties:
      CodeUri: ./ # This is the path to the Code, in our case we are bad and store it in root
      Handler: hello-gopher
      Runtime: go1.x
      Environment:
        Variables:
          my-cool-variable: "maybe-not-so-cool"
      Architectures:
        - x86_64
      Events:
        HelloEndpoint:
          Type: Api
          Properties:
            Path: '/api/hellogopher'
Method: postNext, we need to start using the environment variable in the lambda, I will only add the value of it to the output, modify line 31 in main.go to the following.
output := fmt.Sprintf("Hello From Lambda %s, the variable is %s", input.Name, os.Getenv("my-cool-variable"))That may seem trivial, but you can now leverage this pretty neatly in the SAM CLI to set new variables. We can modify the variables between invocations using the -n parameter. Remember that you can have multiple lambda endpoints in the API, and each lambda can require its own set of environment variables.
You can create a special environment JSON file that controls each lambdas environment. You have to use the resource name from the template.yml and ONLY environments specified in the template.yml will be modifiable. If you try to set a variable that is not declared in the template, it won’t be added.
Create a new file named environments.json which we will use to modify each lambda resources environment variables.
{
    "HelloGopher": {
        "my-cool-variable": "now-it-is-much-cooler"
    }
}Try rebuilding and executing the API using the -n flag to point out the environment file, and you should now see the new value being printed.
sam local start-api -n environments.jsonThere are also parameters, which are not the same as environment variables, but they relate more to cloudformation and we won’t cover the details here.
Sam Generate Event
Not all lambdas are exposed as APIs, some lambdas listen for SQS events, or S3 events to trigger them for instance.
One very common approach is having a lambda listen for SQS events, sadly this is harder to test. There is no way to connect Sam into an SQS queue to test it, the way to test it instead is to generate an SQS payload and invoke the lambda with that payload. This will mimic a live event being fired into the lambda.
Now you might wonder, how does the SQS event look? I don’t know, and we don’t really need to know, because Sam can help us generate fake payloads for known AWS services that are often related to lambdas.
Let us begin by updating the template.yml and adding a new lambda, this lambda will listen for the SQS event on a queue named my-awesome-queue. Now, as I said, we can’t make Sam listen on my-awesome-queue locally, but we can fake the payload. The following gist shows how to tell Sam about SQS, the only new part in the template.yml is the new lambda, that triggers on SQS events.
AWSTemplateFormatVersion: '2010-09-09'
Transform: AWS::Serverless-2016-10-31
Description: >
  demo

  Sample SAM Template for demo
# More info about Globals: https://github.com/awslabs/serverless-application-model/blob/master/docs/globals.rst
Globals:
  Function:
    Timeout: 5

Resources:
  HelloGopher: # Here we set a Resource Name, You can set anything you want.
    Type: AWS::Serverless::Function # More info about Function Resource: https://github.com/awslabs/serverless-application-model/blob/master/versions/2016-10-31.md#awsserverlessfunction
    Properties:
      CodeUri: ./ # This is the path to the Code, in our case we are bad and store it in root
      Handler: hello-gopher
      Runtime: go1.x
      Environment:
        Variables:
          my-cool-variable: "maybe-not-so-cool"
      Architectures:
        - x86_64
      Events:
        HelloEndpoint:
          Type: Api
          Properties:
            Path: '/api/hellogopher'
            Method: post
  SQSLambda: # Here we set a Resource Name, You can set anything you want.
    Type: AWS::Serverless::Function # More info about Function Resource: https://github.com/awslabs/serverless-application-model/blob/master/versions/2016-10-31.md#awsserverlessfunction
    Properties:
      CodeUri: ./sqslambda # This is the path to the Code, in our case we are bad and store it in root
      Handler: sqs-lambda
      Runtime: go1.x
      Architectures:
        - x86_64
      Events:
        SqsEvents: # Set any name, this identifies our Resource, in this case its the Eventhandler
          Type: SQS # Set SQS as the Source for the event triggers
          Properties:
Queue: "my-awesome-queue" # The queue to listen onIn the CodeUri we specified the ./sqslambda location, so we can begin by creating that folder, and add a main.go in it with our lambda.
mkdir ./sqslambda
touch main.go
Our new lambda will be super simple and only print the incoming event into the logs. We will be using the same events package from AWS SDK and specify that the event is an SQSEvent. We could go into the SDK and try copying the SQSEvent structure by using the JSON tags, but that would be too much work.
package main

import (
	"log"

	"github.com/aws/aws-lambda-go/events"
	"github.com/aws/aws-lambda-go/lambda"
)

// our lambda handler that listens on SQS events
func lambdaHandler(event events.SQSEvent) error {

	log.Println(event)

	return nil
}

func main() {
	// Start the lambda handler
	lambda.Start(lambdaHandler)
}Now, before we trigger this lambda we need a SQSEvent. We can use the Generate-Event command to create a event.json file for us which we can pass in as payload.
The syntax is pretty straightforward, you use generate-event following by the service name and receive-message subcommand. There is actually only one subcommand currently, which is receive-message. Who knows maybe they have planned for send-message?
We will pass an argument in –body which is used to modify the body of the SQS payload, the body is the user-specific payload.
sam local generate-event sqs receive-message --body 'My Own Event Payload'Run that and you will see a generated JSON payload that mimics an SQS event. You can either write this payload into a file named event.json and pass that payload into the invocation using the -e flag as before.
There is one nice trick to the -e flag however, if you pass a single - as input, it will read values from STDIN. This means we can chain together the generate event command with invoke.
sam local generate-event sqs receive-message --body 'My Own Event Payload' | sam local invoke -e - SQSLambdaRunning that command should print the whole event and invoke the lambda.
Great, we can now test any lambda, no matter what service triggers it.
Attaching Remote Debugger
Debugging is a very important aspect when developing a service, and attaching a debugger to see what happens during runtime is one of the most useful ways of solving issues.
To do this we can add the -d flag to the Sam commands to open up a remote debugger port, you specify the port as an argument to -d. This works for all invocations, the start-lambda and start-api, also invoke accepts the debugger flag.
Sam needs Linux Delve debugger installed, if you are not running Linux you can still install them using GOOS=linux GOARCH=amd64 go install github.com/go-delve/delve/cmd/dlv@latest
Remember that the debugger should be installed on your host, and we can specify the location of the debugger using the –debugger-path=hostURL/to/debugger argument. I also need to use the delveAPI version 2 to get the debugger to run smoothly.
Let us run the SQS event to debug the lambda. I will add the debug flags needed for it to expose the lambda in debug mode. Note that when you invoke using -d it will pause the lambda at the start and wait for a debugger to attach.
sam local invoke SQSLambda -d 8099 --debugger-path=/home/percy/go/bin --debug-args="-delveAPI=2"Next, we need to attach a debugger, how to do this differs depending on if you are using VS Code or Goland etc. I am using VS Code, so I will add a new configuration to my .vscode/launch.json. If you are using Goland, please see how to attach a debugger here.
{
    "configurations": [

        {
            "name": "Debug with SAM",
            "type": "go",
            "request": "attach",
            "mode": "remote",
            "port": 8099,
            "host": "localhost",
            "env": {},
            "args": []
        }
    ]
}Basically what we do is create a new attach request to a remote debugger, on localhost:8099. Make sure you use the same port as you gave to the -d command.
Save the file and place a debugger in the sqslambda/main.go on line 13. Then run the debug configuration. You should see that it breaks on your placed breakpoint.
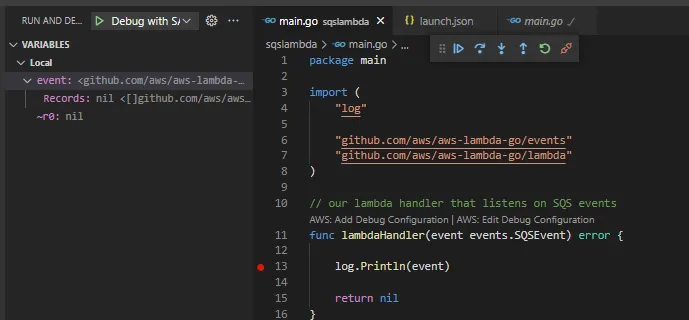
Now, this was a bit work to make it run, there are tricks to automate the running of the debugger command like using preLaunch effects in the launch.json. However, If you are using VS Code, I will soon cover how to use the AWS plugin, which will make debugging even easier. They have removed the need for using any CLI commands, which comes very handy.
Using VS Code With SAM
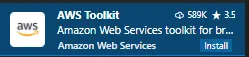
If you are using VS Code, I recommend downloading the AWS Toolkit if you don’t already have it. Go into extensions and search for AWS toolkit and install it.
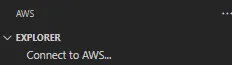
Open the extension after downloading it and log in on your wanted profile, simply press the Connect to AWS button.
The process should be straightforward, it will ask you for a few configurations such as the default region, profile to use etc. Select your wanted options. Afterward, you should see a bunch of Cloud services appear.
We won’t be deploying any SAM application in this tutorial other than locally, but you could (even without the plugin). The plugin will now add many SAM built-in features to replace needing to run the command line. The best feature is that each lambda will now have a Text above them, asking if you want to create a Debugging configuration.

Click on Add Debug Configuration and you launch.json should be updated.
{
    "configurations": [
        {
            "type": "aws-sam",
            "request": "direct-invoke",
            "name": "demo:SQSLambda",
            "invokeTarget": {
                "target": "template",
                "templatePath": "${workspaceFolder}/template.yml",
                "logicalId": "SQSLambda"
            },
            "lambda": {
                "payload": {},
                "environmentVariables": {}
            }
        },
        {
            "name": "Debug with SAM",
            "type": "go",
            "request": "attach",
            "mode": "remote",
            "port": 8099,
            "host": "localhost",
            "env": {},
            "args": []
        }
    ]
}
Now, this looks a lot different from the one we created earlier. This is one of the cool things about the plugin, it has created a unique debug type called aws-sam which allows us to invoke lambdas. There is also a request-type for API calls, which you can generate by visiting the API lambda and generating a debug call for that one.
As you can see, you can specify the invoke target, the environment variables, and the payload. This is all very handy so we can skip using the API, and instead just roll a single easy to handle launch.json.
You should be familiar with all the things you can change because it is exactly what we have covered in this article.
So, why didn’t we just use the plugin from the start? Because then it would be too much magic, and we would not understand what the plugin was doing for us. I believe that learning the foundation of the tools is the best in the long run, also you are not bound to using VS Code, but any IDE you want since we understand how to attach a debugger, and why we need to.
Set up Localstack and SAM Network
If your lambdas are using other AWS resources you can mock those using Localstack. I won’t cover localstack in this tutorial, but we will look at how we can force the SAM resource to run on the same network as a localstack instance.
If you are using localstack and running it with docker, make sure you also specify a docker network. If you run your localstack on docker network named mock-aws-network, you can make Sam use the same network by using the input flag docker-network mock-aws-network on most commands.
sam local invoke --docker-network mock-aws-network
sam local start-api --docker-network mock-aws-network
That comes in handy, as lambdas tend to use other AWS services that need to communicate, and this way we can debug that also.
If you are using the VS code plugin, you can add this line to the launch.json
{
    "configurations": [
        {
            "type": "aws-sam",
            "request": "direct-invoke",
            "name": "demo:SQSLambda",
            "invokeTarget": {
                "target": "template",
                "templatePath": "${workspaceFolder}/template.yml",
                "logicalId": "SQSLambda"
            },
            "sam": {
                "dockerNetwork": "aws-mock-network"
            }
        }
    ]
}Conclusion
In this tutorial, we have learned how to develop lambdas using SAM and how to debug them locally. I think SAM helps out when developing lambdas and removes many of the frustrations I had when I started developing serverless applications. Stuff like debugging was hard but is no longer.
There are still more features in SAM I have not covered here, such as creating other AWS resources (SQS queues, etc) and referencing their ARN straight into your lambda.
You should start trying SAM out and figuring out all the amazing tools it has available.
Thank you for reading, and as always feel free to reach out, I love feedback and discussions.
If you enjoyed my writing, please support future articles by buying me an Coffee