How To Implement a Single Page Application Using React Router
Learn how to use the React router to develop a SPA website
by Percy Bolmér, August 10, 2021
![By [Brando Makes Branding] on Unsplash](/_app/immutable/assets/img0-c93a9035.webp)
What is SPA?
SPA stands for Single Page Application. It is a very common way of programming websites these days. The idea is that the website loads all the HTML/JS the first time you visit. When you then navigate, the browser will only rerender the content without refreshing the website.
This is used to make the user experience feel a lot smoother. You can tell when it’s a SPA or multi-page application when navigating between menus often because a multi-page application will reload, making the whole UI blink fast depending on the content. This is due to it refreshing the website. A SPA will instead feel smooth in the transaction as it simply shows other content without refreshing.
We will look at how we can use the React-Router to build one.
Developing the SPA
First, create the application template using create-react-app.
create-react-app appEnter the newly created app folder and install the React Router, which we will use to create the SPA.
npm i react-router-dom --saveWe will begin by modifying the created application, open up src/App.js and replace everything in it with the following:
App.js removing the original splash screen
import './App.css';
import Main from './layouts/main';

function App() {
  return (
    <Main></Main>
  );
}

export default App;
Notice that we are returning the Main component? Let’s create it so the application doesn’t crash. Create a folder called layouts and a file in it called layouts/main.js. This file will hold the base layout of the application.
mkdir layouts
touch layouts/main.js
In the main.js, we will create a navbar that looks very bad, but we are here to learn React Router and not CSS. This will have navigation links to an about page and a contact page. Below the navbar, we will have a content div that will be used to render the selected link. This is a very common SPA setup where you have a static layout with navigation and a card that changes the content. Here’s the code:
Main.js — The applications default layout
import Navbar from '../components/navbar/navbar'
function Main() {
    return (
        <div>
            <Navbar></Navbar>
            <div className="content">

            </div>
        </div>
    )
}

export default Main;
Let’s create the navbar and then visit the page. Create a folder in the src called components which will hold the components of the application. Then create components/navbar/navbar.js.
mkdir -p components/navbar/
touch components/navbar/navbar.js
Navbar.js — A simple list of links
function Navbar() {
    return (
        <div className="navbar">
            <h1>Navbar</h1>
            <ul>
                <li><a href="/">Home</a></li>
                <li><a href="/about">about</a></li>
                <li><a href="/contact">Contact</a></li>
            </ul>
        </div>
    )
}

export default Navbar;
Finally, open src/index.css, and paste in the following CSS snippet to render the navbar as a horizontal list instead:
index.css — Adding horizontal navbar
.navbar ul {
  list-style-type: none;
  margin: 0;
  padding: 0;
  overflow: hidden;
}

.navbar li {
  float: left;
}

.navbar li a {
  display: block;
  padding: 8px;
  background-color: #dddddd;
}
Start the application and visit localhost:3000 to view the resulting application.
npm start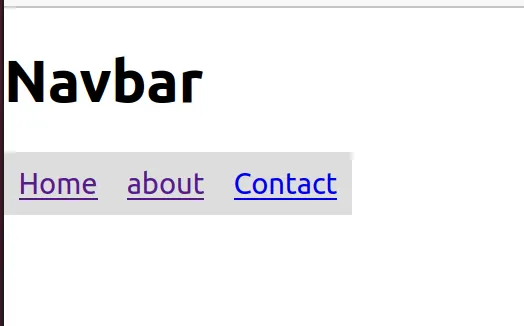
Before we can start implementing the Router we need to create three components, which will all be very simple, as they just print their name.
mkdir components/about
mkdir components/contact
mkdir components/home
About.js — Printing the name
function About() {
    return (
        <h1>About</h1>
    )
}

export default About;
Copy and paste the above code for all three components and change the name to the correct one. So you should have components/about/About.js, components/contact/Contact.js and components/home/Home.js which all look like the About gist, but with its name changed.
Learning To Use the React Router
If you have created all three components, it’s finally time to learn how to use the React Router. We will make it so that each link changes the content shown to the correct component.
There are two files we need to modify to make this work: the layouts/main.js has to be updated to include the Router and then components/navbar/navbar.js needs to replace all <a> tags with a Component named Link from the React router. We will go through it all step by step so we can examine what each component is.
Begin by adding the following import to main.js
Importing needed components from the react-router-dom
import { HashRouter, Switch, Route } from "react-router-dom";Before moving on, we will learn what each component is. This is important, and I’ve seen many people learning the pattern instead of what the components do. I strongly believe that understanding what the components do will make using them easier.
Router — A router is an interface that needs to be fulfilled to act as a router. There are a few different default routers available. We will begin using the HashRouter, but there is also the common BrowserRouter. Here is a great [Stack Overflow](https://stackoverflow.com/questions/51974369/ what-is-the-difference-between-hashrouter-and-browserrouter-in-react) discussion about the difference between them.
HashRouter — The Hash router uses # in the URL to sync the UI. An example is http://localhost:3000/#/about. We will begin using this and later learn to switch it out.
BrowserRouter — A router that uses the HTML5 history API. This is the router we will use.
Switch — A component that lets us control how to render different Routes. It will only render the first matching child route. Great for avoiding having many routes render at the same time.
Route — A component that will render whenever the URL matches the assigned pattern. This means that we can have many Routes render at the same time, which is why the Switch is important.
NavLink/Link — Links is the component to use that allows the Router to change the navigation in your application. NavLink is simply an extension of Link that allows for styling. I tend to use NavLink because it adds the
.activateclass to the currently selected Link in the navbar. This allows us to easily show which the currently selected Link is.
We will add the HashRouter around all the content inside the main.js. This is to make sure that the components inside are used properly. If a Route component would be outside the HashRouter it will not work. So we must make the HashRouter the parent. This is the reason why it’s common to find Routers in App.js.
Hint: we will remove HashRouter and use BrowserRouter later.
The Switch will be placed inside the Content div since it is in the Content div that we want to render the selected page. Remember, whenever a Route matches the URL it will render, and the switch will make sure only the first match renders.
All Routes will go inside the Switch since we only want to render one component at a time. Note that this is not always the case. It is not uncommon to find the same setup, but with a few Routes outside the switch. Here’s the code:
Main.js — Full example where we route to the correct component depending on the URL
import Navbar from '../components/navbar/navbar'
import  { BrowserRouter, HashRouter, Switch, Route } from "react-router-dom";
import Home from '../components/home/home'
import Contact from '../components/contact/contact'
import About from '../components/about/about'

function Main() {
    return (
        <div>
            <HashRouter>
                <Navbar></Navbar>
                <div className="content">

                    <Switch>
                        <Route exact path="/" component={Home}/>
                        <Route path="/contact" component={Contact}/>
                        <Route path="/about" component={About}/>
                    </Switch>
                </div>
            </HashRouter>
        </div>
    )
}

export default Main;
Next, we need to change the Navbar.js to use the special NavLink component instead of <a>. This is because the Router will only work if we use the Link components.
Notice how the / path has the exact keyword in it? This is because the / URL will match ALL paths by default since they all contain /. And remember what link the switch will select? The first match, so we need to say that only select the / if it’s an exact match. The code is as follows:
Navbar.js — The full navbar with NavLinks instead of a tags
import  { NavLink } from "react-router-dom";

function Navbar() {
    return (
        <div className="navbar">
            <h1>Navbar</h1>
            <ul>
                <li><NavLink exact to="/">Home</NavLink></li>
                <li><NavLink to="/contact">Contact</NavLink></li>
                <li><NavLink to="/about">About</NavLink></li>
            </ul>
        </div>
    )
}

export default Navbar;
Optionally you can modify the.active CSS in index.css to highlight the selected link.
index.css — Highlight the select navlink
.active {
  color: #ffffff;
}
Visit localhost:3000 to view the result and try navigation around. You should see the top navbar stays around while the content is switched.
 — Notice the # used in the URL by the hashrouter.](/_app/immutable/assets/img2-a2d17faf.webp)
 — URL changed when selected another navlink and content](/_app/immutable/assets/img3-b21bdb90.webp)
Passing Data to a Link (UseParams and UseLocation)
One key feature of the links is that we can pass data into the components. This can be important when setting up a user profile etc.
We will look into the two ways we can pass data with the current Router.
The first way is by using the useParams hook from the react-router. This is a hook that allows you to pass key-value pairs in the URL. Let’s add the user profile and print a username to showcase.
First, create a new folder named user and a file in it named components/user/profile.js.
mkdir components/user
touch components/user/profile.js
In profile.js we need to import the useParams hook. We will then assign the value of the username using this hook. Here’s the code:
profile.js — useParams is used to extract the username from the URL
import { useParams } from "react-router";

function Profile() {
    // Use the useParams hook to get the username from the URL
    // username has to be applied as a named parameter in the route
    const { username } = useParams();

    return (
        <h1>{username} Profile</h1>
    )
}

export default Profile;
How do useParams know what value to extract? Using named parameters in the route declaration. So we need to change the Route in main.js to include this in the URL. Parameters are named by adding :parameter to the Route. So we want to add :username.
main.js — Added a profile Route with a :username parameter
import Navbar from '../components/navbar/navbar'
import  { HashRouter, Switch, Route } from "react-router-dom";
import Home from '../components/home/home'
import Contact from '../components/contact/contact'
import About from '../components/about/about'
import Profile from '../components/user/profile'
function Main() {
    return (
        <div>
            <HashRouter>
                <Navbar></Navbar>
                <div className="content">

                    <Switch>
                        <Route exact path="/" component={Home}/>
                        <Route path="/contact" component={Contact}/>
                        <Route path="/about" component={About}/>

                        <Route path="/profile/:username" component={Profile}/>
                    </Switch>
                </div>
            </HashRouter>
        </div>
    )
}

export default Main;
The last thing we need to change is the navbar to show the profile page, and insert a value in the link. This will be hardcoded right now, but in a real scenario, your navbar would grab the username from somewhere.
Navbar.js — Added a link to profile/percybolmer, where percybolmer is the username value
import  { NavLink } from "react-router-dom";

function Navbar() {
    return (
        <div className="navbar">
            <h1>Navbar</h1>
            <ul>
                <li><NavLink exact to="/">Home</NavLink></li>
                <li><NavLink to="/contact">Contact</NavLink></li>
                <li><NavLink to="/about">About</NavLink></li>
                <li><NavLink to="/profile/percybolmer">Profile</NavLink></li>
            </ul>
        </div>
    )
}

export default Navbar;
Visit the website again, and see the results. Notice how the URL shows the value of the username. Try changing the URL in the browser to see changes apply.
 — The url to the profile page](/_app/immutable/assets/img4-af0d64f7.webp)
Passing Data by React Router (useLocation)
As you might have figured out, using URL parameters does not allow us to easily add many parameters. It does only allow strings to be passed, and you will likely want to pass more data.
Luckily this is also possible, using state in the links. Each link can have the to parameter accept objects and that can be passed using state. The state can be passed by using the useLocation hook.
The to object should have the state and the pathname variable set, the pathname is the URL endpoint to use.
{
"pathname": "url",
"state": {
    "yourstatevar": "value"
  }
}
Now you’re thinking, “Great, time to use it.” However, there are some very common questions on Stack Overflow and other forums that all occur due to the following things we will go through.
“Yes, I intentionally made these mistakes to make sure we can address them .”— Evil Programming Teacher
These are the issues:
- HashRouter does not support the
useLocationhook. - The Router is not allowed to be inside the same component as the component that puts the router on the tree. You can read a great blog article about it here.
First off, HashRouter does not support the useLocation hook. This is important to know and also very highlighted in the documentation. So we will be switching from HashRouter to BrowserRouter. The only change we need to do is change the name used and make sure to import it.
And while we are changing the name we need to address issue number two. We will simply move the Router into the index.js file. This will make the Router component Wrap the application and thus making it not part of the same component. Here’s the code:
Index.js — Using the Browser Router around our App
import React from 'react';
import ReactDOM from 'react-dom';
import './index.css';
import App from './App';
import reportWebVitals from './reportWebVitals';
import  { BrowserRouter } from "react-router-dom";
ReactDOM.render(
  <React.StrictMode>
    <BrowserRouter>
      <App />
    </BrowserRouter>
  </React.StrictMode>,
  document.getElementById('root')
);

// If you want to start measuring performance in your app, pass a function
// to log results (for example: reportWebVitals(console.log))
// or send to an analytics endpoint. Learn more: https://bit.ly/CRA-vitals
reportWebVitals();
Next, we will remove the router from main.js.
Main.js — No router anymore
import Navbar from '../components/navbar/navbar'
import  { Switch, Route } from "react-router-dom";
import Home from '../components/home/home'
import Contact from '../components/contact/contact'
import About from '../components/about/about'
import Profile from '../components/user/profile'
function Main() {
    return (
        <div>

                <Navbar></Navbar>
                <div className="content">

                    <Switch>
                        <Route exact path="/" component={Home}/>
                        <Route path="/contact" component={Contact}/>
                        <Route path="/about" component={About}/>

                        <Route path="/profile/:username" component={Profile}/>
                    </Switch>
                </div>

        </div>
    )
}

export default Main;
Then we need to update the navbar.js to make sure the TO object passes more data. The code is below:
Navbar — With a to object in the Link
import  { NavLink } from "react-router-dom";

function Navbar() {
    return (
        <div className="navbar">
            <h1>Navbar</h1>
            <ul>
                <li><NavLink exact to="/">Home</NavLink></li>
                <li><NavLink to="/contact">Contact</NavLink></li>
                <li><NavLink to="/about">About</NavLink></li>
                <li><NavLink to={{
                    pathname: "/profile/percybolmer",
                    state: { registrationdate: "2021-07-07" },
                }}>Profile</NavLink></li>
            </ul>
        </div>
    )
}

export default Navbar;
And last, we need to use the useLocation hook. In this example, I’ll show you how to assign both the State variable and the pathname. Usage is just as the useParams hook.
Profile.js — Using the useLocation hook twice.
import { useParams, useLocation } from "react-router-dom";
import React from 'react';


const Profile = () => {
    // Use the useParams hook to get the username from the URL
    // username has to be applied as a named parameter in the route
    let { username } = useParams();
    // useLocation hook is used to grab the state from the input to object
    // You can grab each field in the object by using the same name as the variable name
    let { pathname } = useLocation();
    let { state } = useLocation();

    return (
        <div>
            <h1>{username} Profile</h1>
            <p> Registered on:{state.registrationdate} </p>
            <p> Visiting: {pathname}</p>
        </div>
    )
}

export default Profile;
Visit localhost:3000 and view the result. Don’t forget to notice that the URLs have changed since we removed the HashRouter.
 — Showing the data from useLocation hook](/_app/immutable/assets/img5-4edfbc37.webp)
Programmatically Route Using useHistory
Sometimes you might want to programmatically reroute the user based on some kind of event. This can be done by using the useHistory hook, which will return a history object we can use to redirect the browser. Using it is simple. When you use the history object and use the push(route) it will renavigate the browser.
Let’s make the H1 tag in the navbar a button that redirects to the homepage upon clicking.
We will use the same approach as before, assign a variable by using the hook. We will add a function that will use this variable and push the route.
navbar.js — useHistory example to redirect browser
import  { NavLink , useHistory} from "react-router-dom";

function Navbar() {

    let history = useHistory();

    function goHome(path) {
        history.push("/");
    }

    return (
        <div className="navbar">
            <button type="button" onClick={goHome}><h1>Navbar</h1></button>
            <ul>
                <li><NavLink exact to="/">Home</NavLink></li>
                <li><NavLink to="/contact">Contact</NavLink></li>
                <li><NavLink to="/about">About</NavLink></li>
                <li><NavLink to={{
                    pathname: "/profile/percybolmer",
                    state: { registrationdate: "2021-07-07" },
                }}>Profile</NavLink></li>
            </ul>
        </div>
    )
}

export default Navbar;
Try visiting localhost:3000 again. Navigate to something other than the / page and then press the button. Voila, it should have navigated you back!
Conclusion
You have reached the end of this article. Hopefully, you have found it useful.
You can find the full code used in the article at GitHub.
Today, we have covered the following topics:
- How to set up and use the React Router
- Positioning of the Router
- Using Switch to route between many links
- Linking to a subpage in a subcomponent
- Passing data by using the
useParamsanduseLocationhooks - Programatically reroute using the
useHistoryhook
Thanks for reading. Now go out there and route the world.
If you enjoyed my writing, please support future articles by buying me an Coffee