Rebuilt My Blog With SvelteKit
A comparison of mine Jekyll built blog and my rebuild with SvelteKit
by Percy Bolmér, December 1, 2022

A few months ago a colleague of mine recommended Svelte.
At first, I thought
Oh, great a new javascript framework, just what we need, not like there are hundreds of them
I usually say that I am a Backend developer, but I do know my way around a few frontend frameworks, though I am not at my prime in that realm. I have struggled to get familiar with React (using it professionally) and Jekyll (using it for my current blog). It took me a long time to get efficient at using them.
At first I had no interest in learning about Svelte, but I heard more and more about it, then I saw that it won the Most Loved Web framework.
I started reading more about it as it sounded promising. Here is a very short recap of the information and features that caught my attention.
Web applications are compiled at build time, allowing them to be blazing fast due to optimizations.
Svelte is very easy to use with low complexity
No custom syntax, simple HTML, JavaScript, and CSS. So the entry level is low.
What Is Svelte & SvelteKit?
Svelte is a JavaScript framework, Svelte does not use a virtual DOM such as React or Vue for handling the state of the app.
The fact that no virtual DOM is used allows Svelte to be truly reactive. This means that we don’t have to do any hacks or boilerplate code to get a variable to rerender when we update the value. I think everyone who has written a React application sometimes has had trouble with this.
In Svelte, when we update a click counter etc, It automatically updates, no useEffects, useState, or other hooks.
This is how a simple button component that increments a count, and printing that counter looks.
The cool thing about Svelte is that everything that is inside the same component is scoped. So changing the p color to red will only affect the component that the css is declared in.
One thing that made me love Go, is the easy syntax and low boilerplate. Svelte promises the same thing but for Web applications.
Another cool thing about Svelte is that instead of allowing the Browser to do most of the processing, the server handles that. The Web applications are Compiled before shipping them to production, allowing the server to perform a bunch of build optimizations. This makes creating blazing-fast websites an easy task.
Once you start learning Svelte, it won’t take long before you are faced with the term SvelteKit. While Svelte is the JavaScript framework, SvelteKit is an Application Framework.
SvelteKit is used to build applications using Svelte, it adds a bunch of features. The two most important according to me are the following.
Prerendering
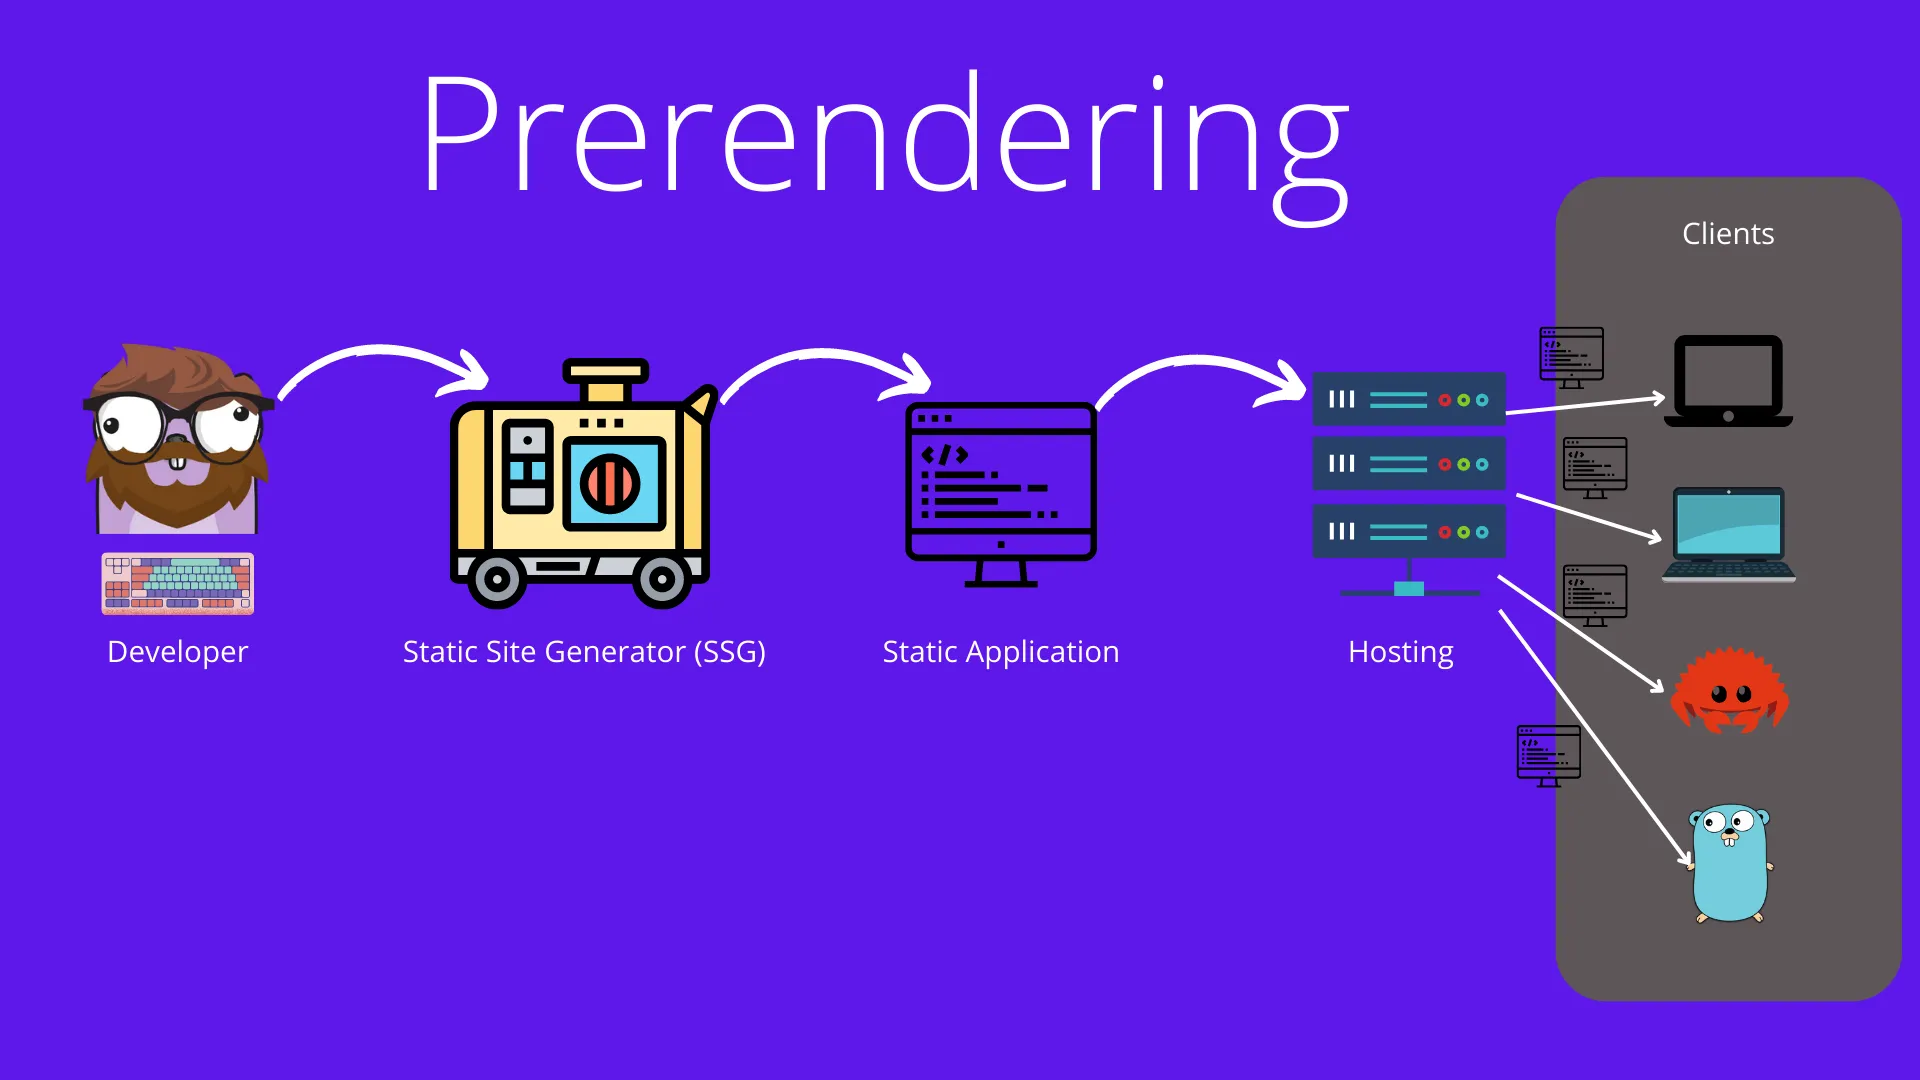
The Application is computed at build time and the static application is stored and served when visiting the website, this means that the load time is drastically lowered since much of the heavy lifting is already done for the client.
This is not the same as Server Rendered, since it happens at build time we can only change the content by rebuilding the application. But it is much easier on the server since it does not have to rerender everything.
Prerendering is an amazing tool when you have a static website, such as a Blog where all the contents can be predetermined.
Note, with SvelteKit it is really easy to combine SSR, Prerendering, and CSR. So we can prerender what can be prerendered and any static components, and leverage other amazing features such as SSR for other content.
Routing
Svelte itself does not have a way to route. This is where SvelteKit comes in, and adds the possibility to easily route users.
SvelteKit enables a file-based routing system. It makes it very easy to control any code that should be run on the server, using a file name prefix +server.js, or on the client using +page.js. This is similar to how we do it in Jekyll so I was familiar with it from the start.
Getting Rid Of Jekyll?

My old blog was a template I found online which I thought looked nice, and it worked. The website was built using Jekyll, which I disliked from the start.
The things I disliked about Jekyll is
- It uses Ruby, which I have no interest in learning. You don’t have to code in Ruby, but it leverages the tooling around Ruby.
- I’ve had a lot of trouble using Gems in Jekyll, many of them were old and there was many dependency issues, conflicting version etc.
- I experienced it being really slow when working locally and performing changes.
- I had a hard time wrapping my head around how to use Jekyll, it was many new terms and it didn’t strike me as obvious.
I choose that Jekyll based template because it was easy to deploy to GitHub Pages and fast to get going.
But since SvelteKit also supports generating a fully static website using Static Site Generator (SSG), there was no issues deploying it to GitHub Pages.
Given the fact that I disliked how Jekyll worked and the tools around it, and that I was more used to the tools used by SvelteKit, such as NPM, YARN, and Vite. I decided to try and rewrite my current blog with Svelte.
Comparing The Websites

Let’s start comparing the Websites and their performance. I will compare the websites using Lighthouse. Lighthouse is present in any Chrome based Web Browser in the developer tab (F12 to open), or through an extension. You can also run an online version of it using PageSpeedInsights. I have deployed both applications to GitHub Pages, and will run the test on the deployed versions.
Lighthouse is a tool to measure your website’s SEO, Performance, Accessibility, and Best Practices.
SEO is measured by checking that search engines can understand the content, that the page can be crawled and indexed, and that it is mobile-friendly.
Performance is a weighted value between multiple metrics related to the speed of the website, we will see more of these metrics soon.
Accessibility is checked to make sure your website is responsive and works for multiple screen sizes.
Best practices check that we are following Web Vital best practices, that the page is not using deprecated technologies, and is fast and secure.
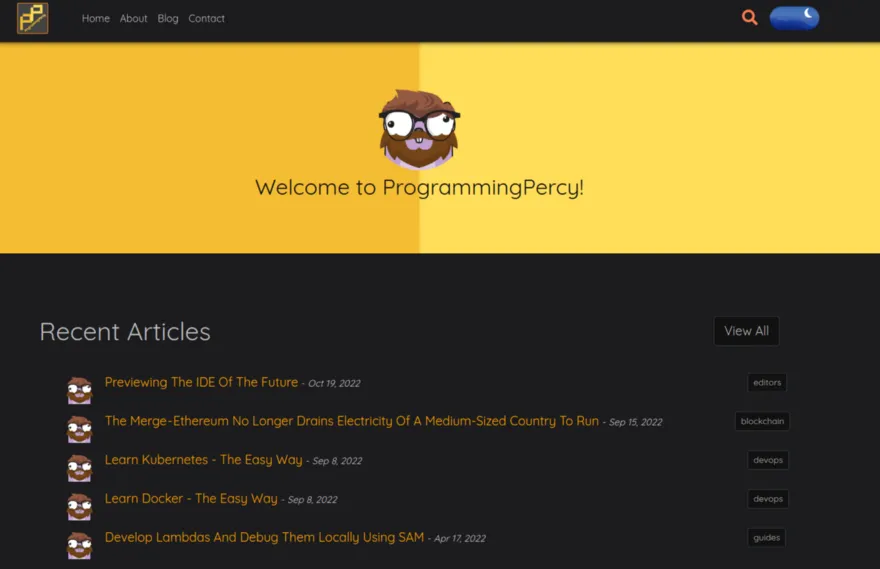
The old splash screen when visiting my Blog is very basic, it shows the 5 latest posts and a little bit of text. It has very few images and looks very simple.
Let us run lighthouse on this website and review the results. I will run lighthouse for Mobile devices since mobiles are usually slower and more widely used.

Lighthouse begins by giving us a summary of the four metrics.
The performance was 44, which is bad. Lighthouse gives us information about why it is low also.
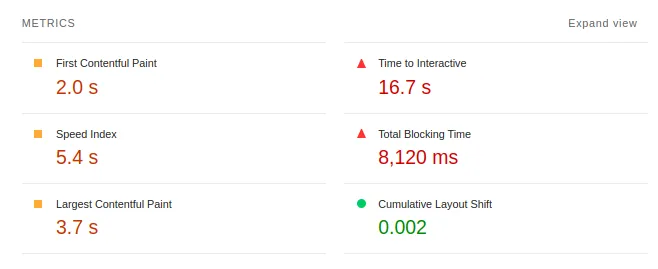
We can see the most crucial metric is Time To Interactive. Time To Interactive is how long before the page is “fully interactive”, this means that the page should respond within 50 milliseconds. My current website takes an astonishing 16.7s! Note that this is on a mobile device which is often considered slower than an desktop.
If this is your first time using LightHouse, you might think 16.7s seconds is high, and it is. But it is probably not as high as you can imagine. Running lighthouse on Facebook.com gives me 4.7 seconds.
Given how little information I have on the old website my result is horrible though.
The second metric that is bad is Total Blocking Time. JavaScript is single-threaded, which means any work being performed will block the website. Blocking is when that work is longer than 50ms, anything lower won’t be perceived by a human.
This is how the new blog looks.
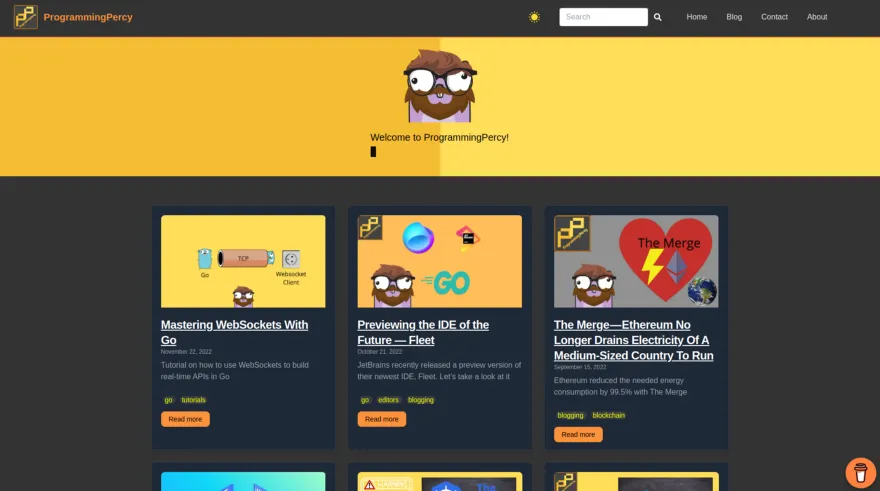
As you can see I have updated the styling. Instead of simply showcasing the title and a description, the new website also shows thumbnails of the posts. The first splash screen will load 9 images and information about the 9 latest blog posts.
Let us run lighthouse on the new website and review the results
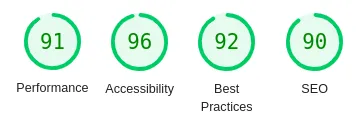
Now, this looks a lot better than the previous website. All four scores are improved. The performance is MUCH higher, even though we now are showing much more data.
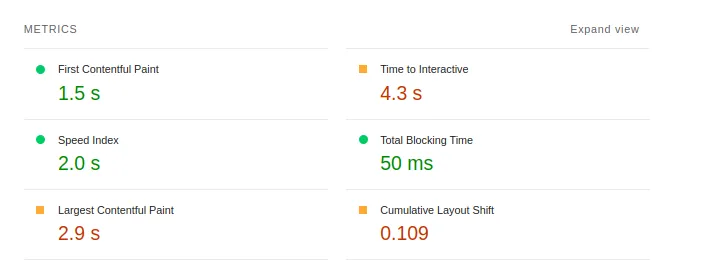
We can see that the new website is fully interactive after 4.3 seconds. This is a reduction of (16.7–4.3) = 12.4s faster than the old blog.
If you wonder what is making it still take 4.3 seconds, there is a still a bit of JavaScript that I have to run and import, such as Google Analytics and Adsense. These does tend to slow down a website pretty much.
Non the Less, This will be a massive improvement for my readers!
Let’s be fair, my readers should not hang out on my home page, they should reside inside of blog posts.
Let’s measure the same blog post on each website, and this is interesting because here there is no difference, both serve a MarkDown file.
We can run lighthouse again but instead on this page.
So, the old website is marked as yellow, so it’s acceptable. I’d like to make a note of the extreme Time To Interactive of 28.7 seconds. Imagine visiting my blog and having to avoid 28 seconds before everything is working as intended.
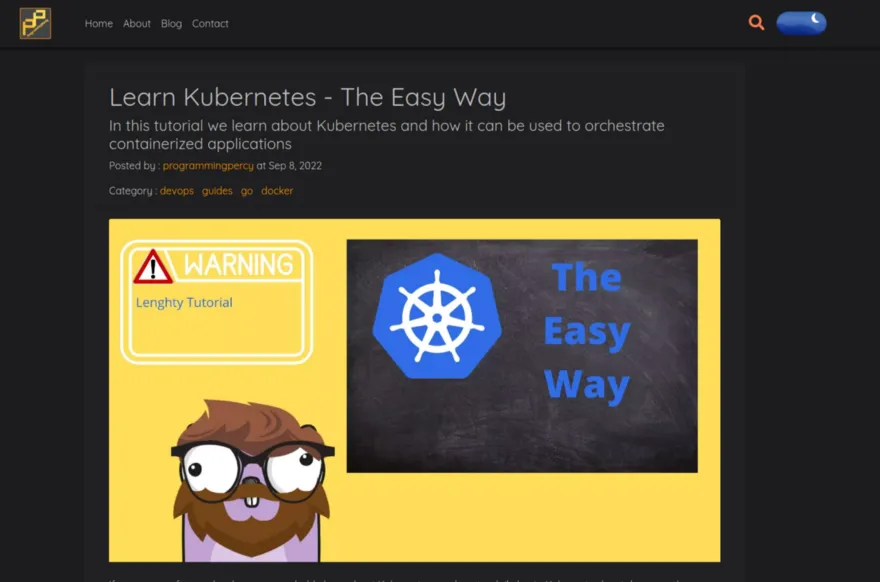
The new website holds the same markdown file, and displays almost identical information.
Let’s let LightHouse devour it.
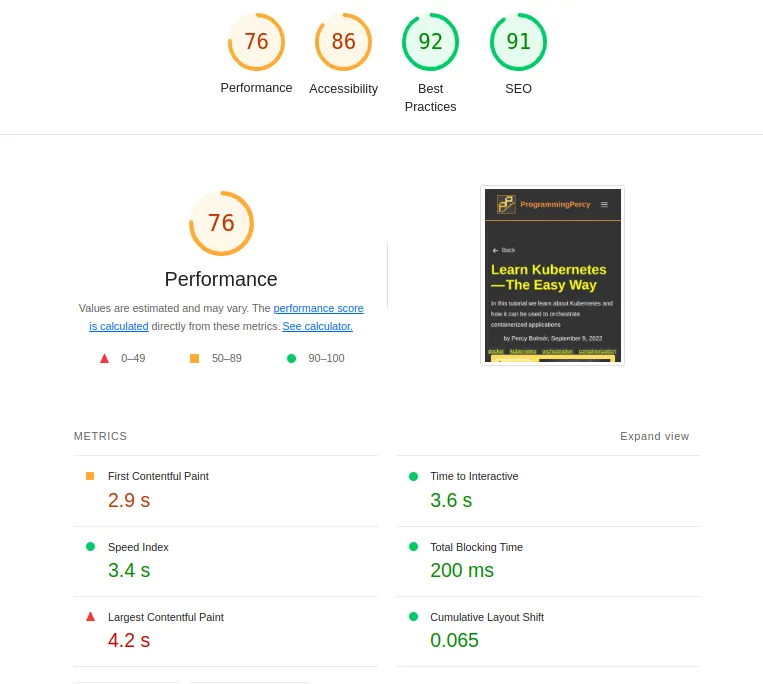
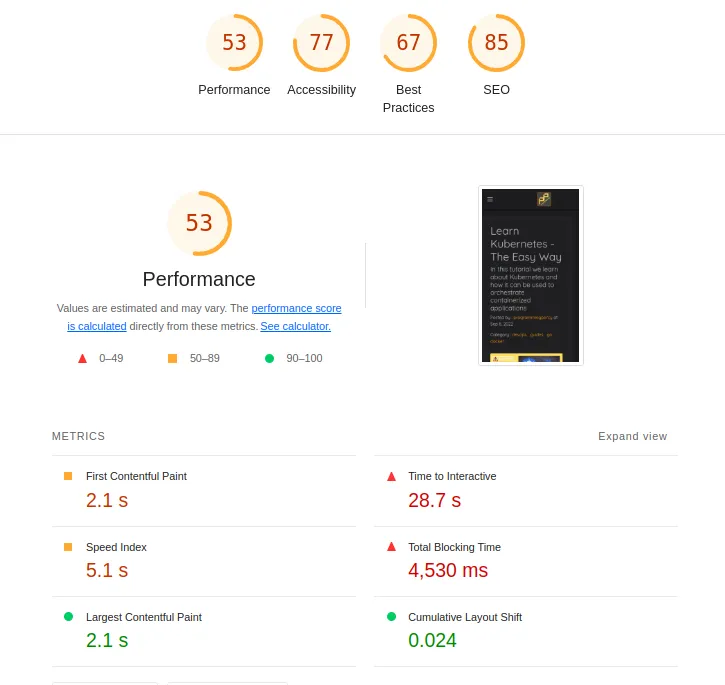
So everything looks a bit better. Performance increased by 22 points, which is much considering 100 is the highest. I can reach 90 if I remove analytics and other stuff, but I want that to be available so I can’t do that.
The time to interactive is 3.6 seconds, which is (28.7–3.6) = 25.1 seconds faster!
Conclusion

I have to say this, I have made almost NO optimizations on the new website, this is using almost only OUT OF THE BOX features. This speed gain is purely from simply using SvelteKit.
And I got to say it feels amazing, I have been struggling with so many plugins and different tools for my Jekyll site, and to no avail.
The only thing I did add extra is a Vite-Plugin to automatically generate webp images for users during the build. Something I already did in the Jekyll application. It was 100x times easier to implement in SvelteKit however. And I will be making a blog post about that in the near future.
On the old website, I was very cautious and afraid of everything I changed as it usually broke many other things. Since SvelteKit has a very understandable and easy structure for both the application and also since Svelte components are super easy to understand, the blog is now much easier for me to work with.
I was very skeptical when I decided to rebuild, many frameworks out there have offered the “next generation”, but having tried SvelteKit, it does feel like it is the next generation framework.
That said, I have to make it clear that SvelteKit has not yet been officially released with a 1.0 version. The current version is still a release candidate only.
But this can also mean that we will see even more amazing things from SvelteKit before v1.0.
I am super psyched about this and I can’t wait to hear from you guys about what you think about the new website.
Do you like it?
Let me know in any of my social media handles!
If you enjoyed my writing, please support future articles by buying me an Coffee