Free Secure Self-Hosting Using Cloudflare Tunnels
A tutorial that covers how to use Cloudflare Tunnel to provide a secure connection to your local resources without publicly exposing an IP.
by Percy Bolmér, January 3, 2023
Recently I have been deploying everything to the Cloud, it is painless and very developer friendly.
But let’s be honest, sometimes I have small applications that I play around with. It can be a personal project that I run and running it locally is very easy, I can run databases in docker, etc, and it costs nothing but electricity.
I have many small applications that I often thought that I should deploy, but I have stopped myself, I need to secure the cloud, set up infrastructure, create databases, and configure all the needed services.
For a simple web application all that can be too much for a small fun project.
What if we would host it from home, on a Raspberry for instance?
Well, we can and always could, but it would require opening a port to my own network, exposing and risking my network to attacks. I would also need to fix a VPN etc. Also If you are not allowed by you’re ISP to be allocated a static IP that would require a WPS.
Happily, we can now leverage Cloudflare Tunnels, which makes all of this super easy, and the best part, for FREE.
There is a privacy concern with Cloudflare Tunnels, they can see you’re applications traffic unencrypted unless you add your own TLS
I can now set up a database using docker, host it myself, and have as many services as I want, easily without any cloud infrastructure to set up.
This tutorial is made of two parts, Part One will be creating an Access to Cloudflare using Tunnels.
Part two will be about adding SSO login protection to an exposed Web Application.
What Are Cloudflare Tunnels And How Do They Work?
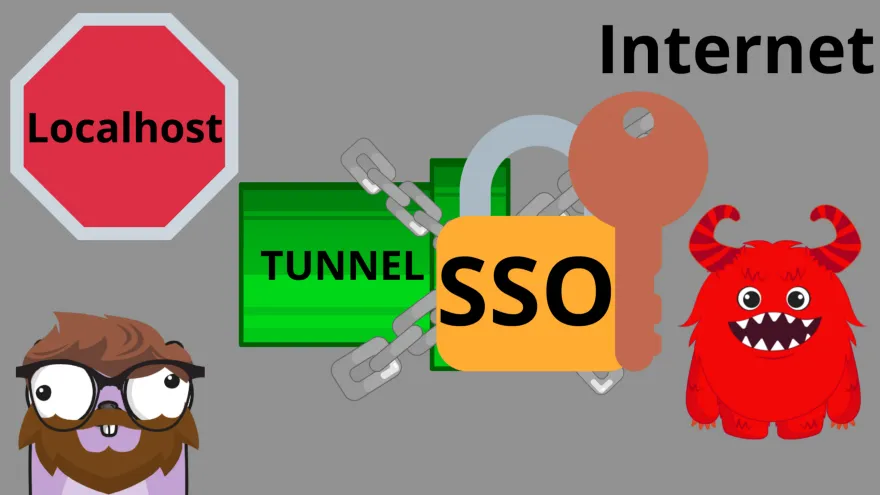
Cloudflare tunnels are a way to access a local resource on the big scary internet.
Imagine that you have an API on localhost:8080 and want it to be available for other people in the world on myawesomeapi.com. Well, Cloudflare tunnels allow this to happen without exposing any IP address from your host.
Tunnels can be used for the following things
- Expose HTTP Web Server
- SSH Server to connect to
- Remote Desktops
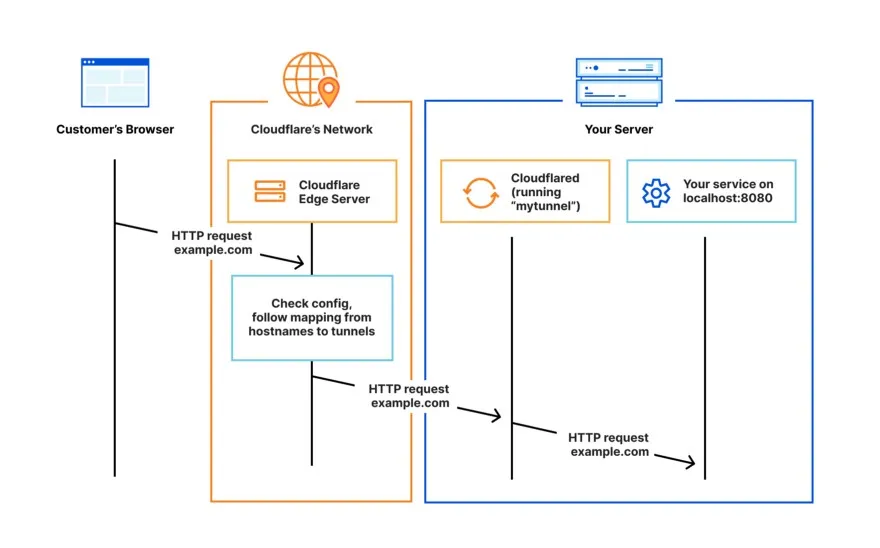
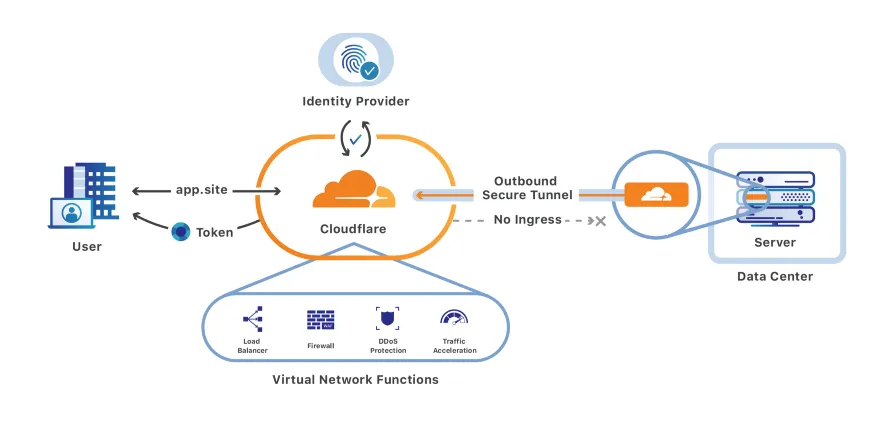
The way it works is that software called cloudflared is run on the host machine, that software will open up 4 connections to Cloudflare. These connections are OUTBOUND only, so traffic can only go OUT from the host to Cloudflare. These connections allow traffic to flow between the host and the Cloudflare network, avoiding exposing the host to the global internet and therefore avoiding an attack surface.
One could say that Cloudflare runs a Man In The Middle between your host and visitors.
While Cloudflare tunnels are extremely easy to use and powerful. There is a CON to it all, Cloudflare could potentially see all traffic that is served between your server and their network.
Prerequisites - Set up a Host Device And CloureFlare Account
To follow this tutorial, you need two things, a computer (using your own or like me a Raspberry PI Zero), and a Domain.
The domain is used to reach the services that you expose, and for this, to work, you need to own a domain. Note that you can TEST hosting an application without a domain, this will give you a random URL to access, but this should only be used when testing. I recommend you grab a domain.
You can obtain an Domain for a 6.98$ from NameCheap. This link is an Affiliate Link, Purchases will Sponsor the Author
Don’t worry, you can host multiple applications on the same Domain using SubDomains.
If you want to continue without a Domain, you can. Later in this tutorial, we will install software called cloudflared, you can run a demo tunnel by executing the following command to host on a Random URL.
cloudflared tunnel - url http://localhost:7000In the tutorial, I will use a Raspberry PI Zero to host an API built in Go. In my examples, I will assume you also host the same API, but you can of course use whatever you’d like.
If you don’t own a Raspberry PI, I can strongly recommend them. They are amazing and really capable of their price. You can buy them here, note that the link is an affiliate link.
Begin by setting up a Raspberry PI, or any other device you have. Make sure you have a connection to it through SSH, this tutorial will not show you how to do that.
This tutorial is great for finding devices on the same network.
Install Go on the device since we will be running an API using Go in this tutorial.
Try visiting the website on the device you are installing Go on to auto-select the correct ARCH, or go into “Try One Of the other Downloads”. I am using a Raspberry PI Zero and have to select the Armv6L.
Once Go is installed, visit the ClourFlares website and sign up for an account.
There are two ways of setting up a tunnel, either through the UI or the CLI.
We will cover both, I like doing the UI way first to easily understand what is going on, once that is done, we can traverse the CLI way easier.
Adding Your Domain To CloudFlare
To begin using the Cloudflare tunnels we need to add a domain to Cloudflare.
How you do this depends on where you bought and manage your domain name. If you don’t own a domain and want to buy one for cheap try using the Cloudflare Registrar it will help you set it up.
If you already own a Domain, you will need to configure the Name servers and add it to Cloudflare, you can find a detailed step-by-step on their website of what needs to be done. I won’t cover that since it would be too long and if they change their values I don’t want to fool anybody, better to use their official docs to make sure they are up to date.
If you don’t own a domain, but want one, you can use Cloudflare registrar to buy one. It is really simple, visit the Domain Registration in the Navbar and press Register Domain in the submenu.
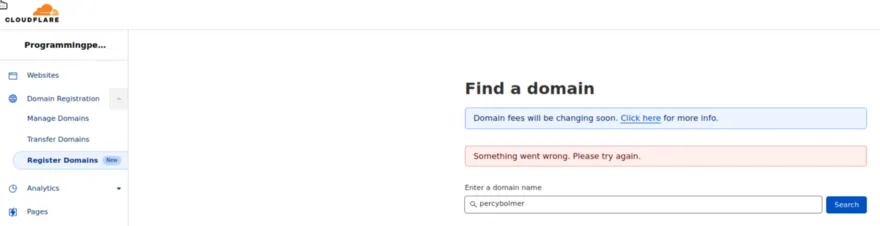
Enter the domain name you want, and pay the price (4–30$) depending on the domain.
When you press buy, it will take you to a checkout form.
Once you have a domain, either by buying one from Cloudflare, or fixed your name servers so that it is accessible.
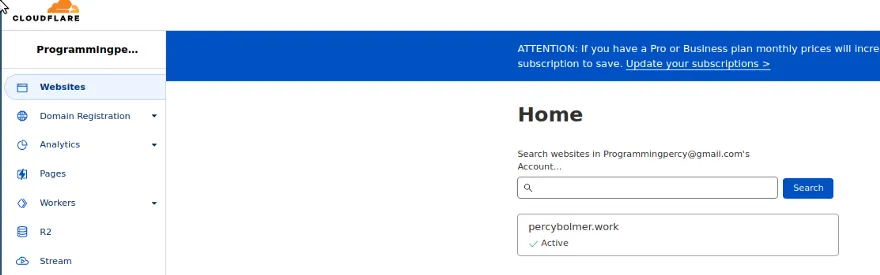
Visit Cloudflare Dashboard and navigate to Websites in the navbar. You should see something similar to this.
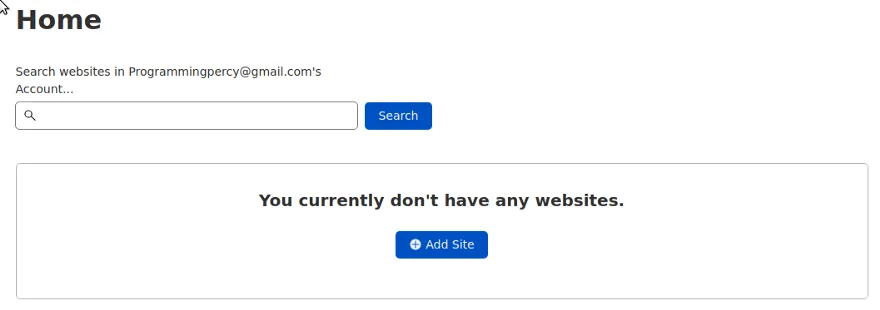
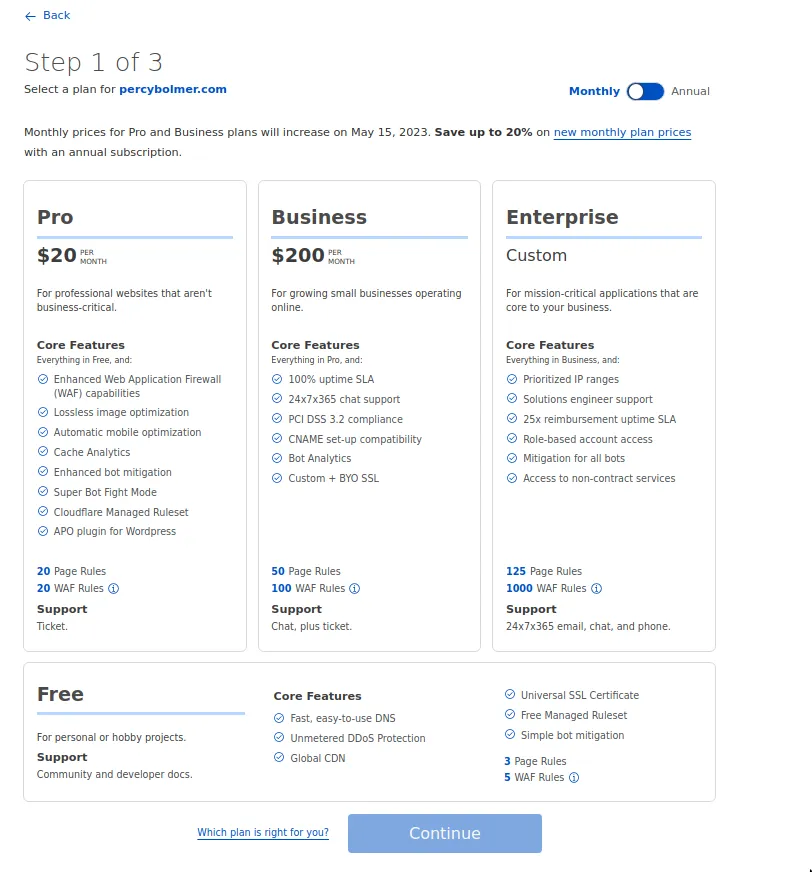
Enter the name of your domain and you will be brought to the Pricing selection, select the tier you want, I will go for Free.
If you have bought your website through Cloudflare it will automatically be detected, otherwise, you should see a DNS check and the status of it. Once the DNS is detected and correctly configured it will be added to your websites list.
You should be able to see your connected websites in the summary tab.
Setup Zero Trust Tunnel Through UI
Start by making sure you are logged in to Cloudflare and then visit the Dashboard for Zero Trust.
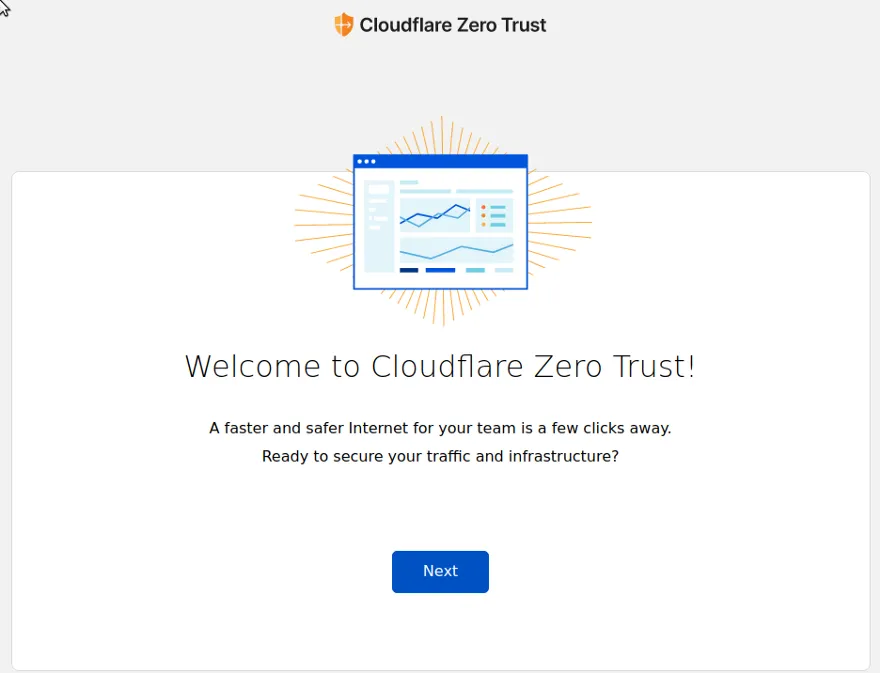
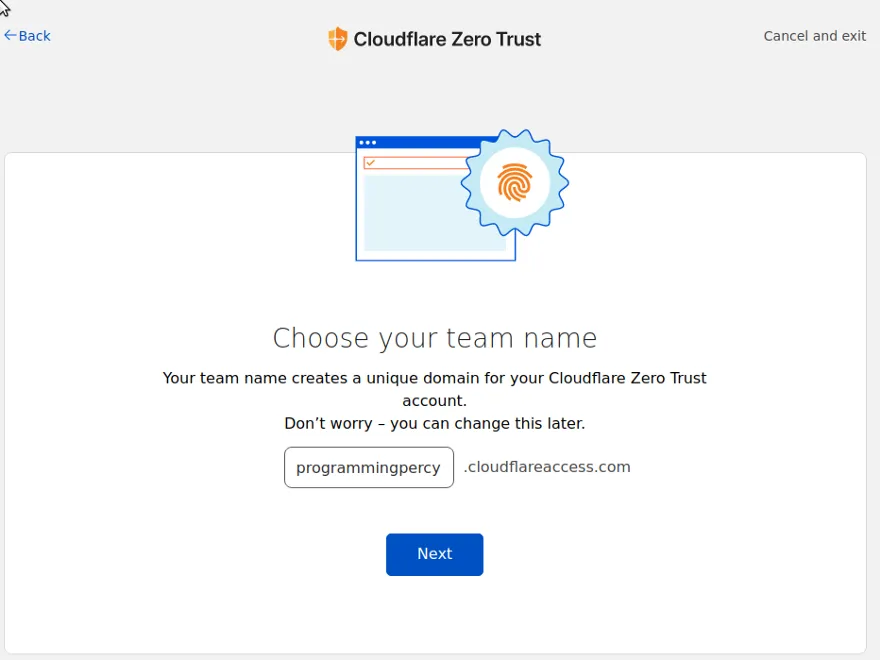
Press Next and CloudFlare will ask you for a Team Name. The Team name can be changed at a later time, and it will be used to create an appropriate SubDomain for you at
YOURTEAMNAME.cloudflareaccess.comSelect a Team name and press Next.
After selecting a name you will be able to select the Pricing Plan, go for the Free to use for now while learning. This is not the same as the previous pricing, this is for Zero Trust.
The Free Option is MORE than enough.
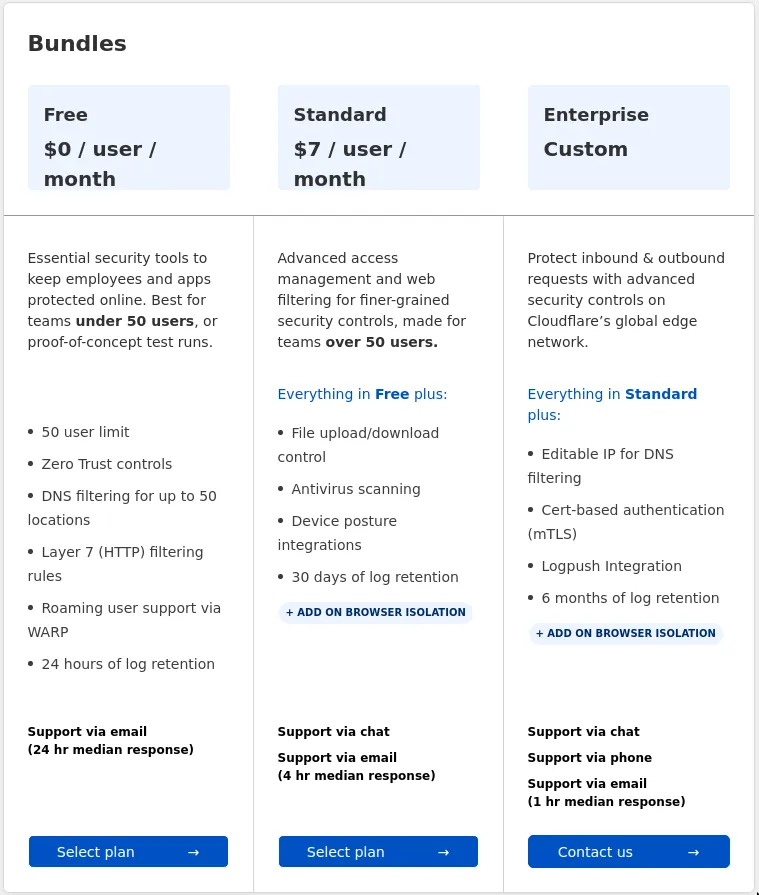
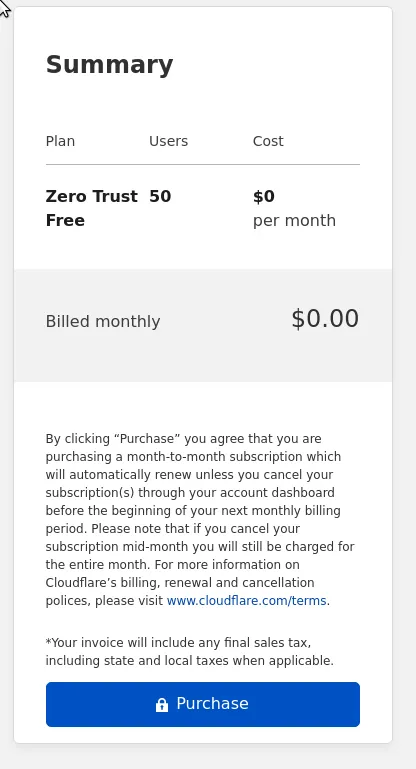
Press Select Plan and it will show you a Summary of the plan selected.
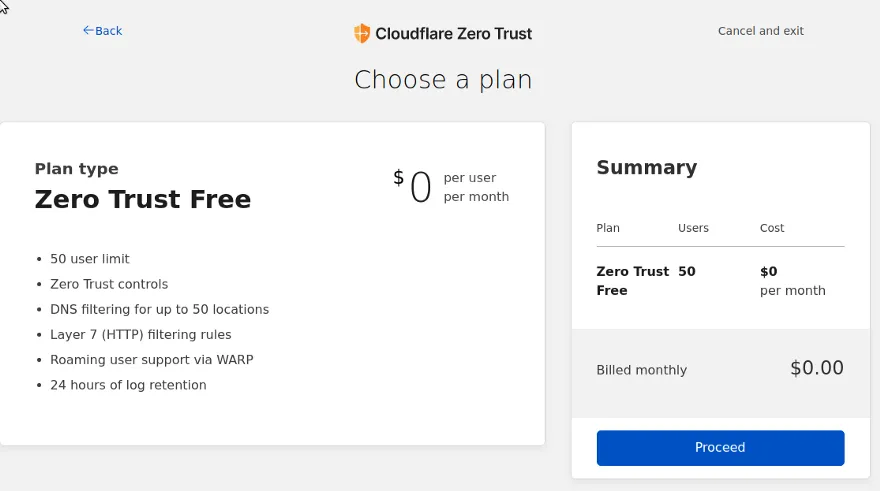
Upon selecting Proceed, it will require you to make a purchase for the selected plan. Don’t worry, we won’t have to provide Billing information since it is free.
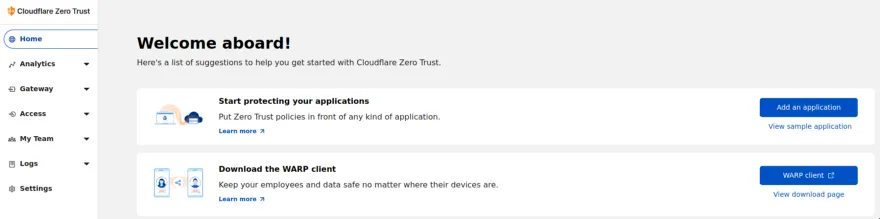
After we have added the Plan it will redirect you to the Dashboard.
Navigate into the Access option in the Navbar on the side. Then select the Submenu Tunnel.
We will be prompted with an information bar that tells us we can use Tunnels to access private resources securely.
How can this be done you ask?
What makes Tunnels so secure is that we don’t have to open our Network to the global internet, we don’t need to open a port.
This is what makes tunnels so amazing!
They are an OUTBOUND traffic tunnel between the client and Cloudflare’s network only.
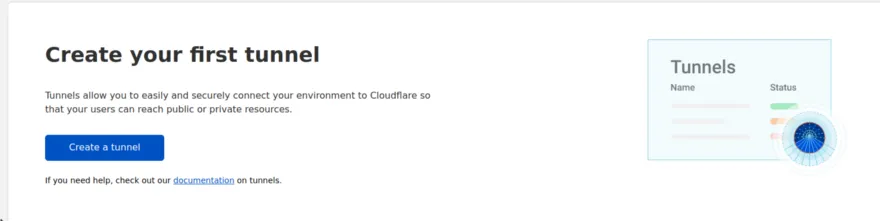
Select Create a tunnel.
We will now be asked to create a tunnel, it is recommended to use one tunnel PER network. In my case, I have a demo-application network which I will create a tunnel for.
Remember the client that hosts the application has to be connected to the network that the tunnel will be run on.

After giving your tunnel a name, it is time for the next step. We need to install a Connector. Use a name for the tunnel that represents the Network, not the application that you will host because you can host many applications on the same tunnel.
The connector is a daemon that runs on your host machine that allows the tunnel to be managed and set up. The connector is called cloudflared and we can run many connectors on the same Tunnel.
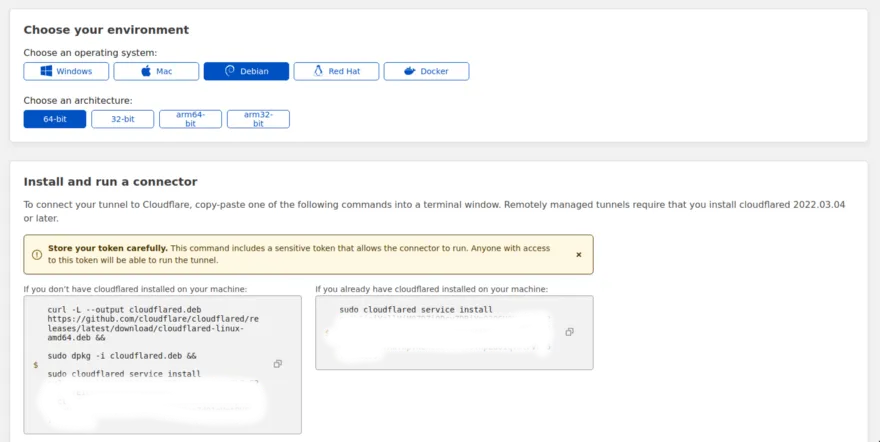
The next screen will show you any available operating systems and architectures, select the one you need and you will be presented with installation instructions for that OS.
In the installation commands, there will be a SECRET TOKEN, DO NOT SHARE THAT TOKEN!
Anyone with the token can connect to the tunnel.
The installation step is basically installing cloudflared and adding the Secret Private Key to connect to the tunnel.
Since I am using a Raspberry PI Zero, my architecture is actually not on the list.
So what I did was install Cloudflared from Source.
Installation instructions were found in the documentation. It will download the repository, build the software and then move it into the user’s $PATH.
git clone https://github.com/cloudflare/cloudflared.git
cd cloudflared
make cloudflared
go install github.com/cloudflare/cloudflared/cmd/cloudflared
sudo mv cloudflared/cloudflared /usr/local/binOnce that is installed you can execute the cloudflared binary to create the daemon connecting to the tunnel using the following, replace $SECRET with your secret key.
sudo cloudflared service install $SECRETIf it went well you should see a log message stating that it was successfully created.
2022-12-30T13:32:37Z INF Using Systemd
2022-12-30T13:32:49Z INF Linux service for cloudflared installed successfullyOnce that appeared, scroll down on the Dashboard in Cloudflare, and you should see that your device appears as a Connector.

Press the Next button which will bring us to the next part of the configuration.
This is where we can connect a service from the device to a certain domain. This is where the fun begins, we can connect the service to a certain subdomain or domain if we want to.
So with even one domain, you can host multiple applications if you want on different subdomains.
The subdomain and domain are basically the URLs of the application to be hosted on.
The service type is what protocol the application uses, there is a bunch of different ones available. In this example, we will host a simple HTTP API, so I select that as the Type, and then the URL on the device, the API we will host is on port 8080 so simply put localhost:8080.
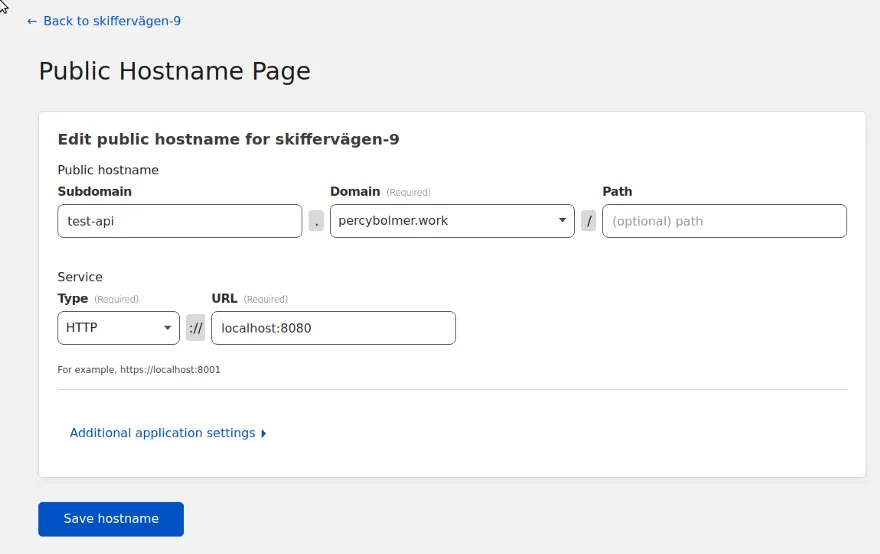
You can set additional settings such as HTTP headers, timeouts, etc. Feel free to browse the options to see what fits your needs.
Press Save Hostname and the tunnel will connect to the endpoint.
Try navigating to the URL of your application, you should be faced with a 404 NOT FOUND.
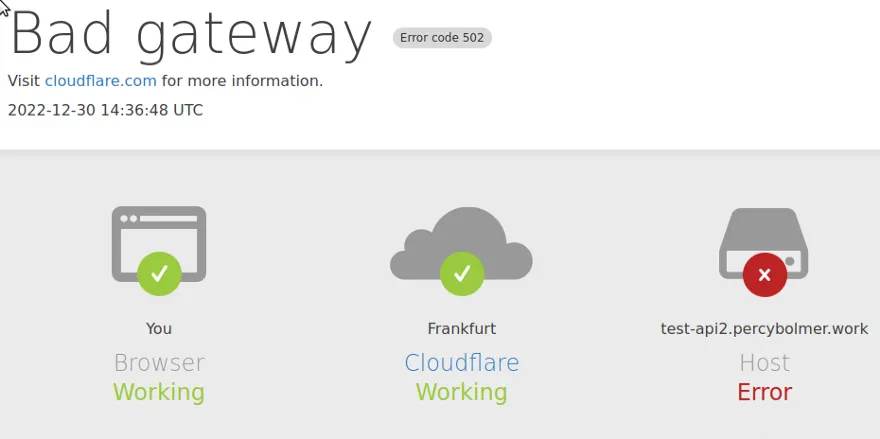
The host has failed, and that is not strange, we don’t host anything yet.
Start A Basic API On The Host Device
Before we fix the Tunnel, we will create a super simple Go application that hosts an API endpoint that just prints a message. It will be hosted on its own localhost port 8080, we will soon see how to connect to this.
I won’t go into the details of what is happening in the Go code, it opens a simple web server that responds with a message on port 8080.
package main

import (
   "fmt"
   "net/http"
   "log"
)
// endpoint that returns a welcome
func endpoint(w http.ResponseWriter, r *http.Request){
    fmt.Fprintf(w, "Welcome to your API hosted Locally")
}

func main(){
    log.Println("hosting on 8080")
    http.HandleFunc("/", endpoint)
    log.Fatal(http.ListenAndServe(":8080", nil))
}Copy the code into a file called main.go and then run it on the host machine by running
go run main.goOnce the API is up and running, go ahead and visit your website again.

TADA, notice how it is even HTTPS instead of HTTP? That is because Cloudflare adds that around all traffic.
This is something to take into consideration if you have trust issues, remember, Cloudflare does a Man-In-The-Middle, if you don’t trust them, don’t host on their platform. They can probably decrypt their tunnel traffic.
If you are not interested in learning about CLI, you can skip to part two.
Creating A Tunnel & Routes Using CLI
Now that we have a tunnel, using the UI works, but it is really nice to sometimes use a CLI to manage things.
We can begin by authenticating the CLI by running the login command, which will bring up the browser and prompt you to log in.
cloudflared tunnel loginIf you have a headless device, you will see a URL printed instead. Copy that into a browser of your choice, and you will be brought to the Cloudflare website to allow the user.
I will give my CLI access to my percybolmer.work domain. Click on the domain you want to give access to and press Authorize.
Basically what happened was that the CLI created a certificate in the default cloudflared directory.
2022-12-30T15:09:14Z INF Waiting for login...
You have successfully logged in.
If you wish to copy your credentials to a server, they have been saved to:
/home/pi/.cloudflared/cert.pemNow any commands we run will operate on that domain.
You can see all tunnels available by running the following command cloudflared tunnel list.
pi@raspberrypi:~/api $ cloudflared tunnel list
You can obtain more detailed information for each tunnel with `cloudflared tunnel info <name/uuid>`
ID                                   NAME           CREATED              CONNECTIONS
c57c9887-a451-46a0-a8e7-cff41211fc23 demo-tunnel 2022-12-30T07:25:37Z 2xCPH, 2xFRAThe important part is the ID, which we can use to configure routes.
You can easily create new tunnels also if you want tunnels for different networks etc. Tunnels are created using cloudflared tunnel create $TUNNELNAME. I will create a new tunnel named cli-tunnel.
cloudflared tunnel create cli-tunnelThe command will print a few important items, the Credentials.json file path, and the ID of the tunnel. Remember those.
To create a new route, create a text file in the default directory (for me it is /home/pi/.cloudflared/). I will create a file named test-api.yaml. YAML is used to configure routes in Cloudflare tunnels.
touch /home/pi/.cloudflared/test-api.ymlTo configure a new route, we need to set the URL that the application is hosted on, the tunnel ID, and the configuration file. The configuration file is already created for us when we created the Tunnel. You can find all possible configurations in the docs.
Notice that I specify port 8083!
url: http://localhost:8083
tunnel: c4922e74-099b-4cc0-8f44-86790e9c8d4c
credentials-file: /home/pi/.cloudflared/c4922e74-099b-4cc0-8f44-86790e9c8d4c.jsonReplace the ID with the one you have on your tunnel.
Now that the route is configured, we need to set up the tunnel to use the hostname. This is the same step that we did in the UI before.
We can use the cloudflared tunnel route dns $TUNNELNAME DOMAIN to do this. In my command, I route the demo-tunnel to percybolmer.work.
cloudflared tunnel route dns cli-tunnel percybolmer.work
2022-12-30T15:27:39Z INF Added CNAME percybolmer.work which will route to this tunnel tunnelID=c4922e74-099b-4cc0-8f44-86790e9c8d4cNow that the tunnel is connected to a domain, we can run it. I will point out the configuration file we created, if you don’t want to, the default configuration should be named config.yml.
cloudflared tunnel --config /home/pi/.cloudflared/test-api.yaml runOnce you run that you should see that it creates 4 connections.
Go ahead and change the Port in the Go program and cancel the old running web server. In the snippet below I have set it to port 8083.
package main

import (
   "fmt"
    "net/http"
    "log"
)
func endpoint(w http.ResponseWriter, r *http.Request){
    fmt.Fprintf(w, "Welcome to your API hosted Locally")
}

func main(){
    log.Println("hosting on 8083")
    http.HandleFunc("/", endpoint)
    log.Fatal(http.ListenAndServe(":8083", nil))
}Save the file and run the webserver
go run main.goAfter that, try visiting the domain you set in the DNS.

You can add more Routes using Ingress settings. This allows you to control what request goes to what service.
With Ingress rules, we have the ability to control the routing and what request goes where.
Ingress rules have to end with a Catch all rule.
We can add a few routes just to show how it works. If we use Ingress routes we cannot have the url field in the test-api.yml anymore.
Open test-api.yml and replace the content with the following
tunnel: c4922e74-099b-4cc0-8f44-86790e9c8d4c
credentials-file: /home/pi/.cloudflared/c4922e74-099b-4cc0-8f44-86790e9c8d4c.json

ingress:
  - hostname: percybolmer.work
    service: http://localhost:8083
  - hostname: percybolmer.work/test
    service: http://localhost:8083
  - hostname: test.percybolmer.work
    service: http://localhost:8083
- service: http_status:404ingress is a configuration field that accepts a list of items, in the hostname we define the URL and in service we point towards the service that should respond.
The service http_status:404 is the standard Cloudflare 404 splash screen. You have to have this as a CATCH all rule at the end of the Ingress config.
If you save the file, before we can run this we need to add the subdomain of test.percybolmer.work.
cloudflared tunnel route dns cli-tunnel test.percybolmer.workThen re-start the tunnel
cloudflared tunnel --config /home/pi/.cloudflared/test-api.yaml runNow visiting either the subdomain or the /test path will bring us to the same service.
You can make the tunnel run as a service upon startup if you use the CLI.
Conclusion Part One
Tunnels are very easy to set up and use, they allow you to create different routes and endpoints easily.
They don’t expose your network directly and you don’t need a VPS, VPN, or open ports.
Is it all good and you can go full loco with it?
It is secure, yes. But that does not mean that you can skip any security measures now.
You should still encrypt your traffic with a custom certificate, reducing the chances of Cloudflare being able to read all data.
You still have to maintain and update the software that is exposed!
The application that is exposed may still pose security risks.
What now?
I do recommend you buy a Raspberry 4 to start playing around with your own home server, it is a powerful Single board computer that is very capable for its price.
Please note that the above link is an Affiliate link, purchases will sponsor me
Continue with Part Two if you want to learn how to add an SSO login Screen.
Part Two: Adding A SSO Login To Cloudflare Application
In this part, we will look at how we can protect an exposed service from Cloudflare with an SSO Login screen.
If you are not familiar with Cloudflare tunnels, you should read my article where we learn how to self-host a service in a secure way.
This part expects you to have a Cloudflare Zero Trust account and that an Access Tunnel is set up.
I will use the examples created in my previous Cloudflare article where we created an HTTP endpoint in Go and added it to a Tunnel.
To add SSO we need to add an Application to Cloudflare, a application is an access policy. Adding an Application allows us to control who can access the tunnel using Email, IP, or many other settings. This can be used to reduce who has access to your hosted web applications.
Enabling SSO Login And Adding Identity Providers
To begin we need to add Identity Providers to the Zero Trust platform.
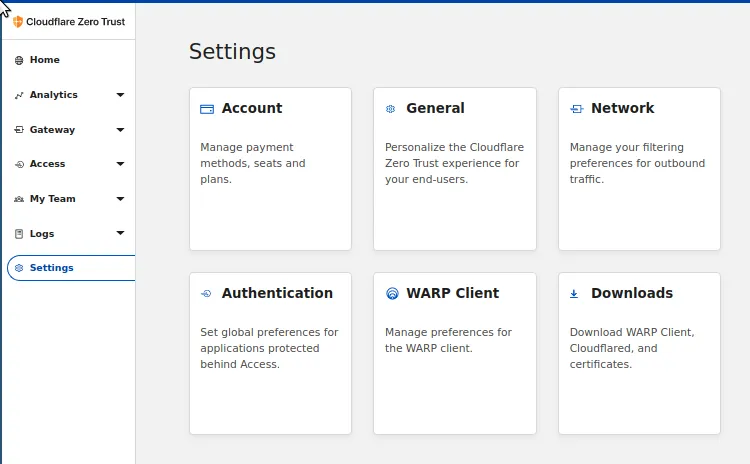
Login on Zero Trust and locate the Settings option in the Navbar. In that view, there is a Authentication card.
After clicking on the Authentication card we will see a few options, we will want to Add new on the Login Methods.
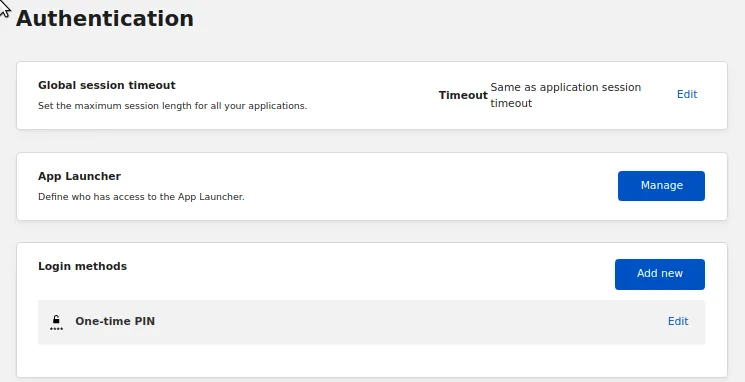
Pressing Add New will bring up a list of all available supported Identity Providers. In this example, I will use GitHub.
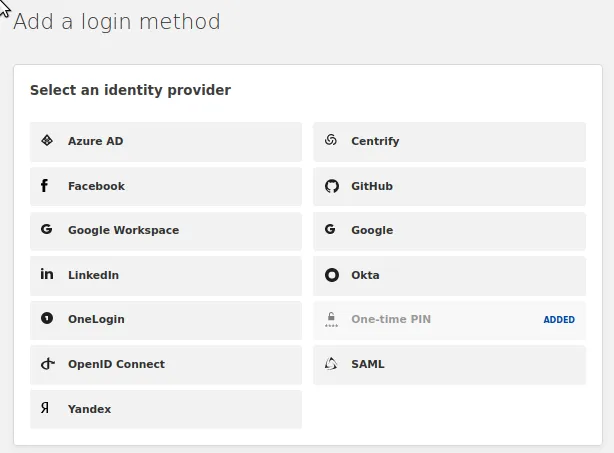
Select the Identity Provider that you want to add as an option to the Login Page.
Depending on the provider you select, you will be brought to a page that explains in detail how to set up that particular Provider.
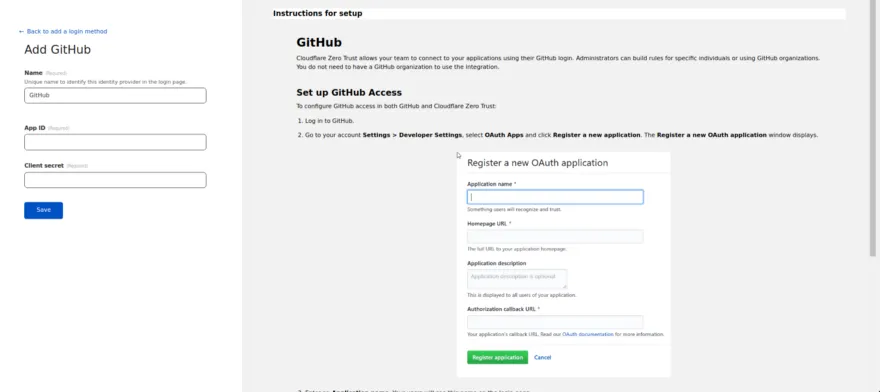
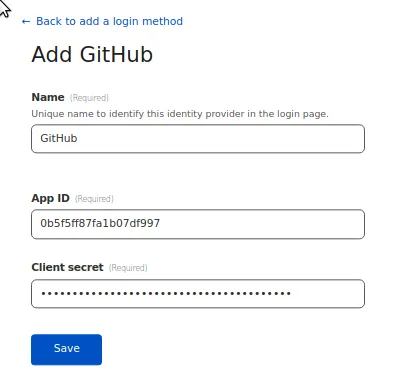
On the left side, it is asking me for the App ID and Client Secret. These values will come from creating a GitHub Application, which can be done by following the instructions on the right.
In the following example, I will be doing this for Github, but it should be fairly similar to most providers.
We need to add an OAuth application to GitHub, this can be done from Developer Settings inside the Profile of the logged-in account.

We will need to provide a few settings in a form. You will need your Cloudflare Zero Trust Team name for some of the questions, and it can be found in the Zero Trust dashboard under Settings->General.
Homepage URL should be https://
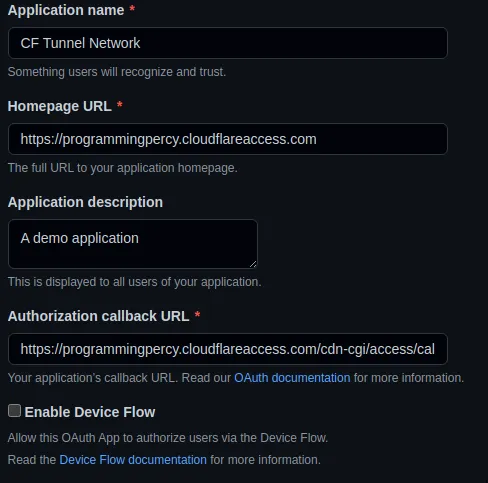
Once you click Register Application you will be directed toward a dashboard for the Application.
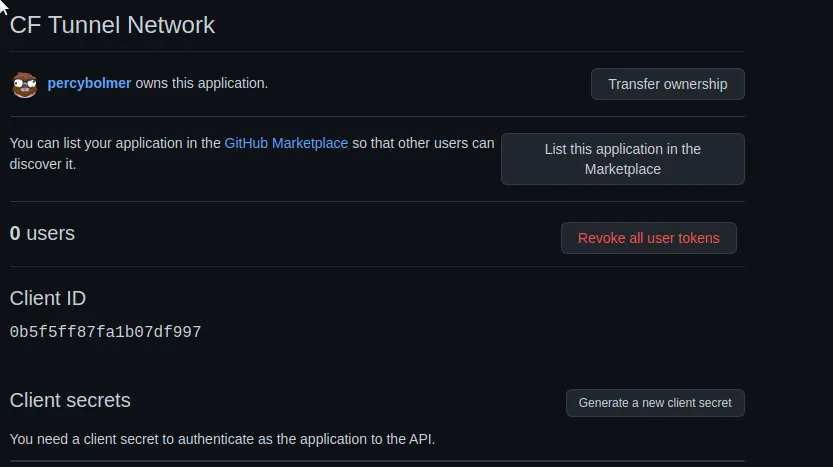
We have found the Client ID, which should go into the Zero Trust form as Application ID. But we still need a client secret, Press the Generate a new client secret.
Copy the Client Secret and Client ID into the Zero Trust form.
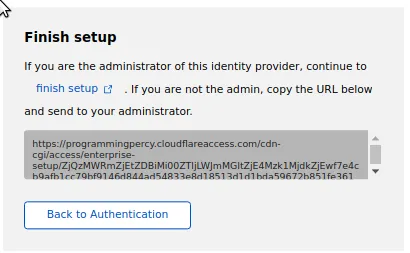
Once you press Save, you will get a small popup asking to finish the setup, if you are not the Admin of the Identity Provider there should be a Link to authorize the application connection.
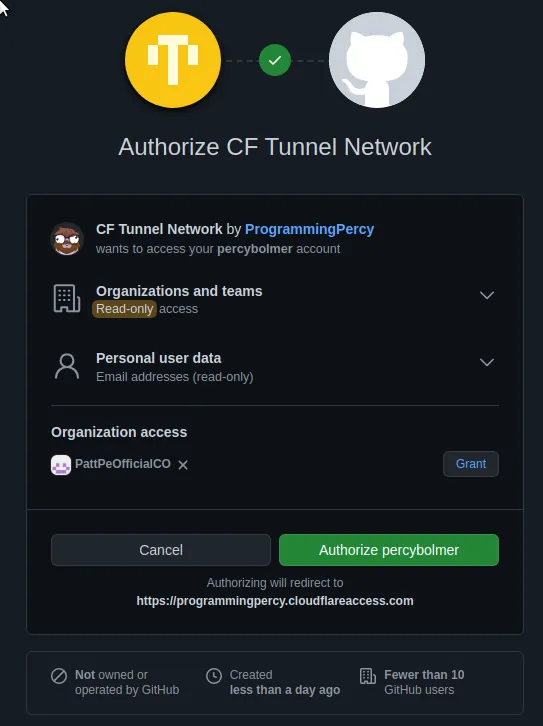
After clicking or visiting that link GitHub will ask for permission to be allowed.
Create The Cloud Flare Application
We now have an OAuth provider ready, so it is time to create our Application.
Make sure that you have a Tunnel up and running that is reachable on a certain URL.
I have an API up and running test-api.percybolmer.work during this tutorial and I want to protect it.

In the Zero trust Dashboard, locate the Access->Applications in the Navigation. This will open up a form that we can use to create the application.
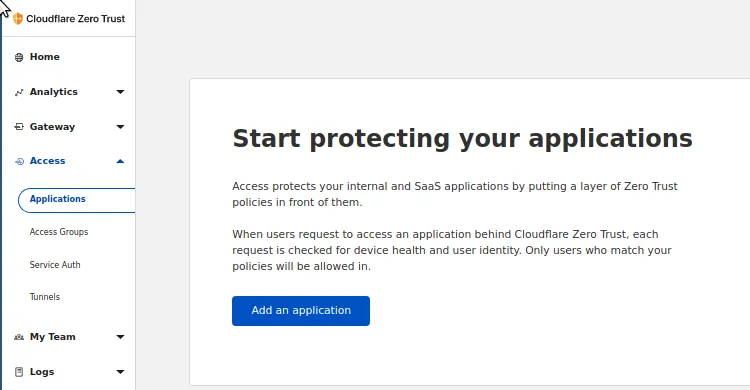
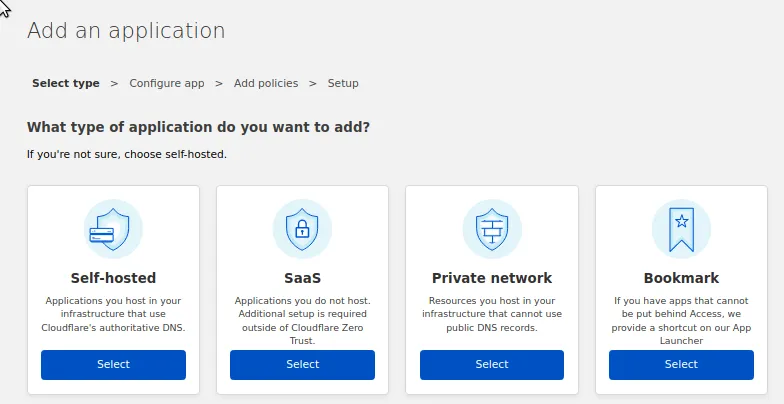
You should be able to select what kind of resource you want to protect, in our case we should select Self Hosted since we are hosting it at the local network.
In the next screen, we can configure three things.
We can set the name of the Application we create, and we can connect that application to a domain. This has to be the domain that your tunnel is running on, in my case test-api.percybolmer.work.
Note that this could be used to protect specific routes only on your hosted application. If you have an /admin endpoint, for instance, you could make those routes covered only.
In this case, I will simply protect the whole route.
You can also configure the Application Appearance, this is how the application will appear in Application Launcher. The app launcher is a nice website that shows a Card layout displaying all the applications on your team. This can be found on the URL $teamname.cloudflareaccess.com after it has been enabled.
At the bottom, we see the Identity Providers that have been enabled, and here we can select which ones to use, I will select Github.
Make sure you protect the same URL as the Tunnel is hosted on

In the next screen, we will be able to set the Access Policy List to use. In this view, we can control WHO is allowed to access the application.
We can create access rules such as disallowing certain IPs, allowing certain IPs, or Emails of the users, etc.
It is really versatile and allows for much filtering on who can access the website. You can set the country of the client etc.
You can read all the rules available in the docs.
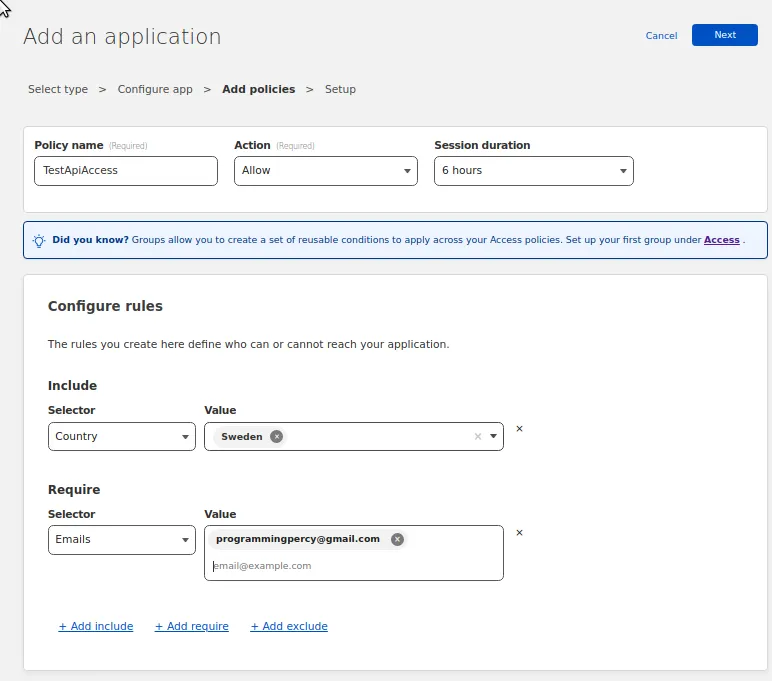
In my policy I only want to allow my own email address, and if it is a sign-in from Sweden.
Set these rules up the way you want. If you have rules that you want to reuse across many applications, you can create Access Groups which is a group of rules that you can reapply.
Press next and move on. In the next form, we can fix Cookie settings and CORS rules.
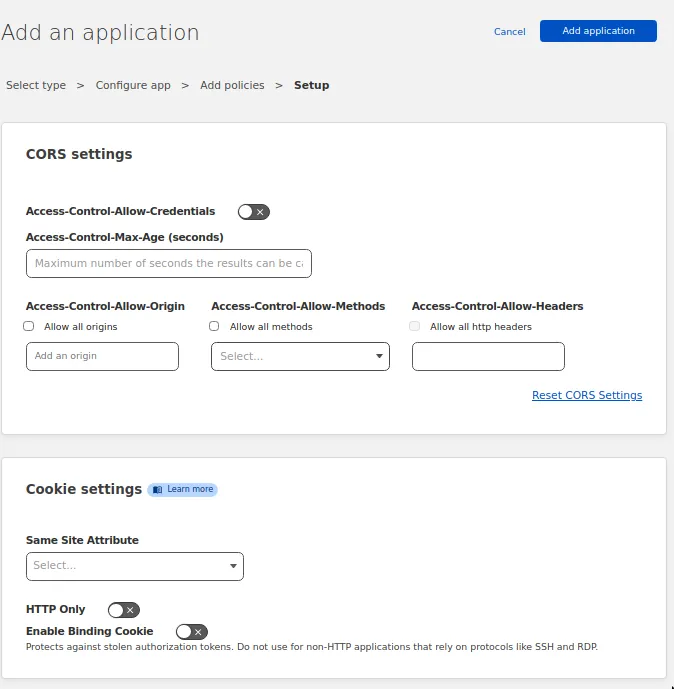
I won’t cover how CORS works, that is a totally separate tutorial.
But if you need to apply origins etc, this is the place to do it. This makes having the correct CORS settings easily set up.
We can also set a few cookie settings such as STRICT mode, or if we want HTTP Only. You can read more about them in the docs.
I am just going to leave them empty for this tutorial.
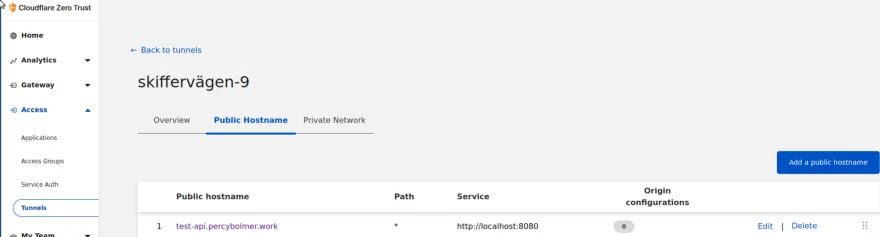
After you submit this, you should be redirected to the summary view of all applications and see the newly created application.

That is it!
Try navigating to the URL you have protected and you should be treated with a Splash Screen to authenticate.
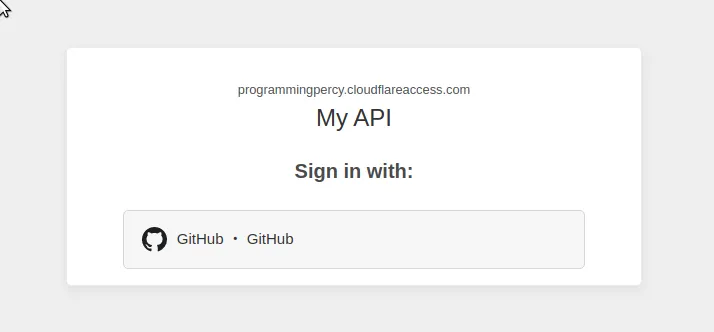
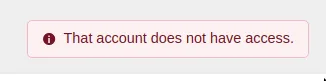
If you try to log in with a GitHub account that is not inside the Access Policy, you should be blocked.
Conclusion
Adding an Access Policy (Application) to protect the self-hosted application is smooth and easy.
The UI is simplistic and it feels easy for even a beginner to get started.
If you’re API needs to use the authenticated user’s information there is a JWT added automatically which you can use. See the docs for more information about this.
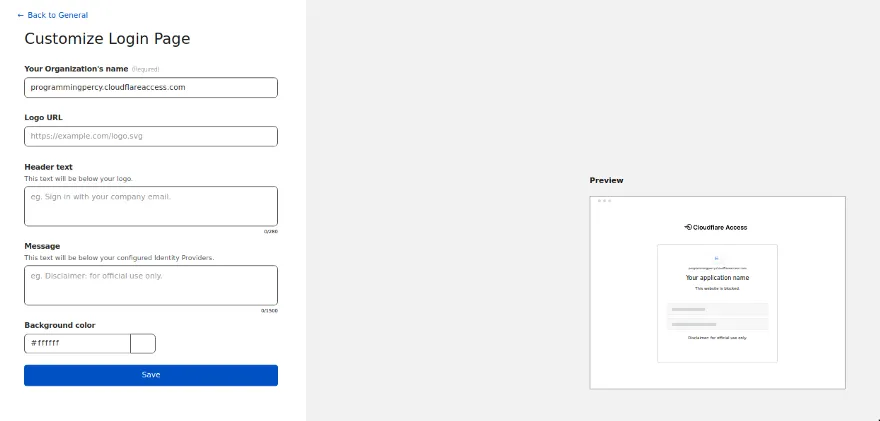
If you want to modify the Login Page to look better and less generic, you can do so by navigating into General->Login Page.
This allows you to change the appearance of the login page a little.
I am really impressed by the Cloudflare services so far.
I do hope you enjoyed this tutorial and I hope to hear from you guys if you test it
What do you think about Cloudflare’s Zero Trust platform?
If you want to get started self-hosting smaller applications you can get by with a Raspberry PI 4, you can get them here. Please note that the link is an Affiliate and the purchase does sponsor me.
Thank you for reading and I hope this helped you!
If you enjoyed my writing, please support future articles by buying me an Coffee