Learn Kubernetes — The Easy Way
In this tutorial we learn about Kubernetes and how it can be used to orchestrate containerized applications
by Percy Bolmér, September 9, 2022
If you are a software developer you probably hear about Kubernetes on almost a daily basis. Kubernetes has taken over the industry as the leading container orchestration tool.
All images in this tutorial is created by Percy Bolmér
When I began learning Kubernetes it was hard, there were so many terms that I quickly almost gave up. For that reason, I will try in this tutorial to slowly and thoroughly walk through each step of Kubernetes in a concise and understandable way.
We will build a simple application that has an API and database running. This tutorial aims to help you get familiar with Kubernetes and hopefully learn some of the basics. This tutorial won’t cover how you can deploy the application into production, that is a topic that needs a whole article in itself.
Let’s begin with some information before we get to the coding.
You can find the full code for this tutorial on my GitHub
What is Kubernetes
Kubernetes is a tool to manage and control containerized applications. If you are unfamiliar with containers and Docker, you can read my article about it.
Learning Docker — The Easy Way
September 8, 2022
A tutorial which covers the basics of Docker and teaches you how to containerize your applications.
Read moreKubernetes, also known as K8S, is an open-source system for automating deployment, scaling, and management of containerized applications.
Kubernetes aims to solve the deployment and control of multiple containers across your infrastructure. Kubernetes is developed as open-source software by Google.
Some of the features you will find by Kubernetes is
- Service Discovery — Exposes your containers via DNS and makes it possible to find services running.
- Load Balancing — If one of your containers has too much traffic, it can distribute traffic to another deployed container.
- Self Healing — Can be configured to restart/remove and start new containers when needed.
- Secrets & Configurations — This makes it easy to store and manage secrets for your deployments.
- Monitoring — Built-in monitoring of applications
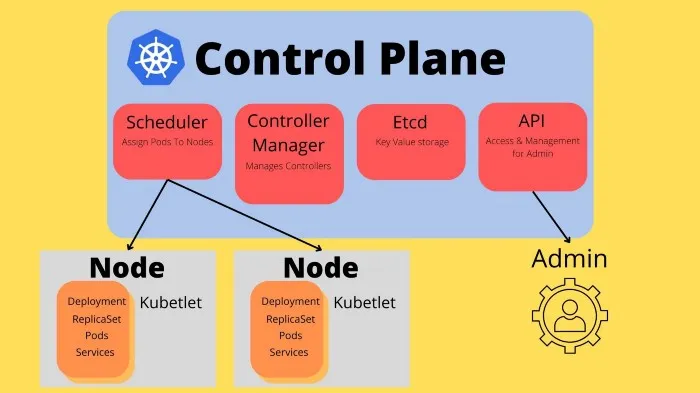
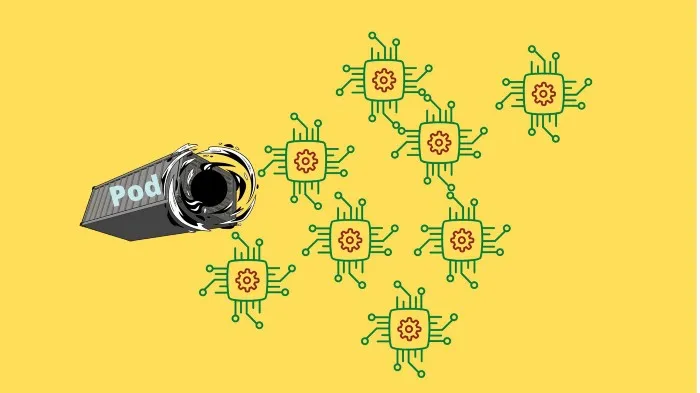
To give us all these features, Kubernetes has many components running that work together, we will overview the Kubernetes components briefly so we know what is what on a base level.
A running K8 cluster is made out of a Control Plane. The control plane is responsible for exposing an API to control the cluster and management for the lifecycles of containers. Inside the control plane, we find a few important nodes that have different responsibilities.
- API — The kube-apiserver is used to interface the cluster and allows us to talk to the cluster.
- Etcd — The key-value storage solution that K8 uses to maintain cluster data
- Scheduler — Checks for new Pods (running containers) that have no Node (worker machine) assigned, and assigns them.
- Controller Manager — The component responsible for managing controllers.
We then have worker nodes that communicate with the control plane. The control plane talks to the worker nodes so that they know what to do. A worker node is used to run Pods (a set of containers).
Each worker node has a kubelet running, which is responsible for accepting instructions from the Control plane about what it should be running. Kubelets are often known as node agents.
So, we have a Control plane running, and multiple kubelets (worker nodes) can connect to it. This is a very basic explanation of how the whole infrastructure of Kubernetes works, you should once more familiar with everything explore the Docs to learn more about the exact internal workings.
Once we are inside a Kubelet, it is good to learn about the different resources that exist that they can run. Here are a few words that are good to understand when working with K8.
- Pods — A set of running containers in your cluster, consider a pod the smallest unit to work within K8. Usually, one container per pod is used, but it could be multiple containers.
- Nodes — A worker machine in the cluster
- Controllers — A loop that checks a certain state of the cluster and tries to regulate it.
- ReplicaSet — Used to ensure that there is always a set amount of Pods running at all times.
- Deployment — Provides updates for ReplicaSets and Pods
- Jobs — A Process to be performed by a Pod, will create the pod and execute the process and then close.
- Services — Allows pods to communicate with other pods in the cluster by exposing ports internally.
I tried keeping the list of words small, I know it can be overwhelming and hard to remember them all, but don’t worry we will cover them piece by piece as we add them to our application.
Installing Kubernetes, Minikube, Docker & Go
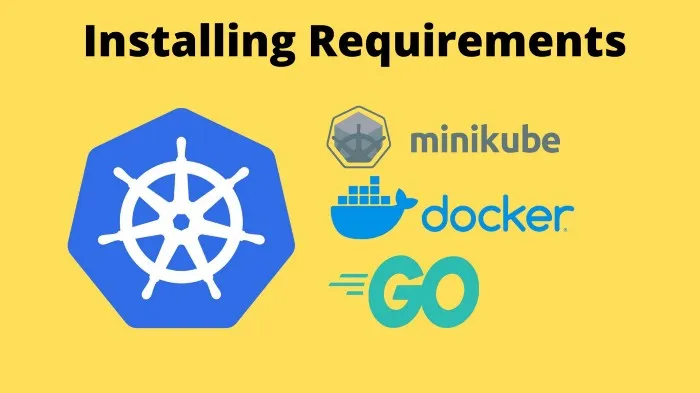
Before we begin working with K8S, we need to Download Kubernetes and install it, and a few other tools used in this tutorial.
Follow the installation guide provided by Kubernetes themself. If you are using Linux, this is what we need to do.
Begin by fetching Kubernetes using curl & install the binary downloaded.
curl -LO "https://dl.k8s.io/release/$(curl -L -s https://dl.k8s.io/release/stable.txt)/bin/linux/amd64/kubectl"
sudo install -o root -g root -m 0755 kubectl /usr/local/bin/kubectl
You can make sure that the installation works by running
kubectl versionThe second step is to install the Minikube. Minikube is a local Kubernetes Node that can be used to learn and test Kubernetes. Basically, it sets up a Virtual machine on your computer that runs a cluster with a single node.
To install Minikube, follow the instructions. For me, running Linux, It’s as easy as running
curl -LO https://storage.googleapis.com/minikube/releases/latest/minikube-linux-amd64
sudo install minikube-linux-amd64 /usr/local/bin/minikube
If you are running Windows, please don’t install Minikube inside WSL, and also make sure you have Hyper-V installed. The reason to avoid WSL is because when writing this tutorial, it is very complex to make it work.
Verify your installation by running minikube version command.

The third software you will need is Docker, docker is needed because we will use it for building our containers.
You can find instructions on how to install Docker for your their website. I won’t cover how to install it in details, as that is covered in Learning Docker — The Easy Way.
The forth requirement is Go, which can be installed by visiting their website. I use Go in this tutorial for a simple service which is not complex and should be very easy to understand for even newer developers.
Preparing Us For The Kubernetes Adventure
Once we have everything up and running, it is time to finally start familiarizing ourselves with the actual Kubernetes usage. Before we use Kubernetes we need somewhere to actually run the application on, a Node, created by Minikube.
Run minikube start to make Kubernetes use Minikube when it runs applications. This is important since we only have one single computer when running this. This might take some time to run, go grab a coffee.
Note if you are using another VM driver than Hyper-V on windows, such as Docker you need to add that to the start minikube start –driver=docker
You can make sure that everything worked by running the Kubectl command-line tool to list available nodes. Run kubectl get nodes in your terminal, and you should see that Minikube is listed as a Node. This command is useful when you want to see nodes on your cluster.

We will need to build a docker image that we can use to run inside the Kubernetes. I have prepared a super simple HTTP server using Go and a Dockerfile that builds it. Create a main.go file and fill it with the gist below.
package main

import (
	"fmt"
	"log"
	"net/http"
)

func main() {
	http.HandleFunc("/", func(w http.ResponseWriter, r *http.Request) {
		fmt.Fprintf(w, "hello gopher")
	})

	http.HandleFunc("/aligator", func(w http.ResponseWriter, r *http.Request) {
		fmt.Fprintf(w, "Hi Mr Aligator")
	})

	log.Fatal(http.ListenAndServe(":8080", nil))
}We will also need to create a dockerfile, I won’t go into details about how the Dockerfile, If you need to learn about Docker you can check out my Learning Docker article.
FROM golang:alpine as builder

WORKDIR /app
COPY . .
RUN CGO_ENABLED=0 GOOS=linux GOARCH=amd64 go build -o hellogopher -ldflags="-w -s"

ENTRYPOINT [ "./hellogopher" ]Before we can build the docker, we need to make sure two things are in order. The first one is that we will need to initialize a go module in the projects root.
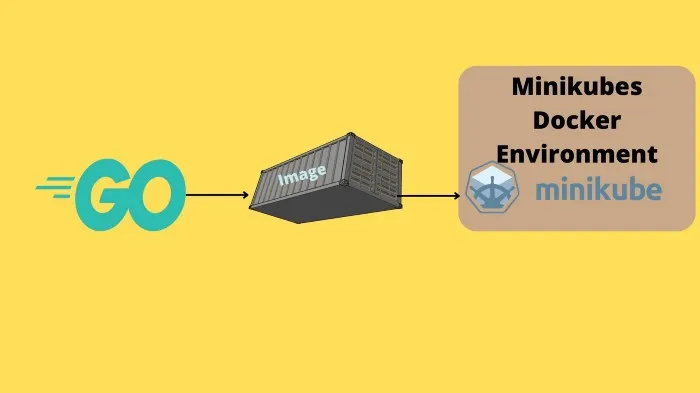
go mod init programmingpercy/hellogopherWe also need to make sure we use the Minikubes docker environment by running
#Only Linux
eval $(minikube docker-env) #This is needed for each terminal restart
If you are using Windows, run the command instead.
#Only windows
minikube -p minikube docker-env | Invoke-Expression
Please don’t skip the above commands, if you do you will be facing issues finding docker images installed on your computer since you are using the wrong docker environment!
Time to build the image that we want to use
docker build -t programmingpercy/hellogopher:1.0 .Get Ready To Kube!
We have everything we need now, we have Kubernetes, Minikube and also a amazing HTTP server inside a Docker image to run. Let us create our first Kubernetes resource.
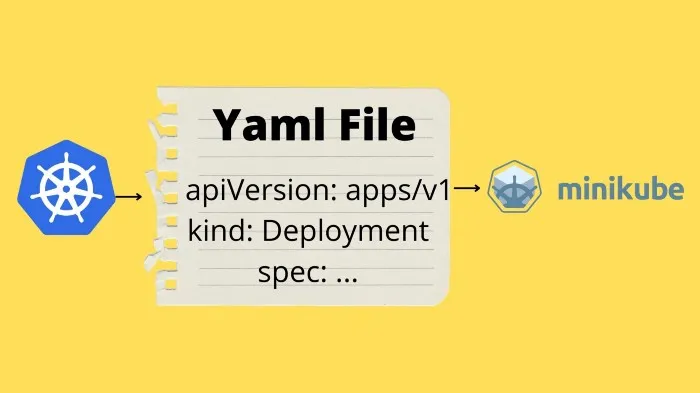
In Kubernetes, we use YAML files to define the objects, all parts of your application is known as objects. There is a ton of things to define in the YAML, but we will keep it simple to start with.
Create a new file named hellogopher.yml which will maintain our objects related to the API.
We will fill the YAML file step by step where we look at what each line means. We begin with a few defaults that are required. What we define in the YAML is a Kubernetes object, and each object requires these fields.
- apiVersion is a field to describe what Version of the Kubernetes API you will use.
- kind is what kind of object we are creating.
- metadata is information about the object that can be used to keep track of it and identify it.
apiVersion: apps/v1 #Which version of the Kubernetes API you're using to create this object
kind: Deployment # What kind of object you want to create [deployment, service etc]
metadata: # Data that helps uniquely identify the object, including a name string, UID, and optional namespace
name: hellogopherNext, we will define the spec, spec is a field in the YAML that defines the state that the object will be in. What information needs to be provided in the spec depends on the type of object you create.
We are creating a deployment object, a deployment is used to specify the desired state for our Pod running the API. This can be settings about environment variables, how many Replicas to create, and default settings about the running pods. We will add three fields to start with.
- selector — the labels that should be used by the deployment to find the related pods. This is important because we can use this selector by other Objects to reference it, and to find it using the kubectl command later.
- replicas — How many Replicas to start, a replica is an identical container. If we set it to 1 we start 1 container, if we set it to 3 it will start 3 containers.
- template — A template that defines how the newly created Pods should be set up, note that the template is an object and contains its own spec field.
The template field contains its own spec since it is an object. In that spec we define that the pods should all run our docker image that we built. We also specify that we should expose port 8080 and that it shouldn’t fetch the image from DockerHub, we only built it locally.
If you wonder about any of the fields and want more info feel free to check out the official docs. I’ve commented on what each field does.
apiVersion: apps/v1 #Which version of the Kubernetes API you're using to create this object
kind: Deployment # What kind of object you want to create [deployment, service etc]
metadata: # Data that helps uniquely identify the object, including a name string, UID, and optional namespace
  name: hellogopher
spec: #  What state you desire for the object
  selector: # Define what selectors the Deployment uses to find the PODS that are related to it
    matchLabels: # matchLabels is a map of {key,value} pairs.
      app: hellogopher
  replicas: 1 # Tells the deployment to run 1 pod
  template: # When creating new pods, this template will be used
    metadata:
      labels: # Labels used when searching / managing deployments
        app: hellogopher
    spec:
      containers:
      - name: hellogopher # Name of the Container
        image: programmingpercy/hellogopher:1.0 # Important, to not use latest tag as it will try DOckerhub then
        imagePullPolicy: IfNotPresent # Will only pull from DockerHub if not present already in Local docker
        ports: # Ports to Expose
- containerPort: 8080To create and run this new resource we will run the following command
kubectl create -f hellogopher.ymlkutebectl create is used to create the resource and the -f flag is used to point at a certain file.
You can now run kubectl get all to list all resources across all namespaces. We can use namespaces in Kubernetes to separate resources, more on this later.

If you see Status ErrImagePull, it is most likely you forgot the eval the docker environment to use Minikubes docker. Remember, you need to Eval each time you restart the terminal. One other common mistake is that you first build the docker image inside your computer’s docker env, then eval.
If you have any other errors, you can deep dive by getting detailed information about the deployment using the following command.
kubectl get deployment/hellogopher -o yamlTo reach the application you need to expose a NodePort. Inside the go HTTP server, we have hard-coded the port 8080 to be exposed, but this needs to be configured for Kubernetes as well. We can do this using the expose deployment command which accepts the name of a resource, and the type to expose. In our case we want to expose a NodePort, which is a way to expose a services port, this is needed if you want to reach the service from outside the deployment.
kubectl expose deployment hellogopher --type=NodePort --port=8080Now check the status for the resources (Hint: kubectl get all ) and you should see the Nodeport.

You may have noticed that the port on your machine that is being used is a dynamically assigned one (30012) for me. Gladly, Minikube offers a set of commands to help us visit the deployment so that we don’t need to keep track of the ports assigned.
You can visit the service by running minikube service hellogopher. This command will bring up your web browser, displaying the hello gopher message.
Let’s practice some, we want to remove the deployment since we are done with it for now. You can do this using the delete deployment command.
kubectl delete deployment hellogopherLabels And Selectors
When working with Kubernetes you will encounter the term labels. A label is a key/value pair that you can assign a resource. Labels are often used to attach information on the resources, but also to distinguish them in large environments. You can use labels to target certain resources that are tagged with the matching label with the kubectl commands, this is great when you want to delete multiple resources that all contain the same label.
You can add labels at runtime or in the YAML configuration. Let us try it out to get a better understanding, we will add a label runtime to our pod.
If you noticed, we created a label named app in the YAML configuration. You can view labels by adding –show-labels, an argument to most of the kubectl commands that get resources.
kubectl get all --show-labels
kubectl get pods --show-labels
Let us create a new label named author for our pod. Remember you can add labels to all resources, so when we add a label, we will use po in front of the name, which tells the command that it is a Pod resource. We use kubectl label followed by the name of the resource, with key=value of the label.
kubectl label po/hellogopher-f76b49f9-95v4p author=percyGetting the pods should now show you that you have an author label added.
Sometimes you might want to update an existing label, it might be a version tag or maybe the author has changed. In that case, you need to add the –overwrite argument to the command. Let’s change the author into Ironman.
kubectl label po/hellogopher-56d8758b6b-2rb4d author=ironman --overwriteSometimes, we might want to remove labels, that is simply done by using the same command, but instead of key=value we use the key- command. Let’s remove the author label again.
kubectl label po/hellogopher-56d8758b6b-2rb4d author-Now, if you get the pod again with –show-labels it should not contain the author label anymore.
So adding and removing labels was quite simple, let us look at how to use them for selecting certain resources.
Using labels for targeting resources is called Selector. Most kubectl commands accept the –selector flag which accepts multiple labels using their key=value syntax. You can specify multiple selectors by comma separating them.
kubectl get pods --selector app=hellogopherYou can also use negative values, by adding an ! in front of the equals sign.
kubectl get pods --selector app!=hellogopherNow getting resources based on a label is great, but imagine that you have a giant cluster of resources, at that point labels become very important. Also, they are very handy when managing resources and you need to target multiple instances with the same command. Let us try deleting all pods tagged with app=hellogopher. Here I use the -l which is shorthand for –selector.
kubectl delete pods -l app=hellogopherYou should see a message that the pod is deleted, but if you try getting all pods, a new one is present.
Remember, the deployment says that we want 1 pod up and running at all times, and Kubernetes handles that for you. So don’t be surprised that a new one gets created when the old one is deleted. This is what we want, if you want to delete everything, you have to delete the deployment.
Liveness, Readiness, and Startup Probes
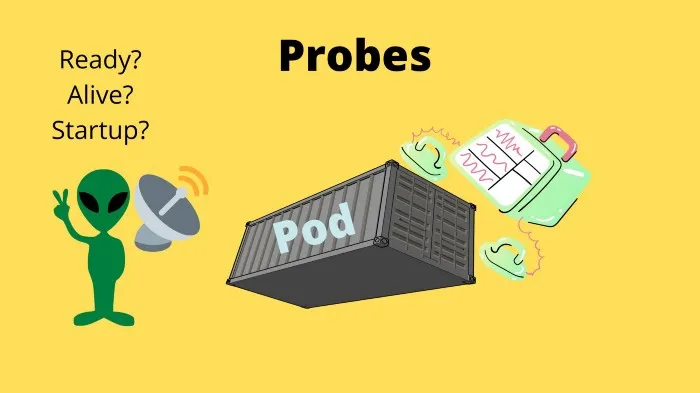
One of the Kubernetes selling points is application monitoring. We can monitor our applications using Probes, probes are used to monitor an endpoint, TCP socket or gRPC endpoint, etc for a status. We have three probes
- Liveness — Checks that the container is alive and well, if not it will try to restart that container.
- Readiness — Checks that a container starts up as expected and when it is ready to be used by other services.
- Startup — This probe will disable liveness and readiness probes, there is a good reason for it. Imagine if the container is slow to start and needs to run slow processes before starting, then concurrently a liveness probe checks a endpoint if its alive and it returns a 500, then the liveness probe restarts. Startups will enable liveness and readiness after starting has been finalized.
We will start by checking out how to easily create a simple readiness probe. We will add a probe that probes the wrong port, a port that the pod does not expose. We will then proceed with checking how we can see why the pod never becomes ready.
When we add a probe we need to define to check the status for Kubernetes, there are a few different ones out there, the most simple one is a HTTP probe which sends an HTTP request and expects a 200 response. You can find all probe types and configurations that can be added to the docs.
Update the hellogopher.yml to define a readinessprobe, note that we use the wrong port.
apiVersion: apps/v1 #Which version of the Kubernetes API you're using to create this object
kind: Deployment # What kind of object you want to create [deployment, service etc]
metadata: # Data that helps uniquely identify the object, including a name string, UID, and optional namespace
  name: hellogopher
spec: #  What state you desire for the object
  selector: # Define what selectors the Deployment uses to find the PODS that are related to it
    matchLabels: # matchLabels is a map of {key,value} pairs.
      app: hellogopher
  replicas: 1 # Tells the deployment to run 1 pod
  template: # When creating new pods, this template will be used
    metadata:
      labels: # Labels used when searching / managing deployments
        app: hellogopher
    spec:
      containers:
      - name: hellogopher # Name of the Container
        image: programmingpercy/hellogopher:1.0 # Important, to not use latest tag as it will try DOckerhub then
        imagePullPolicy: IfNotPresent # Will only pull from DockerHub if not present already in Local docker
        ports: # Ports to Expose
        - containerPort: 8080
        readinessProbe:
          initialDelaySeconds: 5 # Time before starting to Probe status
          timeoutSeconds: 1 # Time to wait before timeout
          # HTTP probe
          httpGet:
            path: / # the path we use to probe
port: 9999Delete the old deployment, and redeploy it (if you don’t remember how backtrack in the article).
Once you have redeployed the deployment, let us take a look at how to find out what is wrong.
Run kubectl get all to fetch information about the deployment and the pod. Grab the pod name, we will use that name to describe it. Describe is a way in Kubernetes to get detailed information about a resource.

Copy the name and describe it.
kubectl describe pod/hellogopher-df787c4d5-gbv66Note that it will print a massive log of information about the pod. In the end, there is a section called Events which shows everything that has happened.
In the event section, you should see the failure reason which should be the readiness probe.

You can go ahead and switch the port defined in the hellogopher.yml into 8080 and redeploy and see that it works.
Let us take a look at the liveness probe, which works the same way as the readiness probe. This probe runs all the time to check that the container is working after starting up.
To test this, we need to add the probe and update the go HTTP server to return a failure after 10 seconds. Then instead of deleting the old deployment, we will update it.
The liveness probe YAML looks exactly like the readiness probe, but one extra field named failureThreshold which is how many times the container is allowed to fail before restarting.
apiVersion: apps/v1 #Which version of the Kubernetes API you're using to create this object
kind: Deployment # What kind of object you want to create [deployment, service etc]
metadata: # Data that helps uniquely identify the object, including a name string, UID, and optional namespace
  name: hellogopher
spec: #  What state you desire for the object
  selector: # Define what selectors the Deployment uses to find the PODS that are related to it
    matchLabels: # matchLabels is a map of {key,value} pairs.
      app: hellogopher
  replicas: 1 # Tells the deployment to run 1 pod
  template: # When creating new pods, this template will be used
    metadata:
      labels: # Labels used when searching / managing deployments
        app: hellogopher
    spec:
      containers:
      - name: hellogopher # Name of the Container
        image: programmingpercy/hellogopher:1.0 # Important, to not use latest tag as it will try DOckerhub then
        imagePullPolicy: IfNotPresent # Will only pull from DockerHub if not present already in Local docker
        ports: # Ports to Expose
        - containerPort: 8080
        readinessProbe:
          initialDelaySeconds: 5 # Time before starting to Probe status
          timeoutSeconds: 1 # Time to wait before timeout
          # HTTP probe
          httpGet:
            path: / # the path we use to probe
            port: 8080
        livenessProbe:
          initialDelaySeconds: 5 # Time before starting to Probe status
          timeoutSeconds: 1 # Time to wait before timeout
          failureThreshold: 3 # How many times it can fail before restarting
          # HTTP probe
          httpGet:
            path: / # the path we use to probe
port: 8080After changing the YAML, we will update main.go and then rebuild the docker image, and update the deployment to use the new image version.
Before we do that, I would like to make sure we delete the old deployment and any services created
kubectl delete service/hellogopher
kubectl delete deployment hellogopher
We will make it start returning HTTP status 500 after 10 seconds of runtime.
package main

import (
	"fmt"
	"log"
	"net/http"
	"time"
)

func main() {
	// Grab time of startup
	started := time.Now()

	http.HandleFunc("/", func(w http.ResponseWriter, r *http.Request) {
		// Calculate runtime duration
		duration := time.Now().Sub(started)
		if duration.Seconds() > 10 {
			log.Println("Timeout triggered")
			w.WriteHeader(http.StatusInternalServerError)
			w.Write([]byte(`hello gopher`))
		} else {
			w.WriteHeader(http.StatusOK)
			w.Write([]byte(`hello gopher`))
		}
	})

	http.HandleFunc("/aligator", func(w http.ResponseWriter, r *http.Request) {
		fmt.Fprintf(w, "Hi Mr Aligator")
	})

	log.Fatal(http.ListenAndServe(":8080", nil))
}Rebuild the image with a new tag of 2.0.
docker build -t programmingpercy/hellogopher:2.0 .Now that we have the new image, let us run the deployment with version 1, and update it at runtime to see what happens.
kubectl create -f hellogopher.ymlIf you check now with kubectl get all you will see that it’s up and running, but it is using version 1.0 of our image as specified in the YAML file. Let us update the docker image used by using the set image. The first parameter is the deployment name, then the pod name defined in the YAML, which is hellogopher in our case.
kubectl set image deployment/hellogopher hellogopher=programmingpercy/hellogopher:2.0If you run kubectl get all you can see how the new pod is created first, and as soon as it’s ready, the old one gets deleted.
You can also update a cluster by modifying the hellogopher.yml file and then running the kubectl apply command. You can try it out by changing the docker image version tag in the configuration and then running it. Apply is useful because you don’t have to manually delete the resources. It will detect any changes that need to be made and perform them.
kubectl apply -f hellogopher.ymlAfter that, you can keep running the status check and see that the restart count goes up on the pod slowly, this now happens each time after 10 seconds when the container has responded 3 failed tries for the probe.

Great, we have a way of restarting our application in case it starts behaving faulty. And we all know that the secret to fixing all failing software is a restart.
What we have done here only touches the surface of what you can do with probes, but since we are in a learning phase let us keep it simple.
Debugging A Pod
When our software fails, restarting might solve the problem but there is often an underlying reason. Debugging and finding out what is going on inside a pod is pretty easy in K8.
The most common approach is to dive into the logs, you can find the pod’s logs by using kubectl logs followed by the pod name.

One other very important thing to learn when debugging in K8 is to enter the pod with a terminal. Now, our pod keeps crashing if you followed the previous steps so entering is gonna be hard.
I recommend that you create a docker image version 3.0 where you either increase the timeout limit in the main.go, or you have to work really fast. I am going to quickly increase mine by modifying the code to 100 seconds, rebuilding the docker image with a new tag, and setting the image during runtime just like before. I won’t cover how to do all that, you should be able to by now, or backtrack and see how we did before.
You can set a higher timeout limit than 100 seconds, or remove it completely by now since we are done with liveness probe, this might avoid you having a crashing container when testing the rest of the tutorial
Opening a terminal from inside the pod is simple, you need a terminal installed on the docker, either bash or ash or others.
You can execute commands from the pod using the kubectl exec. We will add a flag -it that stands for interactive. You then specify the pod name, followed by a – which separates the local command from the command inside the pod, so after the – comes the command to run inside the pod.
We want to attach it to the terminal, so we insert the path to the ash.
kubectl exec -it pod/hellogopher-79d5bfdfbd-bnhkf -- /bin/sh
Being inside the pod and able to run commands makes debugging a lot easier.
One very common error in Kubernetes is the oomkiller, also known as error code 137. This is an error that occurs when your application is out of memory. This can be because the Node does not have enough memory, or that the application is exceeding its limit of used resources.
If your application exceeds the memory limit assigned to it, it will restart, and keep restarting if it still exceeds the limit. So a regular memory leak would be saved with a restart, but if the application really uses more memory than it is allowed, it will repeatedly kill the container.
Visualizing Cluster
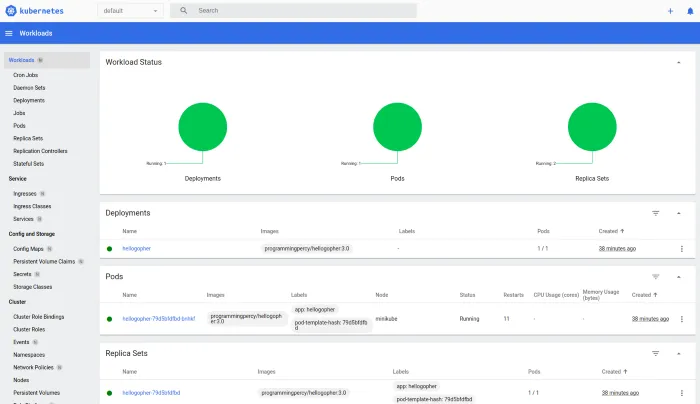
On the topic of debugging, many people want a UI to view what’s going on. Luckily we can get that with K8, there is an Admin Dashboard that can be used for the purpose of visualizing the cluster.
The dashboard can be used by following the official docs, or since we are using Minikube, which has a lot of addons, we can enable the dashboard simply by running
minikube addons enable dashboard
minikube addons enable metrics-server
You can view all minikube addons by running minikube addons list.
Open the dashboard by running the following.
minikube dashboardYou will be presented with an amazing dashboard that presents the cluster for you, this dashboard is very helpful when monitoring the cluster.
Note that we run the dashboard with Minikube, you can run it standalone also, Minikube just makes it easier on your development environment. See the K8 documentation on how to run it without Minikube.
In the UI you can view the workload, resource usage, and what resources that exist.
You can also view logs and execute into the pods if you visit the pod section, you can also see the pod events and everything else we have looked at earlier through the terminal.
Multiple pods, Services & Namespaces
Right now, we are running a cluster with a single deployment that has a single pod. Most of the time you will have multiple deployments for your whole application.
Let us get some on-hand practice by adding a MySQL database that runs and that our hellogopher application can connect to.
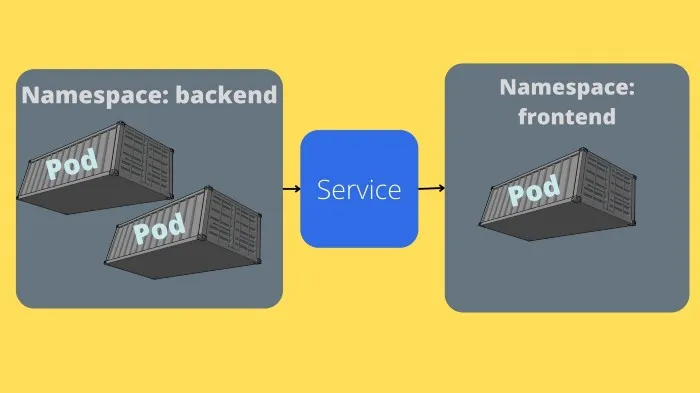
We will be doing it step-by-step so that we can explore services inside K8. Services are used to expose pods to other pods in the cluster.
The first step is adding a deployment that runs a MySQL container. For now, we will make it really simple with hard-coded environment configurations, don’t worry about that for now.
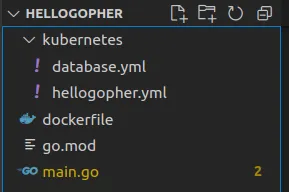
I like separation, so I will advocate that we create a new file named database.yml which will contain all our K8 objects that are related to the database. There are a few different approaches to how to solve this, sometimes you will see many Kubernetes objects inside the same file, this can be done by delimiting the file with a — which tells Kubernetes that the following lines are a new object.
At this point, it might be good to create a folder named kubernetes to store all our YAML files.
Let’s fill the database.yml with a deployment object. That will be used to create a simple MySQL database container and a root password with value password.
apiVersion: apps/v1
kind: Deployment
metadata:
  name: mysql
spec:
  selector:
    matchLabels:
      app: mysql
  strategy:
    type: Recreate
  template:
    metadata:
      labels:
        app: mysql
    spec:
      containers:
      - image: mysql:5.6
        name: mysql
        env:
          # Use secret in real usage
        - name: MYSQL_ROOT_PASSWORD
          value: password
        ports:
        - containerPort: 3306
name: mysqlOnce we have moved the YAML files into their own folder, let us update the running cluster with kubectl apply. Apply will check for any changes and apply the changes, and leave resources that haven’t changed alone. It accepts a -f flag that is short for the folder, and you can even make it recursive with -R.
kubectl apply -f kubernetes/After applying, you should see two deployments up and running, the hellogopher and the MySQL. Run kubectl get all to view the cluster or visit the dashboard.
You can try logging into MySQL easily by executing into the container. Grab the name of the MySQL pod and exec into it with bash as command.
kubectl exec pod/mysql-77bd8d464d-8vd2w -it -- bash
# You are now inside the pod terminal
mysql --user=root --password=$MYSQL_ROOT_PASSWORD
You should get logged into a MySQL, we ain’t doing anything here yet so you can type exit to leave the terminal.
Now one issue with the current setup is that the first hellogopher pod can’t reach the MySQL pod. For this to happen we have to use an service, services are used to allow access between pods, or the outside world. K8 will handle setting up an IP address and a DNS name for the pods. You can even get load-balancing included.
The first step to resolving connectivity between the two pods is to place them in the same namespace. A namespace is used to isolate resources or groups of resources into the same cluster. By default, the default namespace is used. So right now our pods are in the same namespace, but we want to have control of the namespace, it is important to mention the namespace as the namespace used by the resource is part of the DNS name.
Create a new file named 00_namespace.yml inside the Kubernetes folder. The 00 prefix is used by Kubernetes to know the order in which to create the resources, this is important since our resources will need the namespace to be created first.
apiVersion: v1
kind: Namespace
metadata:
name: hellogopherNext up, we will rename database.yml into 01_database.yml so that the database is the second item that gets created. We will add an — in the file, as previously mentioned this tells Kubeternetes that a new object is present in the same file. After the triple dash, we will create the service, notice that we don’t tell K8 which resource the service is connected to, but we do set a selector.
This is how services know which deployments to expose, by applying to all other objects that the selector matches. So in our case, any resource that has the label app: mysql will be exposed.
apiVersion: apps/v1
kind: Deployment
metadata:
  name: mysql
   namespace: hellogopher # Use the hellogopher namespace
spec:
  selector:
    matchLabels:
      app: mysql
  strategy:
    type: Recreate
  template:
    metadata:
      labels:
        app: mysql
    spec:
      containers:
      - image: mysql:5.6
        name: mysql
        env:
          # Use secret in real usage
        - name: MYSQL_ROOT_PASSWORD
          value: password
        ports:
        - containerPort: 3306
          name: mysql
---
apiVersion: v1
kind: Service
metadata:
  name: mysql
  namespace: hellogopher # We added namespace for hellogopher
spec:
  ports:
  - port: 3306 # The ports to expose
  selector:
app: mysql # Selector used to apply service on all Objects with label app=mysqlNote that I have added the namespace: hellogopher label as metadata on each object. This is one way of doing it, another way can be changing the namespace to use by default using use-context. We won’t cover how to set up multiple use-contexts here, you can read about them in the docs.
Make sure you add the namespace in the hellogopher.yml file also. Then delete any existing deployments and services from the default namespace, then redeploy.
kubectl apply -f kubernetesTry fetching the resources using kubectl get all and you will notice that there is no resources. This is because the command is using the default namespace, we can set the namespace to default by setting it in the current context.
kubectl config set-context --current --namespace=my-namespaceNow when you fetch resources you should see them all. You can skip specifying the namespace in the YAML files, but it can be useful if you have multiple namespaces in the same deployments.
So now we have a deployment that will set up the Pod and ReplicaSet for us, a service that exposes the database and we have contained them in their own namespace.
Note that to visit the hellogopher service, you need to apply the namespace using -n to the minikube command in the future.
minikube service hellogopher -n hellogopherConnecting to the Database
Now we have two pods, one running our software and one MySQL. We need to connect to the MySQL one, which is behind a service.
There are two ways in Kubernetes to find service information such as IP and Port which will be needed. You can read more details about them here.
The first, and preferred production way is using a DNS. Kubernetes allows us to install a CoreDNS addon that can be used. If you install a DNS you can refer to the service using its name, pretty much as you do in docker-compose.
The second way is using the built-in discovery. Each pod that is created, will get a set of environment variables set for each service in the same namespace. This requires that the service is created first, and the pod afterward. We solved this using the 00_ and 01_ name prefix.
The environment variables will be named $SERVICENAME as a prefix. In our case, we have named the service mysql. So all pods created after our service will have the following variables set.
MYSQL_SERVICE_HOST=10.0.0.11
MYSQL_SERVICE_PORT=3306
MYSQL_PORT=tcp://10.0.0.11:3306
MYSQL_PORT_3306_TCP=tcp://10.0.0.11:3306
MYSQL_PORT_3306_TCP_PROTO=tcp
MYSQL_PORT_3306_TCP_PORT=3306
MYSQL_PORT_3306_TCP_ADDR=10.0.0.11
You could try executing into the HelloGopher pod and print the variables to try it out.
Let us update the Go code to connect to the database to make sure everything works. I will create a new file named mysql.go which contains the database code, since we are not focusing on Go in this tutorial I won’t explain it in detail. The code will connect to a database using the environment variables related to our service, and if the database does not exist it will create it.
package main

import (
	"context"
	"database/sql"
	"errors"
	"fmt"
	"log"
	"os"
	"time"

	_ "github.com/go-sql-driver/mysql"
)

var (
	// global db variable, yiiikkeees
	databaseConn *sql.DB
)

// DatabaseConfig is a struct holding all relevant info for connecting to db
type DatabaseConfig struct {
	username string
	password string
	hostname string
	port     string
	dbName   string
}

// connectDatabase will connect the software to the globall database variable (yikes)
// only do like this in a example
func connectDatabase() error {
	log.Println("trying to connect to database")
	db, err := sql.Open("mysql", createDSN(true))
	if err != nil {
		return fmt.Errorf("failed to open mysql connection: %w", err)
	}
	databaseConn = db

	if err := createDatabase(os.Getenv("DATABASE_NAME")); err != nil {
		return err
	}

	if err := db.Ping(); err != nil {
		return fmt.Errorf("failed to ping db: %w", err)
	}
	// Reconnect, this time to the database created
	db, err = sql.Open("mysql", createDSN(false))
	if err != nil {
		return fmt.Errorf("failed to open mysql connection using databasename: %w", err)
	}
	log.Println("connected to database")
	databaseConn = db

	return nil
}

// createDatabase will create a database if it does not exist
func createDatabase(dbname string) error {
	log.Println("creating database")
	ctx, cancelfunc := context.WithTimeout(context.Background(), 5*time.Second)
	defer cancelfunc()

	tx, err := databaseConn.BeginTx(ctx, nil)
	if err != nil {
		return err
	}
	// Create database
	res, err := tx.ExecContext(ctx, fmt.Sprintf("CREATE DATABASE IF NOT EXISTS %s", dbname))
	if err != nil {
		return err
	}
	no, err := res.RowsAffected()
	if err != nil {
		return err
	}
	if no == 0 {
		return errors.New("failed to create database, no row affected")
	}
	if err := tx.Commit(); err != nil {
		return fmt.Errorf("failed to commit tx: %w", err)
	}

	return nil
}

// createDSN creates a mysql dsn string
// skipDbName can be passed as true to skip using a certain db
func createDSN(skipDbName bool) string {
	dbCfg := getDatabaseConfig()
	if skipDbName {
		return fmt.Sprintf("%s:%s@tcp(%s)/%s", dbCfg.username, dbCfg.password, dbCfg.hostname, "")
	}
	return fmt.Sprintf("%s:%s@tcp(%s)/%s", dbCfg.username, dbCfg.password, dbCfg.hostname, dbCfg.dbName)
}

// getDatabaseConfig fetches database configs from env vars
func getDatabaseConfig() DatabaseConfig {
	// These env vars are manually added in the 02_hellogopher.yml
	username := os.Getenv("DATABASE_USERNAME")
	password := os.Getenv("DATABASE_PASSWORD")
	database := os.Getenv("DATABASE_NAME")
	// these env vars are automatically added by Kubernetes when pod is created if Service named Mysql Exists
	hostname := os.Getenv("MYSQL_SERVICE_HOST")
	port := os.Getenv("MYSQL_SERVICE_PORT")

	return DatabaseConfig{
		username: username,
		password: password,
		hostname: hostname,
		port:     port,
		dbName:   database,
	}
}After adding that, we need to execute the connection from the main function.
package main

import (
	"fmt"
	"log"
	"net/http"
	"os"
	"time"
)

func main() {
	// Grab time of startup
	started := time.Now()

	// Connect to database, or Crash
	if err := connectDatabase(); err != nil {
		log.Fatal(err)
	}
	defer databaseConn.Close()

	http.HandleFunc("/", func(w http.ResponseWriter, r *http.Request) {
		// Calculate runtime duration
		duration := time.Now().Sub(started)
		if duration.Seconds() > 100 {
			log.Println("Timeout triggered")
			w.WriteHeader(http.StatusInternalServerError)
			w.Write([]byte(`hello gopher`))
		} else {
			w.WriteHeader(http.StatusOK)
			w.Write([]byte(`hello gopher`))
		}
	})

	http.HandleFunc("/aligator", func(w http.ResponseWriter, r *http.Request) {
		fmt.Fprintf(w, "Hi Mr Aligator")
	})

	log.Fatal(http.ListenAndServe(":8080", nil))
}Great, the code to connect to the database is ready. We need to rebuild the docker and update our cluster to use the new version, I am going to tag it with the version 5.0.
docker build -t programmingpercy/hellogopher:5.0 .Now we need to update the cluster to use this version of the code, you can do it at runtime by changing the docker image, or updating the YAML and applying. Since we need to also add a few environment variables that are not automatically generated such as DATABASE_USERNAME, DATABASE_PASSWORD, DATABASE_NAME I recommend we update the hellogopher.yml. We can add those variables using the env field and setting name and value for each.
We will also make sure to rename the file into 02_hellogopher.yml. Since we want it to be created after the MySQL service.
apiVersion: apps/v1 #Which version of the Kubernetes API you're using to create this object
kind: Deployment # What kind of object you want to create [deployment, service etc]
metadata: # Data that helps uniquely identify the object, including a name string, UID, and optional namespace
  name: hellogopher
  namespace: hellogopher
spec: #  What state you desire for the object
  selector: # Define what selectors the Deployment uses to find the PODS that are related to it
    matchLabels: # matchLabels is a map of {key,value} pairs.
      app: hellogopher
  replicas: 1 # Tells the deployment to run 1 pod
  template: # When creating new pods, this template will be used
    metadata:
      labels: # Labels used when searching / managing deployments
        app: hellogopher
    spec:
      containers:
      - name: hellogopher # Name of the Container
        image: programmingpercy/hellogopher:5.0 # Important, to not use latest tag as it will try DOckerhub then
        imagePullPolicy: IfNotPresent # Will only pull from DockerHub if not present already in Local docker
        env:
          # Use secret in real usage
        - name: DATABASE_USERNAME
          value: root
        - name: DATABASE_PASSWORD
          value: password
        - name: DATABASE_NAME
          value: test
        ports: # Ports to Expose
        - containerPort: 8080
        readinessProbe:
          initialDelaySeconds: 5 # Time before starting to Probe status
          timeoutSeconds: 1 # Time to wait before timeout
          # HTTP probe
          httpGet:
            path: / # the path we use to probe
            port: 8080
        livenessProbe:
          initialDelaySeconds: 5 # Time before starting to Probe status
          timeoutSeconds: 1 # Time to wait before timeout
          failureThreshold: 3 # How many times it can fail before restarting
          # HTTP probe
          httpGet:
            path: / # the path we use to probe
port: 8080To test this out you can apply the new configurations, and then execute into the MySQL pod and view the available databases, you should see a database named test.
mv kubernetes/hellogopher.yml kubernetes/02_hellogopher.yml
kubectl apply -f kubernetes/
kubectl exec pod/mysql-77bd8d464d-n5fx5 -it -- sh
#: mysql -p
show databases;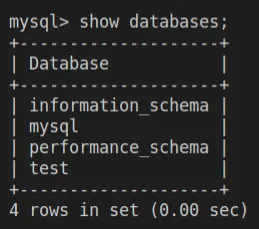
Great, now our Pods are connected to each other!
ConfigMaps & Secrets

You might have noticed that right now we have hardcoded passwords in plain text in the YAML files. As you have guessed, this is not a good practice.
Kubernetes allows us to handle configurations and secrets using configmap and secrets. You can find the details in the docs.
You should use Configmaps when you have nonsecret values, and secret when you have sensitive values, such as passwords. Let us replace the environment variables with the appropriate solution instead. We will store the DATABASE_NAME and DATABASE_USER in a Configmap, but the password is a secret.
Let us begin with creating the Configmap, you can do this from either a literal, which is basically setting the value as a string. You can also use a file that uses a newline as a delimiter. Since you usually have multiple environment variables I prefer using a file.
# Using Literal
kubectl create configmap myConfigMap --from-literal=log_level=debug
# Using a file
kubectl create configmap myConfigMap --from-env-file=path/to/file
Let us begin by trying it out. Create a new file named dbConfig.properties and insert the following values into it.
DATABASE_USERNAME=root
DATABASE_NAME=testWe can then create this configmap using the create configmap command.
kubectl create configmap database-configs --from-env-file=dbConfig.properties You can then view the configmaps or details about a configmap by specifying the name of the one you want to introspect.
kubectl get configmaps
kubectl get configmap/myConfigMap -o yaml
Next, we need to update the 02_hellogopher.yml to start using the Configmap instead. To use a configmap we will replace the value field for each environment variable with valueFrom. This property accepts an object, and the object we will pass in configMapKeyRef. This is a way for Kubernetes to reference a certain configmap in the same namespace using the name for the configmap and key to the particular value we want.
Here is an updated version of the YAML which fetches values using our new configmap.
apiVersion: apps/v1 #Which version of the Kubernetes API you're using to create this object
kind: Deployment # What kind of object you want to create [deployment, service etc]
metadata: # Data that helps uniquely identify the object, including a name string, UID, and optional namespace
  name: hellogopher
  namespace: hellogopher
spec: #  What state you desire for the object
  selector: # Define what selectors the Deployment uses to find the PODS that are related to it
    matchLabels: # matchLabels is a map of {key,value} pairs.
      app: hellogopher
  replicas: 1 # Tells the deployment to run 1 pod
  template: # When creating new pods, this template will be used
    metadata:
      labels: # Labels used when searching / managing deployments
        app: hellogopher
    spec:
      containers:
      - name: hellogopher # Name of the Container
        image: programmingpercy/hellogopher:5.0 # Important, to not use latest tag as it will try DOckerhub then
        imagePullPolicy: IfNotPresent # Will only pull from DockerHub if not present already in Local docker
        env:
          # Use secret in real usage
        - name: DATABASE_USERNAME
          valueFrom:
            configMapKeyRef: # We specify that we want to use a ConfigMap to fetch the value
              name: database-configs # the name of the ConfigMap
              key: DATABASE_USERNAME # The key value used in the configmap
        - name: DATABASE_PASSWORD
          value: password
        - name: DATABASE_NAME
          valueFrom:
            configMapKeyRef: # We specify that we want to use a ConfigMap to fetch the value
              name: database-configs # the name of the ConfigMap
              key: DATABASE_NAME # The key value used in the configmap
        ports: # Ports to Expose
        - containerPort: 8080
        readinessProbe:
          initialDelaySeconds: 5 # Time before starting to Probe status
          timeoutSeconds: 1 # Time to wait before timeout
          # HTTP probe
          httpGet:
            path: / # the path we use to probe
            port: 8080
        livenessProbe:
          initialDelaySeconds: 5 # Time before starting to Probe status
          timeoutSeconds: 1 # Time to wait before timeout
          failureThreshold: 3 # How many times it can fail before restarting
          # HTTP probe
          httpGet:
            path: / # the path we use to probe
port: 8080You can try this out by applying the new changes and then fetching the logs to see that everything still works.
kubectl apply -f kubernetes/Now that is a big improvement, we still have the password plainly, but we will look at that first. Before we do that, I want to address an issue with the current configmap approach, if you have many environment variables, as you might understand this becomes a lot of text to configure in the YAML.
You can however apply a whole configmap without the need to specifically assign each key value. We can do this by adding a envFrom field that accepts the name of the configmap on the Container inside the YAML. This will make all the configuration keys appear as environment variables inside the pods.
Here is a gist where we do this instead, note how I no longer need to assign the DATABASE_NAME or DATABASE_USER as they are defined in the configmap.
apiVersion: apps/v1 #Which version of the Kubernetes API you're using to create this object
kind: Deployment # What kind of object you want to create [deployment, service etc]
metadata: # Data that helps uniquely identify the object, including a name string, UID, and optional namespace
  name: hellogopher
  namespace: hellogopher
spec: #  What state you desire for the object
  selector: # Define what selectors the Deployment uses to find the PODS that are related to it
    matchLabels: # matchLabels is a map of {key,value} pairs.
      app: hellogopher
  replicas: 1 # Tells the deployment to run 1 pod
  template: # When creating new pods, this template will be used
    metadata:
      labels: # Labels used when searching / managing deployments
        app: hellogopher
    spec:
      containers:
      - name: hellogopher # Name of the Container
        image: programmingpercy/hellogopher:5.0 # Important, to not use latest tag as it will try DOckerhub then
        imagePullPolicy: IfNotPresent # Will only pull from DockerHub if not present already in Local docker
        envFrom: # Use this to assign a whole ConfigMap
        - configMapRef:
            name: database-configs # Just specify your configmap name
        env:
        - name: DATABASE_PASSWORD
          value: password
        ports: # Ports to Expose
        - containerPort: 8080
        readinessProbe:
          initialDelaySeconds: 5 # Time before starting to Probe status
          timeoutSeconds: 1 # Time to wait before timeout
          # HTTP probe
          httpGet:
            path: / # the path we use to probe
            port: 8080
        livenessProbe:
          initialDelaySeconds: 5 # Time before starting to Probe status
          timeoutSeconds: 1 # Time to wait before timeout
          failureThreshold: 3 # How many times it can fail before restarting
          # HTTP probe
          httpGet:
            path: / # the path we use to probe
port: 8080You can go ahead and retry the deployment if you want to make sure it is still working.
Now, we have created a ConfigMap that is used by the deployment, but we also introduced a tiny weird dependency to that configmap. And somebody who hasn’t created it manually won’t be able to deploy since they don’t have it, and we can’t have that.
A very simple solution is adding a new Kubernetes object that creates the configmap. Since this is related to the database, I will add it to the 01_database.yml file. Again, a new object, so we need to delimit it by adding — on a new line. Since this is a regular configuration and has no secrets, we can simply have a default value preset.
I will move all settings from dbConfig.properties so you can remove that file. Remember that we add it at the bottom of the 01_database.yml file.
---
apiVersion: v1
kind: ConfigMap
metadata:
  name: database-configs
  namespace: hellogopher
data:
  DATABASE_USERNAME: root
DATABASE_NAME: testRemove the old manually created configmap and reapply the cluster.
kubectl delete configmap database-configs
kubectl apply -f kubernetes/
View the configmap created, view the logs, and make sure everything is still operating. You should be familiar with how by now.
It is time to handle the final piece, the secret password. Many applications out there will be in need of storing secretes. And luckily for us, this is done almost exactly the same way as ConfigMap, but instead a SecretMap.
We will begin by base64 encoding the value of our secret, all secrets should be stored in base64 format. Remember that this is not secure in any way.
percy@pc038:~/private/kubernetes/hellogopher$ echo -n "password" | base64
cGFzc3dvcmQ=
We will take the value outputted and put it in our manifest file 01_database.yml. Just as the configmap we will create a secret object that we use to store our secrets which we can reference.
In 01_database.yml add the following gist to the bottom.
---
apiVersion: v1
kind: Secret
metadata:
  name: database-secrets
  namespace: hellogopher
type: Opaque
data:
DATABASE_PASSWORD: cGFzc3dvcmQ=We will also need to change the 02_hellogopher.yml to use this secret instead. Replace the environment variable DATABASE_PASSWORD with the following gist. Just as we used configMapRef we will now use a secretKeyRef. The syntax is the same.
apiVersion: apps/v1 #Which version of the Kubernetes API you're using to create this object
kind: Deployment # What kind of object you want to create [deployment, service etc]
metadata: # Data that helps uniquely identify the object, including a name string, UID, and optional namespace
  name: hellogopher
  namespace: hellogopher
spec: #  What state you desire for the object
  selector: # Define what selectors the Deployment uses to find the PODS that are related to it
    matchLabels: # matchLabels is a map of {key,value} pairs.
      app: hellogopher
  replicas: 1 # Tells the deployment to run 1 pod
  template: # When creating new pods, this template will be used
    metadata:
      labels: # Labels used when searching / managing deployments
        app: hellogopher
    spec:
      containers:
      - name: hellogopher # Name of the Container
        image: programmingpercy/hellogopher:5.0 # Important, to not use latest tag as it will try DOckerhub then
        imagePullPolicy: IfNotPresent # Will only pull from DockerHub if not present already in Local docker
        envFrom: # Use this to assign a whole ConfigMap
        - configMapRef:
            name: database-configs # Just specify your configmap name
        env:
        - name: DATABASE_PASSWORD
          valueFrom:
            secretKeyRef: # This is used to fetch value from secret, should be base64 encoded
              name: database-secrets # Name of our secrets object
              key: DATABASE_PASSWORD # The secret key to fetch value from
        ports: # Ports to Expose
        - containerPort: 8080
        readinessProbe:
          initialDelaySeconds: 5 # Time before starting to Probe status
          timeoutSeconds: 1 # Time to wait before timeout
          # HTTP probe
          httpGet:
            path: / # the path we use to probe
            port: 8080
        livenessProbe:
          initialDelaySeconds: 5 # Time before starting to Probe status
          timeoutSeconds: 1 # Time to wait before timeout
          failureThreshold: 3 # How many times it can fail before restarting
          # HTTP probe
          httpGet:
            path: / # the path we use to probe
port: 8080Apply the changes and see that it creates the secret.
kubectl apply -f kubernetes/You can now list all secrets present by running
kubectl get secretsAnd then select the name to introspect and show more detailed information about certain secrets by providing their name.
kubectl get secrets database-secrets -o yamlIf you want to make sure, get the logs from the pod to make sure it works.
Now you might think, hey, we still have “clear” text passwords since base64 doesn’t add any protection. Luckily for us, we can replace the values with a Kubernetes patch command. This is amazing because we can automate the secret patching in a CI/CD for instance.
The command we use is patch secret followed by the name of the secret object. We then specify JSON as we want the patch request to use JSON format.
The input to the command is sent as a payload -p flag, and it accepts an Array of changes to apply. op stands for operation and is the operation we want to perform, in our case, replace. path is the full path to the secret, usually /data/your-secret-name, and then the value. Remember the value should be base64 encoded.
kubectl patch secret database-secrets --type='json' -p='[{"op" : "replace","path" : "/data/DATABASE_PASSWORD","value" : "test"}]'After you’ve replaced the secret, try reapplying the changes and fetch the logs to verify that your database connection fails.
Limiting Resources
Before we conclude this tutorial, I want to address an important aspect that we haven’t touched on yet. Right now the resources we create are set up and everything works as we expect, but the pods are free to use whatever resources on the computer they want.
There are two types of settings you need to be familiar with limit and request.
Request — is the MINIMUM available resources the node needs to have able to provide for your pod to be created on it.
Limit — is the MAXIMUM amount of resources your pod is allowed to use. Unless specified, a pod can use an infinite amount of resources on the node.
You can view how many whatever resources your current pods are using with top command.

In the image you see that we get a listing of CPU cores and Memory used, these are the two most common resources.
Let’s add resource limitations for the hellogopher pod, and then you can try limiting the MySQL on your own.
The hellogopher is a super simple API, it does not need a whole CPU core so we will begin by limiting it to 0.1 cores, often you will see a number such as 500m which represents 0.5 CPU cores. So to get 0.1 cores, we need to set the limit as 100m.
For CPU resource units, the quantity expression 0.1 is equivalent to the expression 100m, which can be read as “one hundred millicpu” — Kubernetes resource docs
The memory for the service does not need much, because it is a super simple API. We will limit it to 10Mi, you can read more about all the available units in the memory docs.
Remember, the request is the minimum, and the limit is the maximum. Let us apply it to our configuration.
apiVersion: apps/v1 #Which version of the Kubernetes API you're using to create this object
kind: Deployment # What kind of object you want to create [deployment, service etc]
metadata: # Data that helps uniquely identify the object, including a name string, UID, and optional namespace
  name: hellogopher
  namespace: hellogopher
spec: #  What state you desire for the object
  selector: # Define what selectors the Deployment uses to find the PODS that are related to it
    matchLabels: # matchLabels is a map of {key,value} pairs.
      app: hellogopher
  replicas: 1 # Tells the deployment to run 1 pod
  template: # When creating new pods, this template will be used
    metadata:
      labels: # Labels used when searching / managing deployments
        app: hellogopher
    spec:
      containers:
      - name: hellogopher # Name of the Container
        image: programmingpercy/hellogopher:5.0 # Important, to not use latest tag as it will try DOckerhub then
        imagePullPolicy: IfNotPresent # Will only pull from DockerHub if not present already in Local docker
        envFrom: # Use this to assign a whole ConfigMap
        - configMapRef:
            name: database-configs # Just specify your configmap name
        env:
        - name: DATABASE_PASSWORD
          valueFrom:
            secretKeyRef: # This is used to fetch value from secret, should be base64 encoded
              name: database-secrets # Name of our secrets object
              key: DATABASE_PASSWORD # The secret key to fetch value from
        resources: # Here we start the Resource section
          requests: # Requests are the minimum available resources a Node needs to be accepted as a valid node
            memory: "1Mi"
            cpu: "50m"
          limits: # Limits is the maximum amount of resource the pods are allowed to use
            memory: "10Mi"
            cpu: "100m" # 0.1 Is not allowed, instead we use 100m which is the same
        ports: # Ports to Expose
        - containerPort: 8080
        readinessProbe:
          initialDelaySeconds: 5 # Time before starting to Probe status
          timeoutSeconds: 1 # Time to wait before timeout
          # HTTP probe
          httpGet:
            path: / # the path we use to probe
            port: 8080
        livenessProbe:
          initialDelaySeconds: 5 # Time before starting to Probe status
          timeoutSeconds: 1 # Time to wait before timeout
          failureThreshold: 3 # How many times it can fail before restarting
          # HTTP probe
          httpGet:
            path: / # the path we use to probe
port: 8080It is great to set limitations as it can make your deployments cheaper, avoiding using unnecessary resources. Be vary to not set it to low, running out of memory will most likely cause your pods to crash.
You can go ahead and reapply the configuration to make sure it works, and try settings the resources on the database.
Conclusion

In this tutorial, we have covered how to configure a simple Kubernetes application, and how to run it on a local node using Minikube. We have only touched on the basics, there is much more to learn before becoming a Master Of Kubernetes. Hopefully, I have helped you get started on the path there.
The final code for this tutorial can be found on GitHub.
Hopefully, you have gotten a bit more familiar with the components used in Kubernetes.
Deploying Kubernetes to production is a whole tutorial of its own. I recommend googling on kubeadm and kops to get familiar with tooling used for deployment. One way to deploy Kubernetes easily is using Managed services on AWS, Google, or Azure. They let you deploy very easily instead of setting everything up yourself.
Kubeadm is a tool for setting up a new cluster easily without any messy setups.
Kops is a tool for creating and maintaining a production-grade cluster on AWS.
I do recommend looking into config contexts, so that you can switch between development and production environments, and in production, I would recommend adding much more labels.
There are two more tools I recommend looking into that can be helpful, hopefully, I will create tutorials on those tools soon. Kompose — Tool used to create Kubernetes configuration from a docker-compose.
Helm — Streamlines the installation and management of Kubernetes applications. Think of it as a Package manager for Kubernetes applications.
I hope you enjoyed it, feel free to reach out with any questions, feedback, or tips for future articles.
If you enjoyed my writing, please support future articles by buying me an Coffee