Intro GraphQL in Go
What is GraphQL, why to use it, and how to use it in Golang
by Percy Bolmér, September 14, 2021
, inspired by the works of Renée French (CC BY 3.0)](/_app/immutable/assets/img0-b5a3fa7d.webp)
In this article we will be building a hiring agency API for gophers, using a GraphQL server built in Go. Unlike many other introductions out there I won’t be listing the name of all components with a short declaration. Instead, we will build an application step by step and explain what is going on in each step. Hopefully, this approach makes it a bit easier to not flood you with information. I wont only cover GraphQL, but also how I structure the architecture when using graphql-go
The first thing we need to clear out is a very common misconception.
GraphQL is not a database! — GraphQL
I think this misunderstanding comes from the name, developers are used to hearing all the database names MySQL, PostgreSQL, etc. What is important is the last two letters, QL. If you’ve been around for some time, you might know this is short for Query Language but many I’ve met just relates it to databases.
So, GraphQL is a Query language built to make communicating between servers and clients easier and more reliant. One other thing we need to sort out right away is, GraphQL is database agnostic. This means that it does not care what underlying database is being used.
All images in this article are drawn by Percy Bolmér, the Gopher is drawn by Takuya Ueda, inspired by the works of Renée French. The gopher has been modified in the images.
How is that possible you ask? Well, you should consider GraphQL as a middleware between your database and client. You have a GraphQL server that receives requests in the Query format, the query specifies exactly what data you want to be returned, the server returns the data defined in the request.
The query language is defined and documented here.
query {
  gopher {
    id
    name
  }
  jobs {
    title
    years
  }
}{
"data": {
"gophers": [
{
"name": "original",
"profession": "logotype",
"jobs": {
"title": "Original Gopher By Renee Fench",
"years": 12,
}
}
]
}
}If you have any further questions about GraphQL, they have a very nice FAQ.
In this article we will cover the basics, we will be building an application for searching and finding gophers to hire. We won’t cover all aspects of GraphQL, that would be too long.
Why and when you should use GraphQL
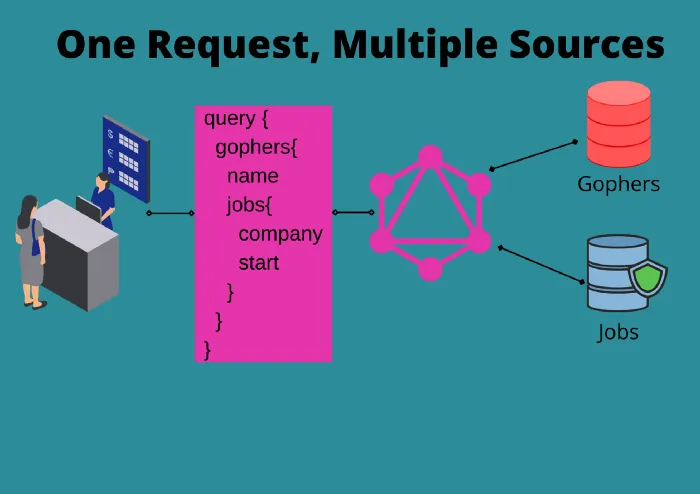
When I first heard about GraphQL, I admit, I was skeptical. And I’ve understood many others are as well. It sounds like just adding another layer between the API and the caller will make things more complex.
But this is not the case, following along and I hope to convince you of that.
One of the best reasons I find for using GraphQL is the ability to combine data sources. I am a big user of the RepositoryPattern which you can find discussed in my Domain-Driven Design article.
How To Implement Domain-Driven Design (DDD) in Golang
October 1, 2021
The easy way of learning how to use DDD in a Go application
Read moreIn short, you have a repository for each data source. For the agency we are building we will have GopherRepository which stores gophers, and a JobRepository that stores jobs. GraphQL makes it possible to easily combine these two structures into a single output, without coupling the data sources in the backend. In the server we will build, it will look like the Gopher struct has Jobs related to it, but it will actually be two different storage solutions.
The second reason I like GraphQL is the ability to avoid overfetching by allowing the user to specify exactly what fields to request. You only send one request and get only the information you request, no extra fields that are unused.
One of the principles in GraphQL is that the development process should start with the Schema definition. This is called Schema Driven Development and I won’t cover it here, but basically, we start with the schemas instead of the business logic.
In GraphQL your API starts with a schema that defines all your types, queries and mutations, It helps others to understand your API. So it’s like a contract between server and the client. — GraphQL Website
How to use GraphQL in Go
The first thing to do is to decide on what Go package to use. The GraphQL website maintains a list of all available packages.
In this article, we will be using graphql-go/graphql which is a package that is built after the official graphql-js reference. This package does not read graphql schema files, rather we define the schemas in the go code. And the way to define the schemas matches the same way used in the javascript side, so that is nice.
We will begin by creating a package and getting the required libraries to get started. We will be fetching graphql-go/graphql which is used for building and defining our schemas, and graphql-go/handler which is used to host the graphql server.
go mod init github.com/programmingpercy/gopheragency
go get github.com/graphql-go/graphql
go get github.com/graphql-go/handler
touch main.go
Queries and Resolvers — Fetching data
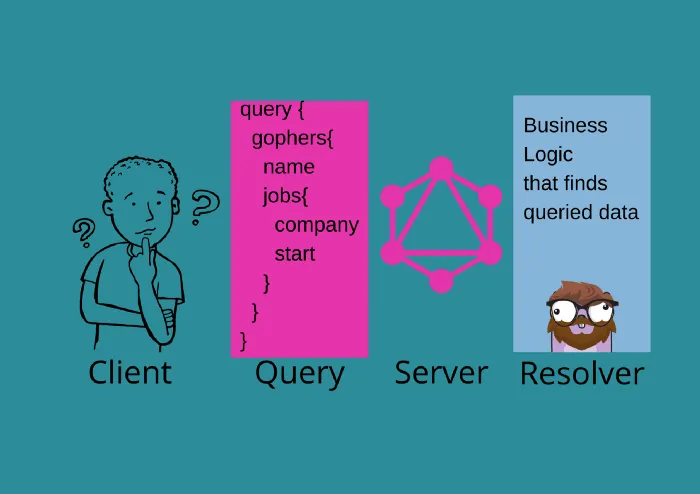
The query is the operation to fetch data from the server. A query is performed by sending a request according to the Schema declaration. You saw an example query earlier in the article, and we will use that as a starting point. Only the fields used in a query will be returned in the response.
There are two keywords we need to learn before moving on.
- Field — A value of a certain data type, String, Int, Float, Boolean, and ID
- Object — An object with fields, think of it like a struct
query {
  gopher { // Object
    id // Field
    name // Field
  }
  jobs { // Object
    title // field
    years // Field
  }

}To begin implementing this we need to start building the schema, remember Schema Driven Development, right?
We will begin by creating the Gopher object that we can query. Create a schema folder and a gopher.go inside of it.
We will begin by creating the GopherType which is a declaration of an object that can be sent using GraphQL. To create a new object in graphql-go/graphql we use the graphql.NewObject function, the input to NewObject is an ObjectConfig.
This ObjectConfig is a struct that is used to configure how the object is defined. The config holds a graphql.Fields object which is an alias for map[string]*graphql.Fields, remember that Objects are a set of Fields.
package schemas

import "github.com/graphql-go/graphql"

// GopherType is the gopher graphQL Object that we will send on queries
// Here we define the structure of the gopher
// This has to match the STRUCT tags that are sent out later
var GopherType = graphql.NewObject(graphql.ObjectConfig{
	Name: "Gopher",
	// Fields is the field values to declare the structure of the object
	Fields: graphql.Fields{
		"id": &graphql.Field{
			Type:        graphql.ID,
			Description: "The ID that is used to identify unique gophers",
		},
		"name": &graphql.Field{
			Type:        graphql.String,
			Description: "The name of the gopher",
		},
		"hired": &graphql.Field{
			Type:        graphql.Boolean,
			Description: "True if the Gopher is employeed",
		},
		"profession": &graphql.Field{
			Type:        graphql.String,
			Description: "The gophers last/current profession",
		},
	},
})Now that we have defined the GopherType we have to set up and host a GraphQL server that can respond to queries.
To have a GraphQL server we need a RootQuery which is the base for each query. The root query will hold all available queries at the top level.
When a request reaches the server, data has to be fetched. Fetching data is done by Resolvers which is a function that accepts the query and all the arguments. We will create a simple server that responds with a simple Hello first before adding the GopherType.
// This package is a demonstration how to build and use a GraphQL server in Go
package main

import (
	"log"
	"net/http"

	"github.com/graphql-go/graphql"
	"github.com/graphql-go/handler"
)

func main() {

	// We create yet another Fields map, one which holds all the different queries
	fields := graphql.Fields{
		// We define the Gophers query
		"gophers": &graphql.Field{
			// It a String, FOR NOW
			Type: graphql.String,
			// Resolve is the function used to look up data
			Resolve: func(p graphql.ResolveParams) (interface{}, error) {
				return "hello", nil
			},
			// Description explains the field
			Description: "Query all Gophers",
		},
	}
	// Create the Root Query that is used to start each query
	rootQuery := graphql.ObjectConfig{Name: "RootQuery", Fields: fields}
	// Now combine all Objects into a Schema Configuration
	schemaConfig := graphql.SchemaConfig{
		// Query is the root object query schema
		Query: graphql.NewObject(rootQuery)}
	// Create a new GraphQL Schema
	schema, err := graphql.NewSchema(schemaConfig)
	if err != nil {
		log.Fatalf("failed to create new schema, error: %v", err)
	}

	StartServer(&schema)
}

// StartServer will trigger the server with a Playground
func StartServer(schema *graphql.Schema) {
	// Create a new HTTP handler
	h := handler.New(&handler.Config{
		Schema: schema,
		// Pretty print JSON response
		Pretty: true,
		// Host a GraphiQL Playground to use for testing Queries
		GraphiQL:   true,
		Playground: true,
	})

	http.Handle("/graphql", h)
	log.Fatal(http.ListenAndServe(":8080", nil))
}After you’ve updated the main.go to host the server on port 8080 then visit localhost:8080/graphql and you’ll see a UI where we can test the current implementation.
On the left side you can write your Query, in the middle you see the response from the Resolver, and to the right you see a clickable tree structure that you can use to see all available queries.

Try it out to see if you get the correct response to make sure everything is working.
Now it’s time to implement an actual resolver, we will create a new folder named gopher which will contain a Resolver used to fetch Gophers. Create the resolver.go file which will define all the Resolver functions we expect from data storage for Gophers.
Remember, any function that looks like funcName(p graphql.ResolveParams) (interface{},error) can be used as a resolver.
package gopher

import "github.com/graphql-go/graphql"

type Resolver interface {
	// ResolveGophers should return a list of all gophers in the repository
	ResolveGophers(p graphql.ResolveParams) (interface{}, error)
	// ResolveGopher is used to respond to single queries for gophers
	ResolveGopher(p graphql.ResolveParams) (interface{}, error)
}Now that we have defined a resolver interface, we need to implement it. Let’s use in memory data storage that contains a few gophers. The Gopher struct must have the JSON tags to match the defined GopherType. If the tags don’t match then the response won’t be returned.
Create a gopher.go and fill in the struct.
package gopher

// Has to conform to the schema declaration
type Gopher struct {
	ID         string `json:"id"`
	Name       string `json:"name"`
	Hired      bool   `json:"hired"`
	Profession string `json:"profession"`
}Let’s create a Repository that defines the functions needed to act as Gopher storage. Create repository.go and insert the following gist.
package gopher

type Repository interface {
	GetGophers() ([]Gopher, error)
	GetGopher(id string) (Gopher, error)
}Next, we implement a simple in-memory data repository. We will create a memory.go and fill in the super simple storage solution that generates two gophers for us.
// InMemoryRepository is a storage for gophers that uses a map to store them
type InMemoryRepository struct {
	// gophers is our super storage for gophers.
	gophers []Gopher
	sync.Mutex
}

// NewMemoryRepository initializes a memory with mock data
func NewMemoryRepository() *InMemoryRepository {
	gophers := []Gopher{
		{
			ID:         "1",
			Name:       "Original Gopher",
			Hired:      true,
			Profession: "Logo",
		}, {
			ID:         "2",
			Name:       "Jan",
			Hired:      true,
			Profession: "The Janitor",
		},
	}

	return &InMemoryRepository{
		gophers: gophers,
	}
}

// GetGophers returns all gophers
func (imr *InMemoryRepository) GetGophers() ([]Gopher, error) {
	return imr.gophers, nil
}

// GetGopher will return a goper by its ID
func (imr *InMemoryRepository) GetGopher(id string) (Gopher, error) {
	for _, gopher := range imr.gophers {
		if gopher.ID == id {
			return gopher, nil
		}
	}
	return Gopher{}, errors.New("no such gopher exists")
}Great, we can now start implementing the Resolvers that are used to handle the queries. Let’s begin simple and implement the response with all Gophers available. We will have a struct that fulfills the Resolver interface. The reason why we have a structure this way will become more clear later, but a Resolver can hold many Repositories to combine data.
// GopherService is the service that holds all repositories
type GopherService struct {
	gophers Repository
}

// NewService is a factory that creates a new GopherService
func NewService(repo Repository) GopherService {
	return GopherService{
		gophers: repo,
	}
}

// ResolveGophers will be used to retrieve all available Gophers
func (gs GopherService) ResolveGophers(p graphql.ResolveParams) (interface{}, error) {
	// Fetch gophers from the Repository
	gophers, err := gs.gophers.GetGophers()
	if err != nil {
		return nil, err
	}
	return gophers, nil
}To start using the ResolveGophers from the GopherService we need to create a service in main.go and also make the RootQuery return a List of GopherType instead. Remember GopherType was the custom Object we created earlier, and a List is an Array in GraphQL.
func main() {
	// Create the Gopher Repository
	gopherService := gopher.NewService(gopher.NewMemoryRepository())
	// We create yet another Fields map, one which holds all the different queries
	fields := graphql.Fields{
		// We define the Gophers query
		"gophers": &graphql.Field{
			// It will return a list of GopherTypes, a List is an Slice
			// We defined our Type in the Schemas package earlier
			Type: graphql.NewList(schemas.GopherType),
			// We change the Resolver to use the gopherRepo instead, allowing us to access all Gophers
			Resolve: gopherRepo.ResolveGophers,
			// Description explains the field
			Description: "Query all Gophers",
		},
	}

........Now restart the program go run main.go and visit localhost:8080/graphql, time to see how GraphQL allows us to avoid over fetching and under fetching.
Remember that in GraphQL, we define what fields to return in the query, so only the fields you query will be returned. See the two images below, in I only fetch the Gophers names, the second image shows how to fetch all data available.


Combining Data in Queries without Coupling data sources
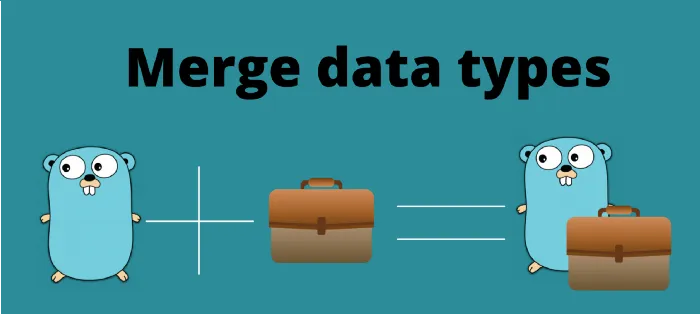
Before we move on, It’s time to show how we can use multiple repositories to fetch data from many sources. This is another great feature with GraphQL.
Each graphql.Field has the Resolve field, so you can input a resolve function to each graphql.Field. Usually, we need access to a storage/repository in the resolver, the easiest way to achieve this is by using the Service to generate the Schema as it has all access needed.
Let’s see when we implement a JobRepository which will be used to handle Jobs. We will store both the JobRepository and the GopherRepository in the GopherService, and create a GenerateSchema function in the schema package that accepts the service as input and creates the schema we can use for the GraphQL. This approach allows us to build resolvers that have access to all data sources so we can combine them.
Begin by creating a job folder and create the job structure that we will use internally. We will also create a Repository for the job.
package job

// Repository is used to specify whats needed to fulfill the job storage requirements
type Repository interface {
	// GetJobs will search for all jobs related to and EmployeeID
	GetJobs(employeeID string) ([]Job, error)
}

// Job is how a job is presented
type Job struct {
	ID string `json:"id"`
	// EmployeeID is the employee related to the job
	EmployeeID string `json:"employeeID"`
	Company    string `json:"company"`
	Title      string `json:"title"`
	// Start is when the job started
	Start string `json:"start"`
	// End is when the employment ended
	End string `json:"end"`
}Next, we need a structure that is part of the repository, this time also an in-memory solution.
// memory is a in memory data storage solution for Job
package job

import (
	"errors"
	"sync"
)

// InMemoryRepository is a storage for jobs that uses a map to store them
type InMemoryRepository struct {
	// jobs is used to store jobs
	jobs map[string][]Job
	sync.Mutex
}

// NewMemoryRepository initializes a memory with mock data
func NewMemoryRepository() *InMemoryRepository {
	jobs := make(map[string][]Job)

	jobs["1"] = []Job{
		{
			ID:         "123-123",
			EmployeeID: "1",
			Company:    "Google",
			Title:      "Logo",
			Start:      "2021-01-01",
			End:        "",
		},
	}
	jobs["2"] = []Job{
		{
			ID:         "124-124",
			EmployeeID: "2",
			Company:    "Google",
			Title:      "Janitor",
			Start:      "2021-05-03",
			End:        "",
		}, {
			ID:         "125-125",
			EmployeeID: "2",
			Company:    "Microsoft",
			Title:      "Janitor",
			Start:      "1980-03-04",
			End:        "2021-05-02",
		},
	}
	return &InMemoryRepository{
		jobs: jobs,
	}
}

// GetJobs returns all jobs for a certain Employee
func (imr *InMemoryRepository) GetJobs(employeeID string) ([]Job, error) {

	if jobs, ok := imr.jobs[employeeID]; ok {
		return jobs, nil
	}
	return nil, errors.New("no such employee exist")

}The last thing to do before we start fixing the Resolvers is to upgrade the Service so it has access to a JobRepository
type Resolver interface {
	// ResolveGophers should return a list of all gophers in the repository
	ResolveGophers(p graphql.ResolveParams) (interface{}, error)
	// ResolveGopher is used to respond to single queries for gophers
	ResolveGopher(p graphql.ResolveParams) (interface{}, error)
	// ResolveJobs is used to find Jobs
	ResolveJobs(p graphql.ResolveParams) (interface{}, error)
}

// GopherService is the service that holds all repositories
type GopherService struct {
	gophers Repository
	// Jobs are reachable by the Repository
	jobs job.Repository
}

// NewService is a factory that creates a new GopherService
func NewService(repo Repository, jobrepo job.Repository) GopherService {
	return GopherService{
		gophers: repo,
		jobs:    jobrepo,
	}
}Now it’s time to pay focus on what happens here. We will add a ResolveJobs function in this function we will access a Source field, this field is the Parent of the object. This is very useful when we want to use data from the query itself, like in this case when we search for a Job we need the ID of the Gopher.
The Source will be a Gopher object, so we need to typecast it. Then use the ID of that gopher to the jobRepository
// ResolveJobs is used to find all jobs related to a gopher
func (gs *GopherService) ResolveJobs(p graphql.ResolveParams) (interface{}, error) {
	// Fetch Source Value
	g, ok := p.Source.(Gopher)

	if !ok {
		return nil, errors.New("source was not a Gopher")
	}
	// Find Jobs Based on the Gophers ID
	jobs, err := gs.jobs.GetJobs(g.ID)
	if err != nil {
		return nil, err
	}
	return jobs, nil
}Time to start building the schema, this is where we can combine data from the GopherService.
Create the GraphQL object to represent the JobType in schemas/factory.go.
package schemas

import (
	"github.com/graphql-go/graphql"
)

// We can initialize Objects like this unless they need a special resolver
var jobType = graphql.NewObject(graphql.ObjectConfig{
	Name: "Job",
	Fields: graphql.Fields{
		"id": &graphql.Field{
			Type: graphql.String,
		},
		"employeeID": &graphql.Field{
			Type: graphql.String,
		},
		"company": &graphql.Field{
			Type: graphql.String,
		},
		"title": &graphql.Field{
			Type: graphql.String,
		},
		"start": &graphql.Field{
			Type: graphql.String,
		},
		"end": &graphql.Field{
			Type: graphql.String,
		},
	},
},
)Let’s begin by fixing the Field for the Jobs array. Notice how we pass the service as a parameter so we can reach the needed Resolver function.
// generateJobsField will build the GraphQL Field for jobs
func generateJobsField(gs *gopher.GopherService) *graphql.Field {
	return &graphql.Field{
		// Return a list of Jobs
		Type:        graphql.NewList(jobType),
		Description: "A list of all jobs the gopher had",
		Resolve:     gs.ResolveJobs,
	}
}Now that we have the Job field done, we want to set that as an available data field for the Gopher type. We will remove the gopher.go file and move the content into its generator function, because again, we need the GopherService present. Remember that the Jobs field will be a child to Gopher, this makes the Source correct.
// genereateGopherType will assemble the Gophertype and all related fields
func generateGopherType(gs *gopher.GopherService) *graphql.Object {
	return graphql.NewObject(graphql.ObjectConfig{
		Name: "Gopher",
		// Fields is the field values to declare the structure of the object
		Fields: graphql.Fields{
			"id": &graphql.Field{
				Type:        graphql.ID,
				Description: "The ID that is used to identify unique gophers",
			},
			"name": &graphql.Field{
				Type:        graphql.String,
				Description: "The name of the gopher",
			},
			"hired": &graphql.Field{
				Type:        graphql.Boolean,
				Description: "True if the Gopher is employeed",
			},
			"profession": &graphql.Field{
				Type:        graphql.String,
				Description: "The gophers last/current profession",
			},
			// Here we create a graphql.Field which is depending on the jobs repository, notice how the Gopher struct does not contain any information about jobs
			// But this still works
			"jobs": generateJobsField(gs),
		}})
}It’s time to finalize the RootQuery and the Schema in a GenerateSchema which is exported to other packages.
// GenerateSchema will create a GraphQL Schema and set the Resolvers found in the GopherService
// For all the needed fields
func GenerateSchema(gs *gopher.GopherService) (*graphql.Schema, error) {
	gopherType := generateGopherType(gs)
	// RootQuery
	fields := graphql.Fields{
		// We define the Gophers query
		"gophers": &graphql.Field{
			// It will return a list of GopherTypes, a List is an Slice
			Type: graphql.NewList(gopherType),
			// We change the Resolver to use the gopherRepo instead, allowing us to access all Gophers
			Resolve: gs.ResolveGophers,
			// Description explains the field
			Description: "Query all Gophers",
		},
	}
	rootQuery := graphql.ObjectConfig{Name: "RootQuery", Fields: fields}
	// Now combine all Objects into a Schema Configuration
	schemaConfig := graphql.SchemaConfig{
		// Query is the root object query schema
		Query: graphql.NewObject(rootQuery)}
	// Create a new GraphQL Schema
	schema, err := graphql.NewSchema(schemaConfig)
	if err != nil {
		return nil, err
	}
	return &schema, nil
}To implement, remove the old main function in main.go and use the newly created Repositories and Schema generator.
func main() {

	gopherService := gopher.NewService(
		gopher.NewMemoryRepository(),
		job.NewMemoryRepository(),
	)

	schema, err := schemas.GenerateSchema(&gopherService)
	if err != nil {
		panic(err)
	}

	StartServer(schema)
}Restart the application and try querying for jobs. You should see that under each Gopher there is a list of jobs presented in the JSON response. Amazing right?

If you wonder about the job resolver and gopher resolver that we created, there is a reason why we haven’t implemented them yet. We don’t want to fetch ALL items each time, but we want to be able to query for certain Gophers only. Enter Arguments.
Arguments — Ability to specify search values
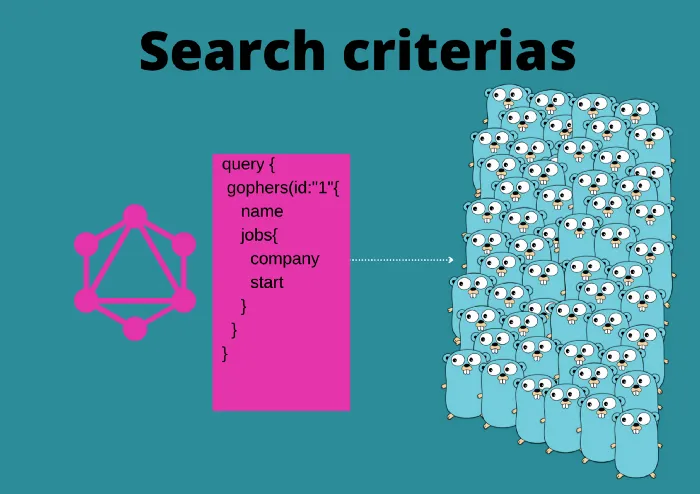
It makes sense to have a way of searching for specific data. This way is done by using Arguments in the Query. An Argument is a named value to include in the query.
A GraphQL field can have zero or many arguments available.
It’s easier to probably implement it to learn, so let’s add the ability to query specific Gophers and Jobs.
In the graphql.ResolveParams we have an Args field that will contain all the arguments sent in the query. We can use the Args field to search for any Argument we add. Let’s add an argument to the Jobs Resolver first, in which we ask for a company argument.
Update the JobRepository to accept yet another parameter which is the companyName.
// GetJobs returns all jobs for a certain Employee
func (imr *InMemoryRepository) GetJobs(employeeID, companyName string) ([]Job, error) {
	if jobs, ok := imr.jobs[employeeID]; ok {
		filtered := make([]Job, 0)
		// Filter out companyName
		for _, job := range jobs {
			// If Company Is Empty accept it, If Company matches filter accept it
			if (job.Company == companyName) || companyName == "" {
				filtered = append(filtered, job)
			}
		}
		return filtered, nil
	}
	return nil, errors.New("no such employee exist")

}We also fix the Repository to correlate the new changes.
// Repository is used to specify whats needed to fulfill the job storage requirements
type Repository interface {
	// GetJobs will search for all jobs related to and EmployeeID
	GetJobs(employeeID, company string) ([]Job, error)
}Now let’s fix the ResolveJobs to check for the Argument.
// ResolveJobs is used to find all jobs related to a gopher
func (gs *GopherService) ResolveJobs(p graphql.ResolveParams) (interface{}, error) {
	// Fetch Source Value
	g, ok := p.Source.(Gopher)

	if !ok {
		return nil, errors.New("source was not a Gopher")
	}
	// Here we extract the Argument Company
	company := ""
	if value, ok := p.Args["company"]; ok {
		company, ok = value.(string)
		if !ok {
			return nil, errors.New("id has to be a string")
		}
	}

	// Find Jobs Based on the Gophers ID
	jobs, err := gs.jobs.GetJobs(g.ID, company)
	if err != nil {
		return nil, err
	}
	return jobs, nil
}The last thing we need to do is make the graphql.Field also accepts the argument. Each graphql.Field has an Args that can be used to define the possible arguments, Args is a map[string]*ArgumentConfig in where we have to set the name and the data type. Let’s add it to the schemas/factory
// generateJobsField will build the GraphQL Field for jobs
func generateJobsField(gs *gopher.GopherService) *graphql.Field {
	return &graphql.Field{
		// Return a list of Jobs
		Type:        graphql.NewList(jobType),
		Description: "A list of all jobs the gopher had",
		Resolve:     gs.ResolveJobs,
		// Args are the possible arguments.
		Args: graphql.FieldConfigArgument{
			"company": &graphql.ArgumentConfig{
				Type: graphql.String,
			},
		},
	}
}Now you can request certain companies by using an argument in the query. The arguments are added by using the following syntax after the Field.
jobs(company: "value"){
Mutations — Modify the Data

Great, we can query data from the server. What about when we want to modify data?
That is when we have mutations in GraphQL. A mutation is defined by a RootMutation just as we had a RootQuery. So we need to build a schema for all available mutations, their arguments, and fields available.
A Mutation in GraphQL will look very much like a Query, and in fact, it will also return the result. So a Mutation can be used to apply new values, but also to fetch values after they are applied. Just as a Query you defined what values to return.
Let’s allow JobRepository to GetJob by an ID and to Update the job, this is so we can later create a Mutation to modify the start and end date of a job.
// Repository is used to specify whats needed to fulfill the job storage requirements
type Repository interface {
	// GetJobs will search for all jobs related to and EmployeeID
	GetJobs(employeeID, company string) ([]Job, error)
	// GetJob will search for a certain job based on ID
	GetJob(employeeID, jobid string) (Job, error)
	// Update will take in a job and update the repository, it will return the new state of the job
	Update(Job) (Job, error)
}Then open the memory.go and update the storage solution to handle these new functions.
// GetJob will return a job based on the ID
func (imr *InMemoryRepository) GetJob(employeeID, jobID string) (Job, error) {
	if jobs, ok := imr.jobs[employeeID]; ok {
		for _, job := range jobs {
			// If Company Is Empty accept it, If Company matches filter accept it
			if job.ID == jobID {
				return job, nil
			}
		}
		return Job{}, errors.New("no such job exists for that employee")
	}
	return Job{}, errors.New("no such employee exist")
}

// Update will update a job and return the new state of it
func (imr *InMemoryRepository) Update(j Job) (Job, error) {
	imr.Lock()
	defer imr.Unlock()
	// Grab the employees jobs and locate the job and change the value
	if jobs, ok := imr.jobs[j.EmployeeID]; ok {
		// Find correct job
		for i, job := range jobs {
			if job.ID == j.ID {
				// Replace the whole instance by index
				imr.jobs[j.EmployeeID][i] = j
				// Return Job, we can Image changes from input Job, like CreateJob which will generate an ID etc etc.
				return j, nil
			}
		}
	}
	return Job{}, errors.New("no such employee exist")
}Next, we need to add a Resolver function to the GopherService, one thing I’ve noticed with graphql-go is that there is quite the overhead since we deal with a lot of interface{}. You can avoid much overhead by creating helper functions to deal with the type assertions, in the code snippet below you see a grabStringArgument which is used to extract GraphQL Arguments that are strings. The mutation resolver is just like the query resolver so there isn’t anything new here.
// MutateJobs is used to modify jobs based on a mutation request
// Available params are
// employeeid! -- the id of the employee, required
// jobid! -- job to modify, required
// start -- the date to set as start date
// end -- the date to set as end
func (gs *GopherService) MutateJobs(p graphql.ResolveParams) (interface{}, error) {
	employee, err := grabStringArgument("employeeid", p.Args, true)
	if err != nil {
		return nil, err
	}
	jobid, err := grabStringArgument("jobid", p.Args, true)
	if err != nil {
		return nil, err
	}
	start, err := grabStringArgument("start", p.Args, false)
	if err != nil {
		return nil, err
	}
	end, err := grabStringArgument("end", p.Args, false)
	if err != nil {
		return nil, err
	}

	// Get the job
	job, err := gs.jobs.GetJob(employee, jobid)
	if err != nil {
		return nil, err
	}
	// Modify start and end date if they are set
	if start != "" {
		job.Start = start
	}

	if end != "" {
		job.End = end
	}
	// Update with new values
	return gs.jobs.Update(job)
}

// grabStringArgument is used to grab a string argument
func grabStringArgument(k string, args map[string]interface{}, required bool) (string, error) {
	// first check presense of arg
	if value, ok := args[k]; ok {
		// check string datatype
		v, o := value.(string)
		if !o {
			return "", fmt.Errorf("%s is not a string value", k)
		}
		return v, nil
	}
	if required {
		return "", fmt.Errorf("missing argument %s", k)
	}
	return "", nil
}Next, we need to update the Schema to have a mutation. Creating all the graphql.Fields can become quite much code as you might have noticed, so I usually create a generator function that reduces the code duplication by a factor of a hella lot.
To create a field we need a Type, which is anything that fulfills an Output interface which looks like the following snippet
type Output interface {
    Name() string
    Description() string
    String() string
    Error() error
}
The second parameter is the Resolver which is an alias FieldResolveFn func(p ResolveParams) (interface{},error), the third is a string description, and the fourth a map of arguments to allow.
// generateGraphQLField is a generic builder factory to create graphql fields
func generateGraphQLField(output graphql.Output, resolver graphql.FieldResolveFn, description string, args graphql.FieldConfigArgument) *graphql.Field {
	return &graphql.Field{
		Type:        output,
		Resolve:     resolver,
		Description: description,
		Args:        args,
	}
}Time to build the mutation query, create a mutation.go file in the schemas package. We begin by creating the arguments available in the request. We want the mutation request to require two arguments, so we create them using graphql.NewNonNull function. Using NewNonNull will make the GraphQL server trigger an error if a request with empty values is sent.
package schemas

import (
	"github.com/graphql-go/graphql"
	"github.com/programmingpercy/gopheragency/gopher"
)
// modifyJobArgs are arguments available for the modifyJob Mutation request
var modifyJobArgs = graphql.FieldConfigArgument{
	"employeeid": &graphql.ArgumentConfig{
		// Create a string argument that cannot be empty
		Type: graphql.NewNonNull(graphql.String),
	},
	"jobid": &graphql.ArgumentConfig{
		Type: graphql.NewNonNull(graphql.String),
	},
	// The new start date to apply if set
	"start": &graphql.ArgumentConfig{
		Type: graphql.String,
	},
	// The new end date to apply if set
	"end": &graphql.ArgumentConfig{
		Type: graphql.String,
	},
}We need to create the RootMutation with the new mutation in it, just as the query was created. We will now be using the generateGraphQLField to make the code a lot shorter.
// generateRootMutation will create the root mutation object
func generateRootMutation(gs *gopher.GopherService) *graphql.Object {

	mutationFields := graphql.Fields{
		// Create a mutation named modifyJob which accepts a JobType
		"modifyJob": generateGraphQLField(jobType, gs.MutateJobs, "Modify a job for a gopher", modifyJobArgs),
	}
	mutationConfig := graphql.ObjectConfig{Name: "RootMutation", Fields: mutationFields}

	return graphql.NewObject(mutationConfig)
}The last thing to do before we can try the mutation is to apply the RootMutation to the Schema in factory.go
// GenerateSchema will create a GraphQL Schema and set the Resolvers found in the GopherService
// For all the needed fields
func GenerateSchema(gs *gopher.GopherService) (*graphql.Schema, error) {
	gopherType := generateGopherType(gs)
	// RootQuery
	fields := graphql.Fields{
		// We define the Gophers query
		"gophers": &graphql.Field{
			// It will return a list of GopherTypes, a List is an Slice
			Type: graphql.NewList(gopherType),
			// We change the Resolver to use the gopherRepo instead, allowing us to access all Gophers
			Resolve: gs.ResolveGophers,
			// Description explains the field
			Description: "Query all Gophers",
		},
	}
	rootQuery := graphql.ObjectConfig{Name: "RootQuery", Fields: fields}
	// build RootMutation
	rootMutation := generateRootMutation(gs)

	// Now combine all Objects into a Schema Configuration
	schemaConfig := graphql.SchemaConfig{
		// Query is the root object query schema
		Query: graphql.NewObject(rootQuery),
		// Appliy the Mutation to the schema
		Mutation: rootMutation,
	}
	// Create a new GraphQL Schema
	schema, err := graphql.NewSchema(schemaConfig)
	if err != nil {
		return nil, err
	}
	return &schema, nil
}Open GraphiQL to try it out. We send the Mutation in the same way as the Query, simply replace the Keyword.

Conclusion
We have covered the very core of GraphQL. During the article you have learned how to Query data, Mutate it and the basics of how GraphQL works. You have seen how we can combine data sources to a single output and how to structure the project.
GraphQL has grown a lot and has much more to offer. Here are some topics you should investigate by yourself to increase your knowledge.
- Enumerations
- Interfaces, Fragments and Inline Fragments
- Subscriptions
Will you be using GraphQL or not?
You can find the full code on GitHub.
Thanks for reading and feel free to reach out to me in any of my social media found below.
If you enjoyed my writing, please support future articles by buying me an Coffee
