Building a Decentralized Application with BEP-20 contract in Solidity
Learn how to build a smart contract using Solidity for the Binance smart chain. The token will be a BEP-20 contract. Using truffle and Ganache
by Percy Bolmér, August 3, 2021
![By [Percy Bolmer]](/_app/immutable/assets/img0-fb234a27.webp)
If you’ve found this article then I’m guessing you are interested in learning more about how to build an application using blockchain. We will go through how to set up the environment used, building a simple application that can use a BEP-20 token. The token will have a super simple staking ability that rewards users for their stakes. This article will assume that there is little or no experience with blockchain and solidity before.
This series is the first of four articles, each with it’s own topic.
- [Building a Decentralized Application with BEP-20 contract in Solidity] — This article will help you understand the basics of Solidity
- Creating A Inheritable Staking Contract In Solidity — Second article in which we cover more advanced Solidity items and implement Staking and Rewarding
- Using a Smart Contract In An Web Application — Third article of the series in which we learn how to connect to the Blockchain via an Web application using MetaMask
- Deploying Smart Contracts to Binance Smart Chain With Truffle — Fourth and last article in which we learn how to deploy our Smart contract to the real networks
Before we begin diving into code, I would like to make sure some basic terminology about the technology is explained.
BEP-20
BEP-20 is the standard used when creating Tokens on the Binance smart chain. The Binance academy has a good explanation of it, here. From a developer perspective, this standard is that all tokens on the Binance smart chain must fulfill a certain interface.
An interface is a set of functions that needs to be present in the contract (Token). The template interface can be found on the Binance docs.
These are the functions that is defined in the BEP20 interface.
function totalSupply() external view returns (uint256);
function decimals() external view returns (uint8);
function symbol() external view returns (string memory);
function name() external view returns (string memory);
function getOwner() external view returns (address);
function balanceOf(address account) external view returns (uint256);
function transfer(address recipient, uint256 amount) external returns (bool);
function allowance(address _owner, address spender) external view returns (uint256);
function approve(address spender, uint256 amount) external returns (bool);
function transferFrom(address sender, address recipient, uint256 amount) external returns (bool);
Now you might not understand what all the items in the function declarations means just yet, but don’t worry. That’s why you are here.
The Binance docs supply a finished BEP20 implementation that can be inherited by our token so it’s plug and play. But we will be implementing the methods ourselves since we want to learn how and what it does.
Ethereums relation to BEP-20
Many of you might find mentions of Ethereum and how Ethereum works when investigating BEP-20. That’s because Binance smart chain token is an extension of the ERC-20 interface (Ethereums standard token). This allows the Binance smart chain to also run on the Ethereum blockchain. You can read more on the binance academy about this.
Smart contracts
Often referred to as code that runs on the blockchain. Smart contracts are what we write using Solidity to manage and perform the business logic of the applications.
Applications or programs that run on the blockchain — Binance Academy
DeFI
DeFI stands for Decentralized Finance. It’s applications that are related to finance that runs on a decentralized blockchain network. You can read a more in-depth explanation by Rakesh Sharma. When it comes to Binance, it’s only semi-decentralized.
DApp
Decentralized application (DApp), meaning the application runs on a decentralized computer system. Such as a Binance smart contract. You can find a great explanation here.
Solidity
Solidity is the programming language most commonly used in blockchain and smart contracts. Solidity docs are available at soliditylang.
Setup development environment
Let’s start by creating a environment to develop in. Create a directory as the root folder to develop from. I’ve named my project dev-token.
mkdir dev-token && cd dev-tokenWe will be using Ganache and Truffle to help us develop our smart contracts.
Truffle is a framework for building/testing/developing smart contracts on the Ethereum blockchain. Truffle can help us begin building fast and also deploy easily. Truffle is installed via npm. If you don’t have npm, download it here.
npm install -g truffleGanache is used to mock an Ethereum blockchain locally. This can be used to test our smart contracts before deploying them into production. It also creates the blockchain with prefilled wallets (100 Ether) so that we can simulate and test the smart contracts without investing any money. Ganache can be downloaded by visiting their website Ganache | Truffle Suite
We will also need an extra assertion package to truffle for the more advanced parts in article 2.
npm install truffle-assertions
npm install chai
Building your first BEP-20 token
Let’s begin initializing a new truffle project, this will create a template application for us.
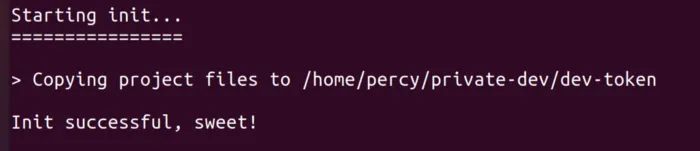
truffle initTruffle init will create a template application for us, which is very nice. You should see a message saying initialization was successful.
You should now see 4 items in the project folder.
- contracts — Folder that will contain the smart contracts of our project
- migrations — Folder that contains the code related to deployment
- test — Folder containing code for testing the smart contracts.
- truffle-config.js —A configuration file for the project. I recommend opening it and taking a look at the options. There are configurations about what network to use, compilation, and testing.
Let us begin by naming and creating the Token that we will use. Rename the file contracts/Migrations.sol to anything that fits your tokens name. Also, remove the example text inside. We will create the token from scratch.
mv contracts/Migrations.sol contracts/DevToken.solWe are going to create our first basic token which will be a simple draft on which we will add more functions later. Let’s make it simple and create a super simple smart contract.
// SPDX-License-Identifier: MIT
pragma solidity ^0.8.4;

// Define our DevToken smart contract.
contract DevToken {

  // Constructor is a function that will run when the Token is created.
  constructor() {

  }
}What is happening in the above code you might ask, and we are going to learn.
The file begins with a license for the smart contract, in my case, I went with an MIT license.
Secondly, we need to specify the compiler version of solidity to use, this is done by the pragma keyword. At the time of writing this article, 0.8.4 was the currently released version. Remember to note what version you use, as this will be important when we compile.
We then define our contract with the contract keyword. We also have a constructor function that will be triggered when the Token is created. For now, it will not do anything, but here we will add initialization of needed items for the smart contract.
Let’s try to compile the code and see if everything is working correctly. To do this you will need to enter the truffle-config.js and update the compiler version.
Locate the compilers section of the configuration and uncomment and change the version to use in the compiler to match what our smart contract is using (0.8.4).

Make sure you are at the root of the project and run the following
truffle compileYou shouldn’t experience any errors, but if you do the error messages should be pretty straightforward and probably related to a typo in your smart contract.
Now that the smart contract is compiled, let’s create a deployment script inside the migrations folder. Rename the file inside to your appropriate name, try including the related smart contract inside the name to make it easy to navigate. Once you have a lot of migration scripts in here, you’ll thank me.
I’ve named mine 1_deploy_devtoken.js. We will only use a super simple deployment script for now.
// Make sure the DevToken contract is included by requireing it.
const DevToken = artifacts.require("DevToken");

// THis is an async function, it will accept the Deployer account, the network, and eventual accounts.
module.exports = async function (deployer, network, accounts) {
  // await while we deploy the DevToken
  await deployer.deploy(DevToken);
  const devToken = await DevToken.deployed()
};
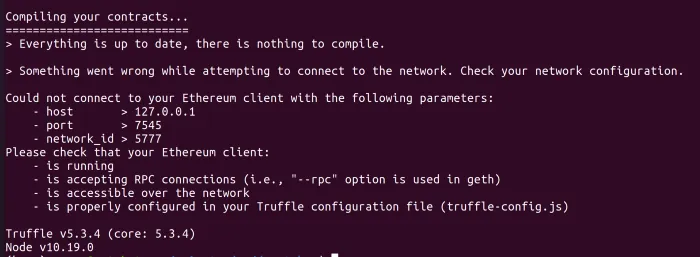
We will continue developing the smart contract in a bit, let’s make sure everything works before. Truffle migrate is used to deploy the compiled smart contracts.
truffle migrateWHAT, it didn’t work? That’s correct because truffle will default to using a local Ethereum network. You should see an error similar to the image.
Setting up a local test network (Ganache small intro)
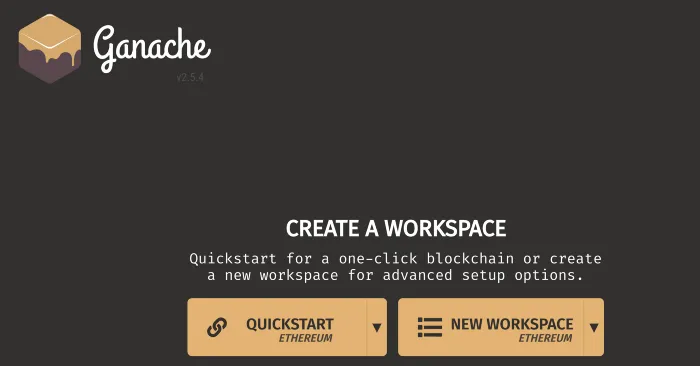
The next step for us is before we can deploy it to create the blockchain network. We will use a local network by using Ganache. Start Ganache by running the downloaded application from the setup chapter.
You should be greeted by a nice splash screen asking you to create a workspace. Select New workspace.
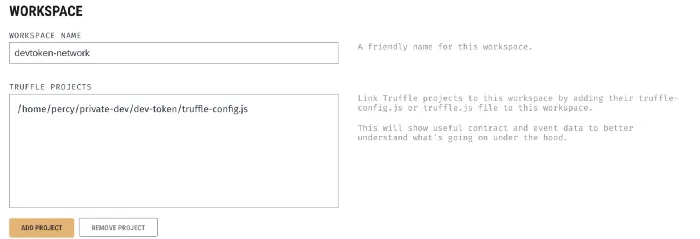
Give your workspace a nice name, and you can also upload the truffle-config.js by pressing ADD PROJECT to allow Ganache to better understand what’s going on.
Save the workspace, you should now see new addresses created with the default ETH balance set. You can change network ID and IP and more, but to avoid trouble skip that. If you do decide to change any of it, don’t forget to also update your truffle-config.js to match the network.
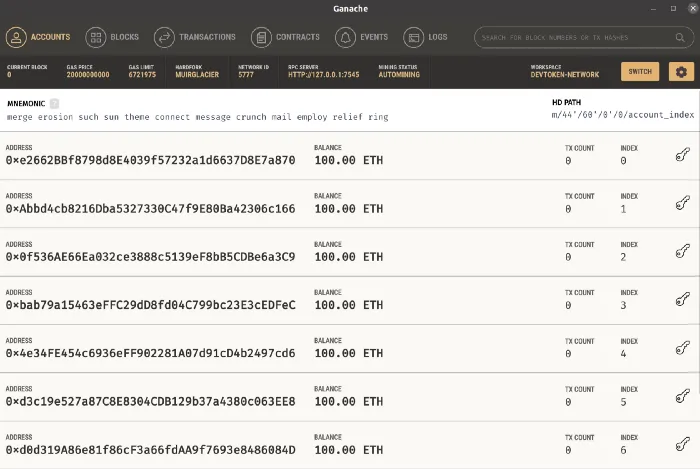
Ganache contains a lot of information about the network, and also lists all available contracts in the contracts tab.
Testing the token
Let’s go ahead and retry the truffle migrate.
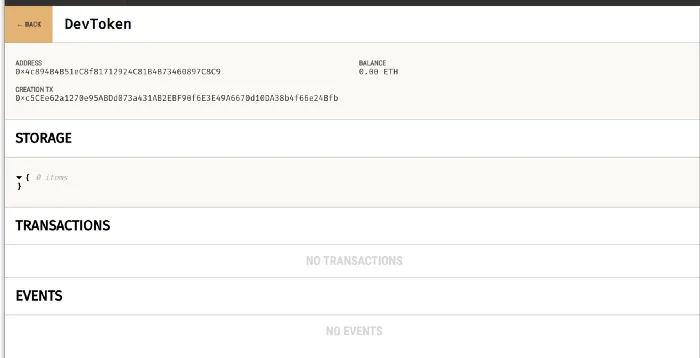
truffle migrateThis time, the migration should work and you should see that the Token was deployed and that some ETH was used. Remember that this is the way the Ethereum network works.

You can now visit Ganache and go to the Contracts tab, you should see your contract there and be able to enter it to see more details.
Implementing BEP20 interface
We will begin by implementing all the functions needed for BEP20, and while we go I will try to explain everything and what it means.
There are some items that we will need to keep track of in our contract, we won’t be adding everything at first, but start with some values. I’m sorry for the wall of text, but I don’t want us to miss any details. I promise once we have covered the basics we will speed up. This is what we will create, for now, make sure to read the code so you understand my explanations below.
// SPDX-License-Identifier: MIT
pragma solidity ^0.8.4;

/**
* @notice DevToken is a development token that we use to learn how to code solidity
* and what BEP-20 interface requires
*/
contract DevToken {


  /**
  * @notice Our Tokens required variables that are needed to operate everything
  */
  uint private _totalSupply;
  uint8 private _decimals;
  string private _symbol;
  string private _name;

  /**
  * @notice _balances is a mapping that contains a address as KEY
  * and the balance of the address as the value
  */
  mapping (address => uint256) private _balances;

  /**
  * @notice Events are created below.
  * Transfer event is a event that notify the blockchain that a transfer of assets has taken place
  *
  */
  event Transfer(address indexed from, address indexed to, uint256 value);

  /**
  * @notice constructor will be triggered when we create the Smart contract
  * _name = name of the token
  * _short_symbol = Short Symbol name for the token
  * token_decimals = The decimal precision of the Token, defaults 18
  * _totalSupply is how much Tokens there are totally
  */
  constructor(string memory token_name, string memory short_symbol, uint8 token_decimals, uint256 token_totalSupply){
      _name = token_name;
      _symbol = short_symbol;
      _decimals = token_decimals;
      _totalSupply = token_totalSupply;

      // Add all the tokens created to the creator of the token
      _balances[msg.sender] = _totalSupply;

      // Emit an Transfer event to notify the blockchain that an Transfer has occured
      emit Transfer(address(0), msg.sender, _totalSupply);
  }
}We will need to be able to provide a totalSupply which means that we need to keep track of how many Tokens our contract contains totally.
We also need to provide the decimals , which is the decimal precision of our contract.
Symbol which is a short name for our contract, and a Name which is the name of it.
It also makes sense that we want to keep track of all account balances in the Contract. so we will create a mapping that uses an address as the lookup key, and the balance of the account as the value which will be stored as uint256.
A mapping in Solidity is a Key-value map. Think of it as a hash map from other languages.
Notice how everything has the modifier private ? In solidity, we can assign modifiers that give our variables certain access restrictions. Private means that these variables only are accessible from inside the Contract.
We will update the constructor to accept these values so they can be defined upon the creation of the Token. Adding the variables as input parameters in the constructor will trigger an error if you use the string data type. It’s time to learn something about the way of storing data.
Memory usage in Solidity
There are three ways of telling the contract on how to store data Storage, memory, callback. Some data types will require you to specify this.
Storage means that the data is stored on the blockchain for the lifetime of the contract, memory is stored during the lifetime of the function. Callbacks are a much more complex data location which we won’t cover yet. The cost of using the data locations also comes in that order, Storage being most expensive, memory, callback cheaper. If you wanna a deep dive into the internal workings of the data locations, read the docs.
In the constructor, we will also add the totalSupply to the msg.sender. You might wonder who the heck that is, so did I the first time. Msg is a variable that will be accessible in all your functions and depending on who calls the function the value will change. In Solidity, there are a few variables that are so-called special variables , that are always accessible in functions. These variables are very related to the context of the request. So we can find timestamps, gas cost, etc. The most used one I’d argue is msg.sender which is the address of the one calling the function.
Events in Solidity and the Ethereum blockchain
The final new thing that we have added is an Event. Events are a way of logging what is happening in the blockchain (or the EVM, really). So we will have to emit (send off) events if we want to log the transactions that are happening. This is not the same as PERFORMING the actions, this is only logging! But there is one more great, super useful feature to events. Our applications can listen to events, so this is important for the web UI we will build in part 3 of the series.
Events are sent in Solidity by calling the Emit keyword. We will view this in the later stages of the code.
Events are really simple, you specify the name, the values it will contain. Then you Emit an event and set the needed values. Nothing more to it.
Since we updated the constructor, we will also need to change the migration script so the values are assigned.
// Make sure the DevToken contract is included by requireing it.
const DevToken = artifacts.require("DevToken");

// THis is an async function, it will accept the Deployer account, the network, and eventual accounts.
module.exports = async function (deployer, network, accounts) {
  // await while we deploy the DevToken
  await deployer.deploy(DevToken, "DevToken", "DVTK", 18, "50000000000000000000000");
  const devToken = await DevToken.deployed()
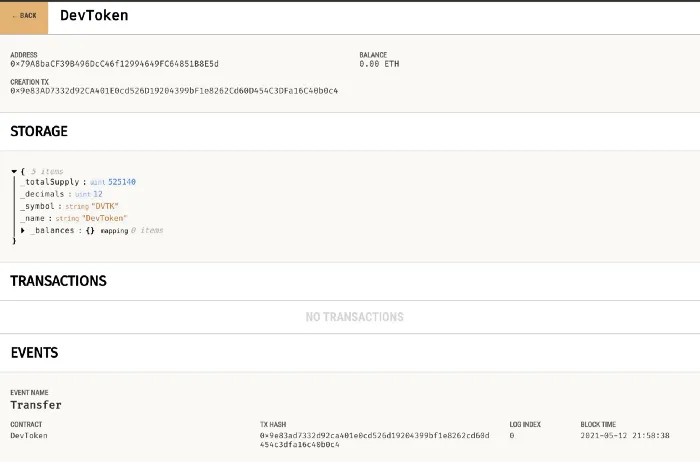
};After that, let’s try redeploying the smart contract on our test network. Small note, redeploying to a real network is not so easy and we won’t cover that here, so make sure you test your contracts properly!
truffle migrateAfter redeploying it, open Ganache and go into the Contracts tab and locate your Token. You should now see a lot more of the values, like supply amount and eventual balances. You can also see the Event that was transmitted.
Time to implement the BEP20 Functions
Now that we can deploy our simple Token, let’s begin implementing the interface, this won’t be very much work seeing as we just mastered the basics.
Let’s start with the easiest parts, we want to allow users to retrieve the variables we have set. They are currently private, so let’s make sure we create some Getters for them. A getter is a public function that can be called from outside the contract.
There is not much new here, we can take a look at the modifiers of the functions (YES, functions in solidity can have multiple modifiers).
external is a modifier that tells the compiler that the function can be called from other contracts and transactions. External functions are not callable from inside the contract they reside!
view modifier tells the compiler that the function promises to not modify the state of the contract in any way, a view function cannot change the value of anything! The view is good for our getters.
  /**
  * @notice decimals will return the number of decimal precision the Token is deployed with
  */
  function decimals() external view returns (uint8) {
    return _decimals;
  }
  /**
  * @notice symbol will return the Token's symbol
  */
  function symbol() external view returns (string memory){
    return _symbol;
  }
  /**
  * @notice name will return the Token's symbol
  */
  function name() external view returns (string memory){
    return _name;
  }
  /**
  * @notice totalSupply will return the tokens total supply of tokens
  */
  function totalSupply() external view returns (uint256){
    return _totalSupply;
}Before we create more advanced features for our token I think it’s a good time to start writing unit tests. Tests are important to make sure the smart contracts are behaving as we want. There are multiple ways to test, for instance, truffle comes with a console attached that you can enter by typing ( You need to be located in the directory where the code resides).
truffle migrate // Redploy first to update with our new functions
truffle console
In there you can use javascript to test things out. I’m gonna show a super simple example of the console how to call a function of a deployed contract.
// Wait until the token is deployed
devToken = await DevToken.deployed()
// Grab the total supply, use await to make sure we get the response
let totalSupply = await devToken.totalSupply()
// totalsupply will unusable amount, convert to number
totalSupply.toNumber()
We can write a unit test using truffle in the same way we just tested the console, which is much more developer-friendly than trying to test all functions in the console.
Create a file called DevToken.js inside the test folder. Truffle allows us to write tests both with javascript and with Solidity, I prefer to use javascript since I find it a lot easier. The javascript test has to follow Mocha or Chai testing frameworks, you can read more about tests on the truffles website.
The syntax is pretty easy, we begin by making a contract. Every test is recognized by the syntax
it(“name of test”, async accounts => { our test logic})We use the same syntax as in the truffle console, which is javascript.
The first test is super simple, grab the total supply and see that it matches what we use in the migration script. We then use assert.equal(actual, expected, errormessage)
const DevToken = artifacts.require("DevToken");


// Start a test series named DevToken, it will use 10 test accounts
contract("DevToken", async accounts => {
    // each it is a new test, and we name our first test initial supply
    it("initial supply", async () => {
        // wait until devtoken is deplyoed, store the results inside devToken
        // the result is a client to the Smart contract api
        devToken = await DevToken.deployed();
        // call our totalSUpply function
        let supply = await devToken.totalSupply()

        // Assert that the supply matches what we set in migration
        assert.equal(supply.toNumber(), 5000000, "Initial supply was not the same as in migration")

    });

});Go to your console and run truffle to execute the tests using the following command. You have to be located at the root of your project.
truffle testGreat, fix any eventual errors, it should work though.
Let’s continue, we will now look into functions that modify the state of the blockchain.
We will begin by adding the ability the burn and mint tokens. Mint is a term used in Solidity that means Creating new Tokens. Burn is the term that is the opposite, it removes tokens from the contract. It is very much like we did in the constructor when the token was created.
Mint will be taking an address and creating the tokens on that address balance, and increasing the totalSupply.
Burn will do the opposite, destroy the tokens and reduce totalSupply.
The first versions we will create will be accessible from outside the smart contract, this is simple to implement by adding the public modifier. We will look at creating more secure public available versions of the functions later. Since it will require some more advanced features to make them secure so that not anyone can create tokens.
There are not many new items that we introduce here.
The most important one is required. Require is kind of like assert in the test we made before. Require will make sure that our conditions are fulfilled before proceeding. Require will cancel the function with the error message set if the condition given is false. What’s important to know is that require will REVERT any changes made in the function to the state if it’s triggered. So the image you burn tokens, then later in the function have another require check which triggers, the burn action will be reverted.
Also, notice how we extract the user’s account balance by using the _balances mapping. Mappings are super simple to use since we can use the address key to access the value, and it’s also cheap.
I’ve also added a function that is required by the BEP20 interface, which is balanceOf which is used to find out an account’s balance. By now you should have no trouble understanding how that function works.
**
  * @notice balanceOf will return the account balance for the given account
  */
  function balanceOf(address account) external view returns (uint256) {
    return _balances[account];
  }

 /**
  * @notice mint will create tokens on the address inputted and then increase the total supply
  *
  * It will also emit an Transfer event, with sender set to zero address (adress(0))
  *
  * Requires that the address that is recieveing the tokens is not zero address
  */
  function mint(address account, uint256 amount) public {
    require(account != address(0), "DevToken: cannot mint to zero address");

    // Increase total supply
    _totalSupply = _totalSupply + (amount);
    // Add amount to the account balance using the balance mapping
    _balances[account] = _balances[account] + amount;
    // Emit our event to log the action
    emit Transfer(address(0), account, amount);
  }
  /**
  * @notice burn will destroy tokens from an address inputted and then decrease total supply
  * An Transfer event will emit with receiever set to zero address
  *
  * Requires
  * - Account cannot be zero
  * - Account balance has to be bigger or equal to amount
  */
  function burn(address account, uint256 amount) public {
    require(account != address(0), "DevToken: cannot burn from zero address");
    require(_balances[account] >= amount, "DevToken: Cannot burn more than the account owns");

    // Remove the amount from the account balance
    _balances[account] = _balances[account] - amount;
    // Decrease totalSupply
    _totalSupply = _totalSupply - amount;
    // Emit event, use zero address as reciever
    emit Transfer(account, address(0), amount);
}Let’s add some tests so we know that the functions work as we expect.
Our tests will now introduce only one new thing, try-catch. This is how we can catch any errors thrown by the requirements in solidity. So every function that will exit due to a requirement should be wrapped in a try-catch. The catch will store the returned value in the variable error (You can name it anything, in the catch(name). Error is a variable that contains a few values, try printing it to see all values, the value we want to assert is the reason. This will be the error message you set in the requirement of your smart contract function.
it("minting", async() => {
        devToken = await DevToken.deployed();

        // Let's use account 1 since that account should have 0
        let intial_balance = await devToken.balanceOf(accounts[1]);

        // Let's verify the balance
        assert.equal(intial_balance.toNumber(), 0, "intial balance for account 1 should be 0")

        // Let's mint 100 tokens to the user and grab the balance again
        let totalSupply = await devToken.totalSupply();
        await devToken.mint(accounts[1], 100);
        // Grab the balance again to see what it is after calling mint
        let after_balance = await devToken.balanceOf(accounts[1]);
        let after_supply = await devToken.totalSupply();
        // Assert and check that they match
        assert.equal(after_balance.toNumber(), 100, "The balance after minting 100 should be 100")
        assert.equal(after_supply.toNumber(), totalSupply.toNumber()+100, "The totalSupply should have been increasesd")

        try {
            // Mint with address 0
            await devToken.mint('0x0000000000000000000000000000000000000000', 100);
        }catch(error){
            assert.equal(error.reason, "DevToken: cannot mint to zero address", "Failed to stop minting on zero address")
        }
    })

    it("burning", async() => {
        devToken = await DevToken.deployed();

        // Let's continue on account 1 since that account now has 100 tokens
        let initial_balance = await devToken.balanceOf(accounts[1]);

        // Burn to address 0
        try{
            await devToken.burn('0x0000000000000000000000000000000000000000', 100);
        }catch(error){
            assert.equal(error.reason, "DevToken: cannot burn from zero address", "Failed to notice burning on 0 address")
        }

        // Burn more than balance
        try {
            await devToken.burn(accounts[1], initial_balance+initial_balance);
        }catch(error){
            assert.equal(error.reason, "DevToken: Cannot burn more than the account owns", "Failed to capture too big burns on an account")
        }

        let totalSupply = await devToken.totalSupply();
        try {
            await devToken.burn(accounts[1], initial_balance - 50);
        }catch(error){
            assert.fail(error);
        }

        let balance = await devToken.balanceOf(accounts[1]);


        // Make sure balance was reduced and that totalSupply reduced
        assert.equal(balance.toNumber(), initial_balance-50, "Burning 50 should reduce users balance")

        let newSupply = await devToken.totalSupply();

        assert.equal(newSupply.toNumber(), totalSupply.toNumber()-50, "Total supply not properly reduced")
})Let’s add the transfer function that is needed as well. This time we will only add two functions, and they will be the same function but with different modifiers. I think it’s time we focused on the modifiers. The functions will take Tokens from one account and insert them into another account.
We have seen the public and the internal modifier.
Public functions are callable from outside and inside the contract like we do in our tests. Internal functions are not callable from the outside. I think that is easy to grasp. But let me introduce external.
External is a modifier that means that the function is only callable from outside the contract. Use this modifier if you believe that the function NEVER needs to be called from inside the contract. Now you will ask me, WHY, why complicate things and not use public?
We will soon understand everything, we will create two transfer methods, one called transfer , the second one _transfer. The transfer will be external and callable from outside, _transfer will be internal and only available from inside the contract. The reason for this is because we can assume transfer will be called a lot from outside, as people will move their tokens around. External cost LESS gas than a public function. So having two functions, one for users to spam that is cheap, and one for internal calls. This setup allows our contract to be a lot cheaper than if both actions used a public function. If you want to learn more about WHY it’s cheaper, it’s all related to how solidity will access and store the data during the function calls. You can read up on Solidity reference types to learn more.
/**
  * @notice transfer is used to transfer funds from the sender to the recipient
  * This function is only callable from outside the contract. For internal usage see
  * _transfer
  *
  * Requires
  * - Caller cannot be zero
  * - Caller must have a balance = or bigger than amount
  *
   */
  function transfer(address recipient, uint256 amount) external returns (bool) {
    _transfer(msg.sender, recipient, amount);
    return true;
  }
  /**
  * @notice _transfer is used for internal transfers
  *
  * Events
  * - Transfer
  *
  * Requires
  *  - Sender cannot be zero
  *  - recipient cannot be zero
  *  - sender balance most be = or bigger than amount
   */
  function _transfer(address sender, address recipient, uint256 amount) internal {
    require(sender != address(0), "DevToken: transfer from zero address");
    require(recipient != address(0), "DevToken: transfer to zero address");
    require(_balances[sender] >= amount, "DevToken: cant transfer more than your account holds");

    _balances[sender] = _balances[sender] - amount;
    _balances[recipient] = _balances[recipient] + amount;

    emit Transfer(sender, recipient, amount);
}There isn’t anything new in those functions except the GAS saving trick to use two different functions. It’s time to add tests for those functions, we will try to transfer tokens from account 0 to account 1.
One thing I want to clarify is that our transfer token has no required checks of its own, but that is because they require conditions that will be triggered by the _transfer instead.
Let’s set up a test to make sure the transferring is working correctly, and I also want to see if you noticed something important. During our old test, we never actually set the accounts used during the transfer. This is because Truffle helped us, but this time let’s make sure it’s the correct account used during the test.
This can be done by setting the from parameter inside our function, this will set the msg.sender value into the account set inside the from parameter.
    it("transfering tokens", async() => {
        devToken = await DevToken.deployed();

        // Grab initial balance
        let initial_balance = await devToken.balanceOf(accounts[1]);

        // transfer tokens from account 0 to 1
        await devToken.transfer(accounts[1], 100);

        let after_balance = await devToken.balanceOf(accounts[1]);

        assert.equal(after_balance.toNumber(), initial_balance.toNumber()+100, "Balance should have increased on reciever")

        // We can change the msg.sender using the FROM value in function calls.
        let account2_initial_balance = await devToken.balanceOf(accounts[2]);

        await devToken.transfer(accounts[2], 20, { from: accounts[1]});
        // Make sure balances are switched on both accounts
        let account2_after_balance = await devToken.balanceOf(accounts[2]);
        let account1_after_balance = await devToken.balanceOf(accounts[1]);

        assert.equal(account1_after_balance.toNumber(), after_balance.toNumber()-20, "Should have reduced account 1 balance by 20");
        assert.equal(account2_after_balance.toNumber(), account2_initial_balance.toNumber()+20, "Should have givne accounts 2 20 tokens");


        // Try transfering too much
        try {
            await devToken.transfer(accounts[2], 2000000000000, { from:accounts[1]});
        }catch(error){
            assert.equal(error.reason, "DevToken: cant transfer more than your account holds");
        }

})Go ahead and run the tests to make sure everything is working.
truffle testBefore we start looking into the final functions of BEP20, which is all related to allowance. Allowance means that an account owner can allow other users to purchase or use X amount of tokens from the owner’s account.
First I want us to make sure we change the mint and burn function to apply the same pattern as transfer and _transfer, meaning we will add a _burn and _mint and change the logic some. Don’t hate me for changing things, I want you to learn!
The reason why we do this now is that we will also now look into Inheritance in Solidity. We don’t want anyone to be able to call the mint and burn functions, but we want them to be Public. We will now add something often referred to as owner only modifier. This means even though the function is public, it’s only the owner of the smart contract that’s allowed to use it.
Locate the burn and the mint functions, and change the modifier from public to internal. Also, rename them to _burn and _mint
We will then add two new functions, burn and mint, which are public, and just forward the function call to its _ counterpart. This is my changes applied
  /**
  * @notice _mint will create tokens on the address inputted and then increase the total supply
  *
  * It will also emit an Transfer event, with sender set to zero address (adress(0))
  *
  * Requires that the address that is recieveing the tokens is not zero address
  */
  function _mint(address account, uint256 amount) internal {
    require(account != address(0), "DevToken: cannot mint to zero address");

    // Increase total supply
    _totalSupply = _totalSupply + (amount);
    // Add amount to the account balance using the balance mapping
    _balances[account] = _balances[account] + amount;
    // Emit our event to log the action
    emit Transfer(address(0), account, amount);
  }
  /**
  * @notice _burn will destroy tokens from an address inputted and then decrease total supply
  * An Transfer event will emit with receiever set to zero address
  *
  * Requires
  * - Account cannot be zero
  * - Account balance has to be bigger or equal to amount
  */
  function _burn(address account, uint256 amount) internal {
    require(account != address(0), "DevToken: cannot burn from zero address");
    require(_balances[account] >= amount, "DevToken: Cannot burn more than the account owns");

    // Remove the amount from the account balance
    _balances[account] = _balances[account] - amount;
    // Decrease totalSupply
    _totalSupply = _totalSupply - amount;
    // Emit event, use zero address as reciever
    emit Transfer(account, address(0), amount);
  }
  /**
  * @notice burn is used to destroy tokens on an address
  *
  * See {_burn}
  * Requires
  *   - msg.sender must be the token owner
  *
   */
  function burn(address account, uint256 amount) public returns(bool) {
    _burn(account, amount);
    return true;
  }

    /**
  * @notice mint is used to create tokens and assign them to msg.sender
  *
  * See {_mint}
  * Requires
  *   - msg.sender must be the token owner
  *
   */
  function mint(address account, uint256 amount) public returns(bool){
    _mint(account, amount);
    return true;
}Try rerunning the tests, everything should work as before since we haven’t changed anything that is breaking. What is left is to implement an owner check, so that these functions aren’t exploited by others.
Inheritance in Smart contracts
We will do this by creating a new smart contract and inherit that contract as part of our DevToken. This is pretty easy, so don’t get scared.
Create a file in the contracts folder called Ownable.sol
Just as the DevToken.sol we should start the file with a compiler version and license.
// SPDX-License-Identifier: MIT
pragma solidity ^0.8.4;
We will be creating a private variable called _owner, a private means that this variable is only accessible from the contract it is declared in. So only the Ownable contract will be able to modify the _owner variable.
The only new thing we will do in this contract is that we will create our Modifier. The modifier will be called onlyOwner and it will perform a standard requirement to check to see that msg.sender == _owner. This will mean that if we apply the onlyOwner to our functions, this check will happen before the function is triggered. This is an easy way of setting requirements for functions without having duplicate code to check the same thing in many functions.
The constructor will just assign _owner to msg.sender. This will work since we constructor is called upon deploying the contract, so it’s the owner that will do that.
Notice that inside the modifier function, the _; is not a typo, it has to be there for the compiler to let you through.
// SPDX-License-Identifier: MIT
pragma solidity ^0.8.4;

/**
* @notice Contract is a inheritable smart contract that will add a
* New modifier called onlyOwner available in the smart contract inherting it
*
* onlyOwner makes a function only callable from the Token owner
*
*/
contract Ownable {
    // _owner is the owner of the Token
    address private _owner;

    /**
    * Event OwnershipTransferred is used to log that a ownership change of the token has occured
     */
    event OwnershipTransferred(address indexed previousOwner, address indexed newOwner);

    /**
    * Modifier
    * We create our own function modifier called onlyOwner, it will Require the current owner to be
    * the same as msg.sender
     */
    modifier onlyOwner() {
        require(_owner == msg.sender, "Ownable: only owner can call this function");
        // This _; is not a TYPO, It is important for the compiler;
        _;
    }

    constructor() {
        _owner = msg.sender;
        emit OwnershipTransferred(address(0), _owner);
    }
    /**
    * @notice owner() returns the currently assigned owner of the Token
    *
     */
    function owner() public view returns(address) {
        return _owner;

    }

}And let’s also add three more functions, since the owner of the token might want to move on with other things in life, or let others own it.
We will add functions to renounce ownership and transfer it to another address. In this case, there is nothing new to learn you, it’s just extra code, you should be able to follow it on your own. Notice how the functions have the onlyOwner modifier though!
    /**
    * @notice renounceOwnership will set the owner to zero address
    * This will make the contract owner less, It will make ALL functions with
    * onlyOwner no longer callable.
    * There is no way of restoring the owner
     */
    function renounceOwnership() public onlyOwner {
        emit OwnershipTransferred(_owner, address(0));
        _owner = address(0);
    }

    /**
    * @notice transferOwnership will assign the {newOwner} as owner
    *
     */
    function transferOwnership(address newOwner) public onlyOwner {
        _transferOwnership(newOwner);
    }
    /**
    * @notice _transferOwnership will assign the {newOwner} as owner
    *
     */
    function _transferOwnership(address newOwner) internal {
        require(newOwner != address(0), "Ownable: new owner is the zero address");
        emit OwnershipTransferred(_owner, newOwner);
        _owner = newOwner;
}We will want to test this contract out, so create an Ownable.js inside the test folder.
Also make sure to update migrations/1_initial_migration.js to deploy our new Ownable contract (We will remove this again shortly, ‘ll explain soon)
// Make sure the DevToken contract is included by requireing it.
const DevToken = artifacts.require("DevToken");
const Ownable = artifacts.require('Ownable')

// THis is an async function, it will accept the Deployer account, the network, and eventual accounts.
module.exports = async function (deployer, network, accounts) {
  // await while we deploy the DevToken
  await deployer.deploy(DevToken, "DevToken", "DVTK", 18, "50000000000000000000000");
  const devToken = await DevToken.deployed()

  await deployer.deploy(Ownable);

};const { assert } = require("chai");
const Ownable = artifacts.require("Ownable");
// Start a test series named Ownable, it will use 10 test accounts
contract("Ownable", async accounts => {
it("transfer ownership", async () => {
ownable = await Ownable.deployed();
let owner = await ownable.owner();
// Make sure account 0 is owner
assert.equal(owner, accounts[0], "The owner was not properly assigned");
// Transfer it to acconts 1
await ownable.transferOwnership(accounts[1]);
// Verify that accounts 1 is now the new owner
let new_owner = await ownable.owner();
assert.equal(new_owner, accounts[1], "The ownership was not transferred correctly");
});
it("onlyOwner modifier", async () => {
ownable = await Ownable.deployed();
// Try executing a Transfer from accounts 2
try {
await ownable.transferOwnership(accounts[2], { from: accounts[2]});
}catch(error){
assert.equal(error.reason, "Ownable: only owner can call this function", "Failed to stop non-owner from calling onlyOwner protected function");
}
});
it("renounce ownership", async () => {
ownable = await Ownable.deployed();
// renounce from accounts 1 as it is the new owner
await ownable.renounceOwnership({ from: accounts[1]});
let owner = await ownable.owner();
assert.equal(owner, '0x0000000000000000000000000000000000000000', 'Renouncing owner was not correctly done')
})
});Run the tests, everything should check out if you following my lists.
truffle testIt’s time to inherit Ownable into DevToken. In solidity inheriting means that the two contracts (or more in the future) will be MERGED into one contract. This means that after we inherit we will only have one contract, the DevToken. That is also the reason why we will remove the Deployment of Ownable again from migrations.
Open up DevToken.sol again, to inherit another contract in solidity we use the keyword is. So we will update the DevToken contract to is Ownable.
// SPDX-License-Identifier: MIT
pragma solidity ^0.8.4;

import "./Ownable.sol";
/**
* @notice DevToken is a development token that we use to learn how to code solidity
* and what BEP-20 interface requires
*/
contract DevToken is Ownable{After this change, DevToken now has all the capabilities we added to the Ownable smart contract. Let’s remove the deployment of Ownable in 1_initial_migrations.js and update the tests in Ownable.js to instead run on the DevToken contract.
The only thing in the tests you will need to change is the artifacts.require line.
Instead of the constant Ownable to be an Ownable artifact, let’s make it require DevToken. That’s all!
// Replace this row
const Ownable = artifacts.require("Ownable");
// With this
const Ownable = artifacts.require("DevToken");
Rerun the tests and make sure it works!
Great job, we know now how to create custom Modifiers and also how to inherit other contracts.
Let’s apply onlyOwner to secure the mint and burn functions. If I haven’t mentioned this before, YES a function can have MANY multipliers.
function burn(address account, uint256 amount) public onlyOwner returns(bool) {
    _burn(account, amount);
    return true;
  }

    /**
  * @notice mint is used to create tokens and assign them to msg.sender
  *
  * See {_mint}
  * Requires
  *   - msg.sender must be the token owner
  *
   */
  function mint(address account, uint256 amount) public onlyOwner returns(bool){
    _mint(account, amount);
    return true;
}Adding Allowance — The final pieces of BEP20
It’s time to add the final functions needed for BEP20. Allowance means that Account 1 can say “Hey, account 2 has access to X tokens from my account”.
There are not any new items to understand here, but only more codes of the same as before. So I won’t be explaining as thoroughly as we have been up until now. Every piece of code you see now should be relatable to the things we have done before.
The only hard part in the code is the variable that we will use to store the allowed allowances which is a Mapping like the balances, but the value returned is another mapping. So a Mapping with an address as key, and the value is yet another mapping with an address as key, but the amount as value.
The idea is that the outer mapping will be the owner’s address, and the child mapping that is stored as the value will be a mapping of spenders.
[OwnerAccount][Spender] will be the syntax to extract a spender from the mapping.
  /**
  * @notice _allowances is used to manage and control allownace
  * An allowance is the right to use another accounts balance, or part of it
   */
mapping (address => mapping (address => uint256)) private _allowances;Let’s first add an Event that we can use to log approvals.
  /**
   * @notice Approval is emitted when a new Spender is approved to spend Tokens on
   * the Owners account
   */
event Approval(address indexed owner, address indexed spender, uint256 value);We will add quite a few functions which are all needed for BEP20.
- allowance — Returns the amount of Tokens a Spender from an Owner
- approve — Allows an account to spend X Tokens on the Owners account
- transfer from — Moves X tokens from sender to recipient using allowance
- getOwner — Just wrap the current owner(), needed BEP20
/**
  * @notice getOwner just calls Ownables owner function.
  * returns owner of the token
  *
   */
  function getOwner() external view returns (address) {
    return owner();
  }
  /**
  * @notice allowance is used view how much allowance an spender has
   */
   function allowance(address owner, address spender) external view returns(uint256){
     return _allowances[owner][spender];
   }
  /**
  * @notice approve will use the senders address and allow the spender to use X amount of tokens on his behalf
  */
   function approve(address spender, uint256 amount) external returns (bool) {
     _approve(msg.sender, spender, amount);
     return true;
   }

   /**
   * @notice _approve is used to add a new Spender to a Owners account
   *
   * Events
   *   - {Approval}
   *
   * Requires
   *   - owner and spender cannot be zero address
    */
    function _approve(address owner, address spender, uint256 amount) internal {
      require(owner != address(0), "DevToken: approve cannot be done from zero address");
      require(spender != address(0), "DevToken: approve cannot be to zero address");
      // Set the allowance of the spender address at the Owner mapping over accounts to the amount
      _allowances[owner][spender] = amount;

      emit Approval(owner,spender,amount);
    }
    /**
    * @notice transferFrom is uesd to transfer Tokens from a Accounts allowance
    * Spender address should be the token holder
    *
    * Requires
    *   - The caller must have a allowance = or bigger than the amount spending
     */
    function transferFrom(address spender, address recipient, uint256 amount) external returns(bool){
      // Make sure spender is allowed the amount
      require(_allowances[spender][msg.sender] >= amount, "DevToken: You cannot spend that much on this account");
      // Transfer first
      _transfer(spender, recipient, amount);
      // Reduce current allowance so a user cannot respend
      _approve(spender, msg.sender, _allowances[spender][msg.sender] - amount);
      return true;
    }
    /**
    * @notice increaseAllowance
    * Adds allowance to a account from the function caller address
    */
    function increaseAllowance(address spender, uint256 amount) public returns (bool) {
      _approve(msg.sender, spender, _allowances[msg.sender][spender]+amount);
      return true;
    }
  /**
  * @notice decreaseAllowance
  * Decrease the allowance on the account inputted from the caller address
   */
    function decreaseAllowance(address spender, uint256 amount) public returns (bool) {
      _approve(msg.sender, spender, _allowances[msg.sender][spender]-amount);
      return true;
}There isn’t something new in those functions so I won’t cover the details, they should be pretty straightforward.
The only tricky part is the transferFrom. Remember that the first parameter (spender) is the account holding the tokens. So we need to input 3 addresses, spender (token owner), recipient, and a msg.sender who is allowed to spend on behalf of a spender.
Finally, let’s add some tests to make sure functionality works as expected.
it ("allow account some allowance", async() => {
        devToken = await DevToken.deployed();


        try{
            // Give account(0) access too 100 tokens on creator
            await devToken.approve('0x0000000000000000000000000000000000000000', 100);
        }catch(error){
            assert.equal(error.reason, 'DevToken: approve cannot be to zero address', "Should be able to approve zero address");
        }

        try{
            // Give account 1 access too 100 tokens on zero account
            await devToken.approve(accounts[1], 100);
        }catch(error){
            assert.fail(error); // shold not fail
        }

        // Verify by checking allowance
        let allowance = await devToken.allowance(accounts[0], accounts[1]);

        assert.equal(allowance.toNumber(), 100, "Allowance was not correctly inserted");
    })

    it("transfering with allowance", async() => {
        devToken = await DevToken.deployed();

        try{
            // Account 1 should have 100 tokens by now to use on account 0
            // lets try using more
            await devToken.transferFrom(accounts[0], accounts[2], 200, { from: accounts[1] } );
        }catch(error){

            assert.equal(error.reason, "DevToken: You cannot spend that much on this account", "Failed to detect overspending")
        }
        let init_allowance = await devToken.allowance(accounts[0], accounts[1]);
        console.log("init balalnce: ", init_allowance.toNumber())
        try{
            // Account 1 should have 100 tokens by now to use on account 0
            // lets try using more
            let worked = await devToken.transferFrom(accounts[0], accounts[2], 50, {from:accounts[1]});
        }catch(error){
            assert.fail(error);
        }

        // Make sure allowance was changed
        let allowance = await devToken.allowance(accounts[0], accounts[1]);
        assert.equal(allowance.toNumber(), 50, "The allowance should have been decreased by 50")


})Conclusion of the first article
This concludes the first article. There are two more articles in this series, you can find the full code I have in the BEP-20 branch of my repository.
- Setup of the development environment
- Got started with basic solidity syntaxes
- Writing unit tests for our code
- A smart contract that fulfills the BEP20 interface
The next article will cover more advanced topics in solidity, we will look into adding a third contract used for Staking and rewards based on time and more.
I hope you enjoyed it, feel free to reach out if there are any questions.
If you enjoyed my writing, please support future articles by buying me an Coffee